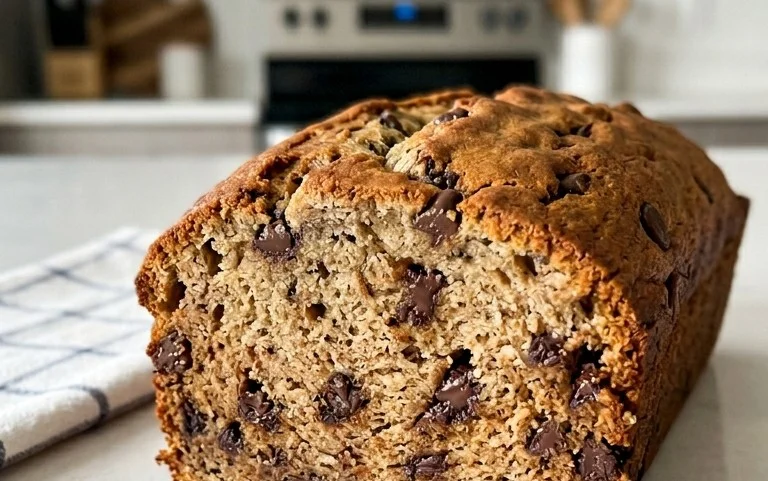
Easy Oreo Cake Balls Recipe-Sweet Treat
Oreo Cake Balls are an absolute revelation for any dessert lover, and trust me, they are surprisingly simple to make! If you’ve ever found yourself staring longin extractgly at a perfectly frosted cake, only to wish for a more portable, bite-sized version, then these delightful little treasures are precisely what you’ve been dreaming of. What’s not to love about the irresistible combination of rich, chocolatey cake and that iconic, crunchy Oreo cookie flavor? They capture the essence of a decadent cake but in a fun, no-fuss format that’s perfect for parties, gifts, or just a guilt-free indulgence.
What Makes Oreo Cake Balls So Irresistible?
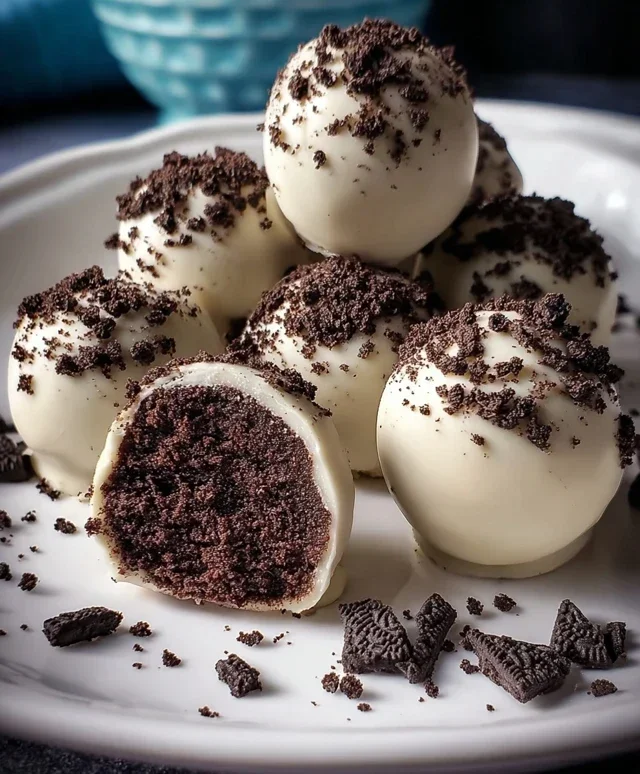
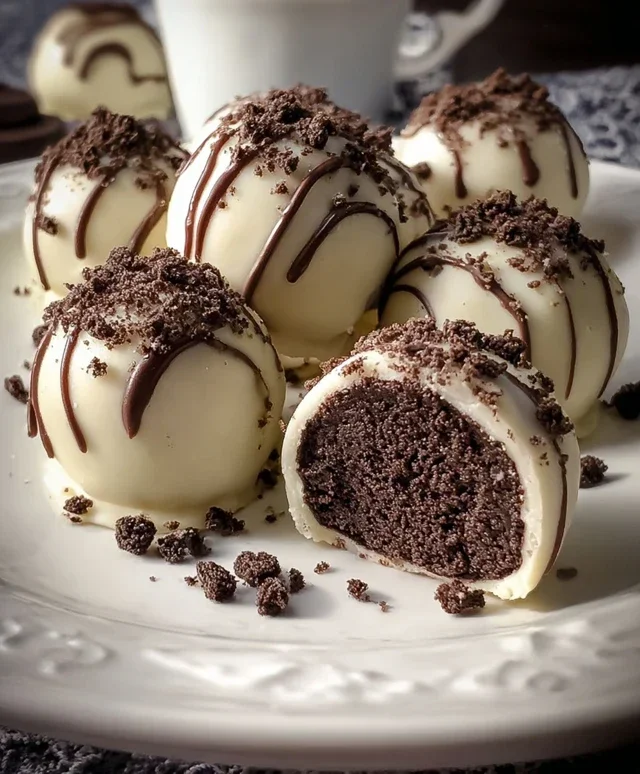
The magic of Oreo Cake Balls lies in their perfect balance of textures and flavors. We’re talking about a moist, tender cake base infused with crushed Oreos, mixed with cream cheese for that irresistible tang and richness, and then enrobed in a luscious chocolate coating. They’re the ultimate treat because they deliver all the satisfaction of a slice of cake in a convenient, pop-in-your-mouth package. Get ready to impress everyone with these addictive Oreo Cake Balls!
Oreo Cake Balls
Get ready to indulge in a treat that’s ridiculously easy to make and even more delightful to eat. Oreo Cake Balls are the ultimate no-bake dessert that transforms your favorite chocolate sandwich cookies into bite-sized spheres of pure bliss. They’re perfect for parties, potlucks, or simply satisfying a serious sweet tooth. The magic lies in their simplicity: crushed Oreos mixed with cream cheese, rolled into balls, and coated in creamy white chocolate. The result is a wonderfully rich, decadent, and satisfying confection that everyone will adore. Forget complicated cake baking; this recipe lets you achieve a cake-like texture and flavor with minimal effort.
Ingredients:
Instructions:
Prepare the Oreo Base: The foundation of these delicious cake balls starts with the Oreos themselves. You’ll want to finely crush all 24 of the regular-sized Oreo cookies. The easiest way to do this is by placing them in a food processor and pulsing until they are fine crum extractbs. Alternatively, you can place the Oreos in a sturdy zip-top bag, seal it well, and then crush them using a rolling pin or the bottom of a heavy pan. The goal is to get them as close to a fine powder as possible, ensuring a smooth texture in your final cake balls. Once crushed, set these crum extractbs aside in a medium-sized mixing bowl.
Combine with Cream Cheese: Now it’s time to bring the creamy element into play. To the bowl of Oreo crum extractbs, add the 4 ounces of softened cream cheese. Softened cream cheese is crucial here; if it’s too cold, it will be difficult to incorporate evenly and might leave lumps. You can soften cream cheese by leaving it out at room temperature for about an hour, or by gently microwaving it in 10-second intervals until it’s pliable but not melted. Using a spatula or a wooden spoon, thoroughly mix the cream cheese into the Oreo crum extractbs until a thick, dough-like consistency forms. It should be cohesive enough to hold together when you squeeze it in your hand. This mixture is essentially your “cake batter.”
Form and Chill the Balls: Once your Oreo and cream cheese mixture is well combined, it’s time to roll them into balls. You can use a small cookie scoop or simply a tablespoon to portion out the mixture. Roll each portion into a uniform ball, about 1 inch in diameter. Aim for consistency in size so they all bake (or rather, chill and coat) evenly. Place these rolled balls onto a baking sheet lined with parchment paper. Parchment paper is essential to prevent sticking. After you’ve rolled all the balls, place the baking sheet in the refrigerator for at least 30 minutes. This chilling step is vital. It firms up the balls, making them much easier to handle and dip in the melted candy coating. If they aren’t firm, they can easily fall apart during the dipping process.
Melt and Prepare the Coating: While the Oreo balls are chilling, you can prepare your white candy melt coating. In a microwave-safe bowl, add the 10 ounces of white candy melts. Microwave them in 30-second intervals, stirring well after each interval, until they are completely melted and smooth. Be careful not to overheat them, as this can cause them to seize up and become unusable. If you find your candy melts are a bit too thick to coat the balls smoothly, you can add the optional 2 tablespoons of heavy cream, one tablespoon at a time, stirring until you achieve a pourable, but not watery, consistency. You want the coating to be thick enough to adhere well to the balls but thin enough to dip without clumping. You can also melt your candy melts using a double boiler method if you prefer.
Dip and Decorate Your Cake Balls: Once the Oreo balls are firm from chilling and your candy melt coating is smooth and ready, it’s time for the most satisfying part – dipping! Take one chilled Oreo ball at a time and carefully drop it into the melted white candy coating. Use a fork or a toothpick to gently roll the ball, ensuring it’s fully coated. Lift the coated ball out of the candy melt, allowing any excess coating to drip back into the bowl. If using a fork, you can gently tap the fork on the side of the bowl to help remove excess. Place the dipped cake ball back onto the parchment-lined baking sheet. Immediately after dipping each ball, while the coating is still wet, sprinkle it with the crushed Oreo cookies for that extra Oreo punch and visual appeal. If you want to add another layer of decoration, you can melt a small amount of semi-sweet chocolate chips (separately, using the same microwave method) and drizzle it over the white-coated balls using a fork or a piping bag with a fine tip once the white coating has set.
Conclusion:
There you have it – your ultimate guide to creating irresistible Oreo Cake Balls! This recipe is a true crowd-pleaser because it’s incredibly simple to make, requires minimal ingredients, and delivers an explosion of cookies-and-cream flavor in every bite. The satisfyingly moist cake interior, coated in rich chocolate, creates a delightful textural contrast that will have everyone asking for seconds. They’re perfect for parties, bake snon-alcoholic ales, or just a special treat to brighten your day. Don’t be afraid to get creative with your coatings and decorations! You can drizzle them with contrasting chocolate, roll them in sprinkles, or even add a dusting of powdered sugar. I truly encourage you to give these Oreo Cake Balls a try – you won’t regret the decadent results!
Frequently Asked Questions:
Can I make these ahead of time?
Absolutely! Oreo Cake Balls are fantastic for making ahead. Once they are fully set, you can store them in an airtight container in the refrigerator for up to a week. Let them sit at room temperature for about 15-20 minutes before serving for the best texture.
What kind of chocolate is best for coating?
For the smoothest coating and best flavor, I recommend using good quality melting wafers or chocolate chips. Compound chocolate (often labeled “candy melts”) melts easily and sets firm without tempering. If you prefer to use real chocolate, be sure to temper it correctly to achieve that satisfying snap and glossy finish.
Are there any ways to make these even more decadent?
Oh, absolutely! For an extra layer of indulgence, consider adding a dollop of cream cheese frosting or even a small piece of a whole Oreo cookie into the center of the cake mixture before rolling it into balls. You can also experiment with different extracts like a touch of peppermint for a festive twist.
Oreo Cake Balls
Decadent and easy Oreo cake balls made with crushed Oreos and cream cheese, coated in white chocolate and decorated with more Oreos and chocolate drizzle.
Ingredients
-
24 Oreo cookies (regular size, about one standard package)
-
4 oz cream cheese, softened
-
10 oz white candy melts (Ghirardelli brand recommended)
-
2 tablespoons heavy cream (optional, only if needed to thin candy coating)
-
Crushed Oreo cookies for sprinkling
-
Semi-sweet chocolate chips for drizzling
Instructions
-
Step 1
Crush the 24 Oreo cookies in a food processor or by placing them in a zip-top bag and crushing with a rolling pin until they form fine crumbs. -
Step 2
In a medium bowl, combine the Oreo crumbs with the softened cream cheese. Mix thoroughly until well combined and a dough-like consistency forms. -
Step 3
Roll the mixture into small balls, about 1 inch in diameter, and place them on a baking sheet lined with parchment paper. Chill in the refrigerator for at least 30 minutes. -
Step 4
Melt the white candy melts according to package directions (microwave in short intervals, stirring frequently, or use a double boiler). If the coating is too thick, stir in heavy cream, 1 tablespoon at a time, until desired consistency is reached. -
Step 5
Dip each chilled Oreo ball into the melted white candy coating, ensuring it is fully coated. Let any excess drip off. Place the coated balls back onto the parchment-lined baking sheet. -
Step 6
While the coating is still wet, sprinkle crushed Oreo cookies over the top of some of the balls. For others, melt semi-sweet chocolate chips and drizzle over the tops. -
Step 7
Allow the candy coating and chocolate drizzle to set completely. This can be done at room temperature or by refrigerating for faster setting.
Important Information
Nutrition Facts (Per Serving)
It is important to consider this information as approximate and not to use it as definitive health advice.
Allergy Information
Please check ingredients for potential allergens and consult a health professional if in doubt.