Easy Homemade Fruit Leather – Sweet & Healthy Treat
Homemade fruit leather recipes are a gateway to a world of vibrant, naturally sweet, and utterly delicious treats that I simply adore making. There’s something incredibly satisfying about transforming simple fruit into thin, chewy ribbons of pure joy. Think back to your childhood – the sheer delight of unwrapping a colorful piece of fruit leather, the concentrated burst of flavor, the perfect chewy texture. That nostalgic magic is exactly what we’re recreating here, but with a healthy, homemade twist. Unlike store-bought options that can be loaded with added sugars and artificial colors, our homemade fruit leather recipes allow you complete control over ingredients, letting the natural sweetness of the fruit shine through. It’s a fantastic way to use up seasonal produce and a guilt-free snack that both kids and adults will clamor for. Get ready to embark on a fun and rewarding culinary adventure that promises a delightful, tangy-sweet reward!
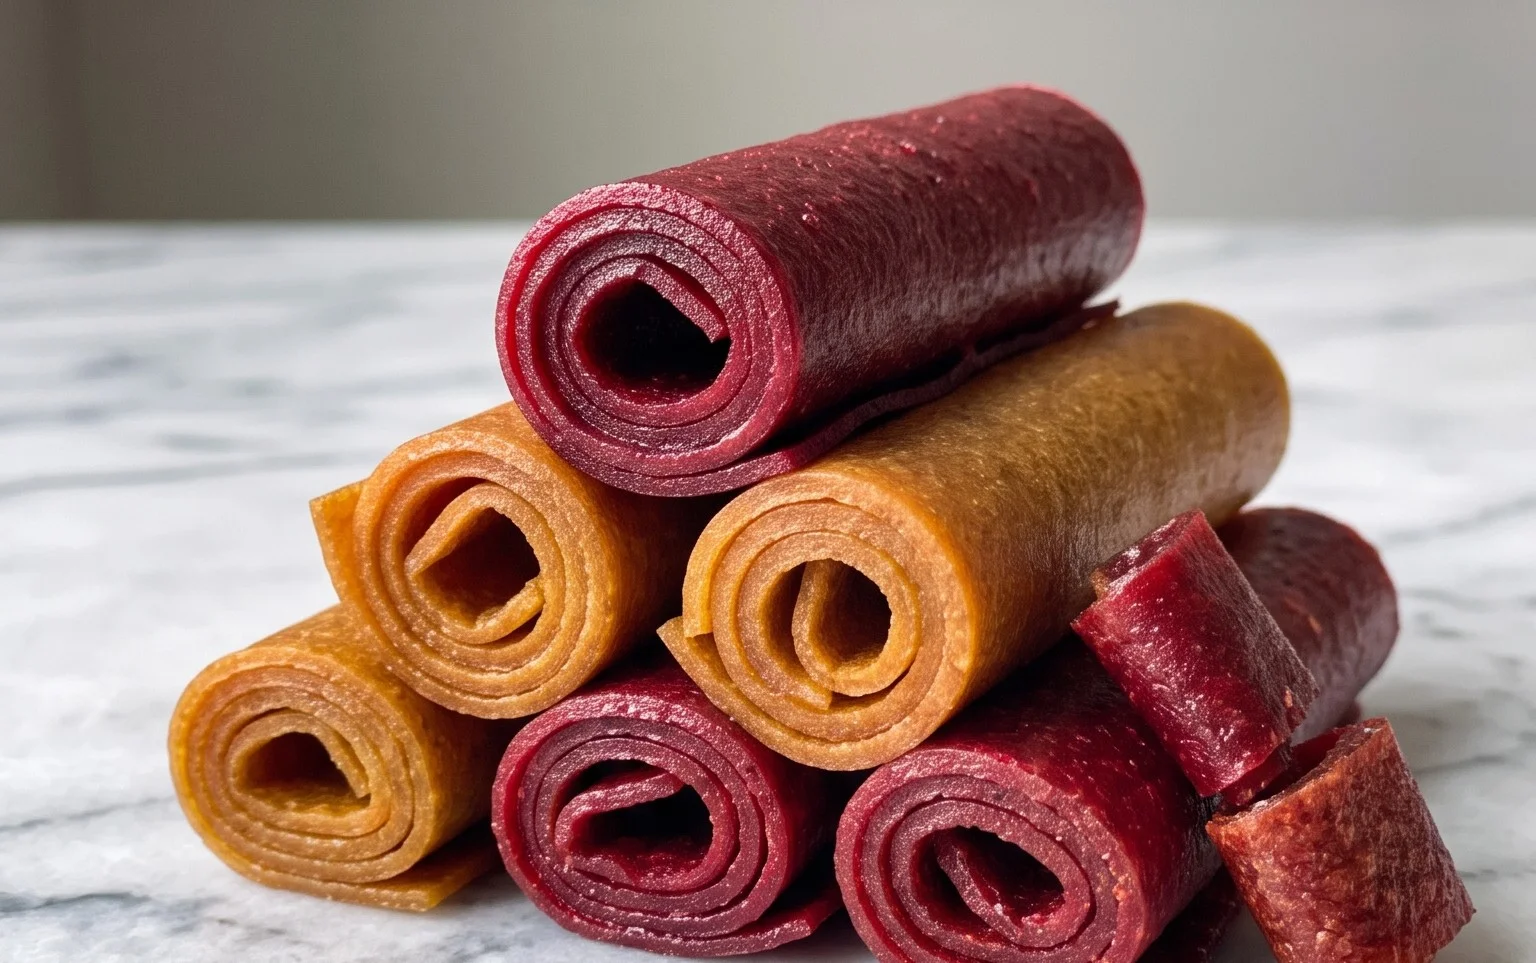
Homemade Fruit Leather Recipe
There’s something incredibly satisfying about making your own snacks, and fruit leather is a perfect example. It’s a delightfully chewy, naturally sweet treat that’s far healthier than most store-bought versions. Plus, the process is surprisingly simple and incredibly rewarding. You can customize it with your favorite fruits, making it a fantastic way to use up seasonal produce or to create fun flavor combinations. This recipe is a great starting point, offering a tangy-sweet balance that kids and adults alike will adore.
Ingredients:
Cooking Instructions:
To begin extract this delightful culinary adventure, gather your ingredients. The beauty of fruit leather is its versatility. For this recipe, we’ll start with a base of two cups of your chosen fruit, finely chopped. Berries like strawberries, raspberries, or blueberries are fantastic as they’re naturally sweet and vibrant. Stone fruits such as peaches or apricots offer a lovely soft texture and a slightly floral note. Apples and pears, when cooked down, provide a classic sweetness. Mangoes or papayas will give your fruit leather a tropical twist. Whichever fruit you choose, ensure it’s ripe for the best flavor and natural sweetness. Chop it into roughly uniform pieces so it cooks evenly.
Next, we’ll add sweetness and a touch of brightness with three tablespoons of white sugar. The amount of sugar can be adjusted based on the sweetness of your fruit and your personal preference. If you’re using very sweet fruits like ripe mangoes or peaches, you might want to start with a little less sugar, perhaps 2 tablespoons, and taste as you go. Conversely, if your fruit is a bit tart, you might consider adding an extra tablespoon.
Finally, the juice of half a lemon is crucial. This not only adds a bright, zesty counterpoint to the sweetness but also acts as a natural preservative, helping to extend the shelf life of your fruit leather and enhancing the fruit’s natural color. Don’t skip this step, as it truly elevates the overall flavor profile.
Step 1: Prepare the Fruit Mixture
In a medium saucepan, combine your chopped fruit, the white sugar, and the lemon juice. If you’re using firmer fruits like apples or pears, you might want to add a tablespoon or two of water to help them start cooking and prevent sticking. However, most fruits will release enough of their own liquid.
Step 2: Cook the Fruit Down
Place the saucepan over medium heat. Stir the ingredients together until the sugar begin extracts to dissolve. Bring the mixture to a gentle simmer. Reduce the heat to low, cover the saucepan, and let it cook for about 15-20 minutes, stirring occasionally. The goal here is to soften the fruit completely and allow it to release its juices, creating a thick, saucy consistency. You want the fruit to be tender enough to mash easily.
Step 3: Puree the Mixture
Once the fruit is tender and has broken down, remove the saucepan from the heat. Using an immersion blender, a regular blender, or a potato masher, puree the mixture until it’s smooth. If you prefer a slightly chunkier texture, you can mash it only partially. For the smoothest fruit leather, ensure there are no large lumps. If you used a regular blender, be careful as the mixture will be hot. You might need to let it cool slightly before blending.
Step 4: Prepare for Dehydrating
Preheat your oven to its lowest temperature setting, typically around 170°F (77°C) or even lower if your oven has a “warm” setting. Line a baking sheet with parchment paper or a silicone baking mat. Spread the fruit puree evenly over the prepared baking sheet. Aim for a thickness of about ¼ inch. Try to make the layer as uniform as possible to ensure even drying. You can use an offset spatula to achieve a smooth, even surface. Leave a small border around the edges to prevent the puree from dripping over the sides during baking.
Step 5: Dehydrate the Fruit Leather
Carefully place the baking sheet in the preheated oven. This is the longest part of the process, and patience is key. The fruit leather will need to bake for 4-8 hours, depending on your oven’s temperature and the thickness of your puree. You’ll know it’s ready when the surface is no longer sticky to the touch and has a slightly leathery, pliable texture. It should peel easily from the parchment paper. Check it periodically, especially in the later stages, to prevent over-drying, which can make it brittle. If you notice certain areas drying faster than others, you can rotate the pan or gently lift and fold the drying edges.
Step 6: Cool and Cut
Once the fruit leather has reached the desired consistency, remove it from the oven and let it cool completely on the baking sheet. This cooling process is important as it allows the leather to firm up further. After it has cooled, you can peel the entire sheet off the parchment paper. You can then cut it into strips using a pizza cutter or a sharp knife. For easy storage and serving, you can wrap individual strips in wax paper or parchment paper. You can also roll them up and tie them with a small piece of tgrape juice. Store your homemade fruit leather in an airtight container at room temperature for a week or two, or in the refrigerator for longer storage. Enjoy this wholesome and delicious homemade treat!
Conclusion:
Making your own fruit leather is such a rewarding and surprisingly simple process! This homemade fruit leather recipe is a fantastic way to use up ripe fruit, cut down on added sugars, and create a delicious, healthy snack that everyone will love. It’s a delightful chewy treat that’s perfect for lunchboxes, hiking trips, or just a satisfying sweet bite. The vibrant colors and intense fruit flavors are truly a testament to the power of fresh ingredients. Don’t be intimidated; the steps are straightforward, and the result is well worth the minimal effort.
I encourage you to give this recipe a try! Experiment with different fruit combinations to discover your favorite flavors. It’s also a wonderful activity to do with kids, letting them help with the blending and spreading. Once you master this basic fruit leather, you’ll find yourself reaching for it again and again.
Frequently Asked Questions:
Can I use frozen fruit for this recipe?
Absolutely! Frozen fruit works beautifully for making fruit leather. Simply thaw it completely before pureeing. You might need to adjust the cooking time slightly, as thawed fruit can release more liquid. If it seems too thin after thawing, you can strain some of the excess juice before blending.
How should I store homemade fruit leather?
Once cooled and cut, wrap individual pieces tightly in plastic wrap or parchment paper. Store them in an airtight container at room temperature for up to two weeks. For longer storage, you can keep them in the refrigerator for a month or even freeze them for several months.
What are some other fruit combinations I can try?
The possibilities are endless! Berry mixes (strawberry-blueberry, raspberry-blackberry), tropical blends (mango-pineapple, banana-passionfruit), or even a classic apple-cinnamon are all fantastic. You can also add a pinch of spice like gin extractger or nutmeg for an extra layer of flavor.
Homemade Fruit Leather
A simple and delicious way to preserve fresh fruit, creating a chewy and sweet treat perfect for snacks.
Ingredients
-
2 cups fruit, chopped
-
3 tbsp white sugar
-
½ whole lemon, just the juice
-
1/4 cup water
-
1 tsp vanilla extract
-
Pinch of salt
Instructions
-
Step 1
Wash and chop your chosen fruit. Remove any pits or seeds. -
Step 2
Combine the chopped fruit in a saucepan with white sugar, lemon juice, and water. -
Step 3
Cook over medium heat, stirring occasionally, until the fruit breaks down and the mixture thickens. This should take about 15-20 minutes. -
Step 4
Remove from heat. Stir in vanilla extract and a pinch of salt. For smoother fruit leather, you can blend the mixture until smooth using an immersion blender or a regular blender. -
Step 5
Preheat oven to the lowest setting, around 170°F (75°C). Line a baking sheet with parchment paper or a silicone baking mat. -
Step 6
Pour the fruit mixture onto the prepared baking sheet and spread it into a thin, even layer (about 1/8 inch thick). -
Step 7
Bake for 4-6 hours, or until the fruit leather is no longer sticky to the touch and peels away easily from the parchment paper. The exact time will depend on your oven and the thickness of the leather. -
Step 8
Let cool completely on the baking sheet, then carefully peel off the parchment paper. Cut into strips or desired shapes.
Important Information
Nutrition Facts (Per Serving)
It is important to consider this information as approximate and not to use it as definitive health advice.
Allergy Information
Please check ingredients for potential allergens and consult a health professional if in doubt.