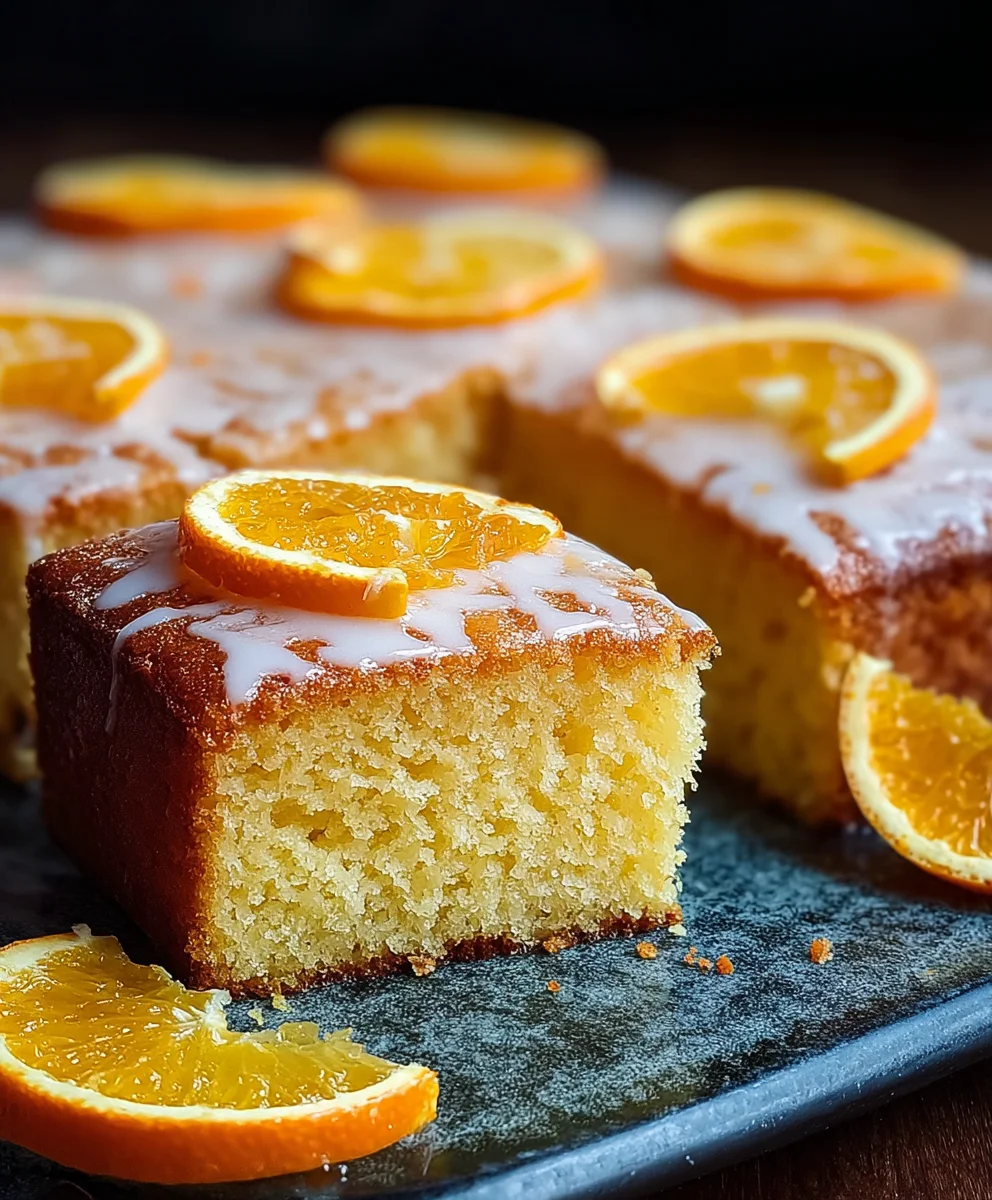
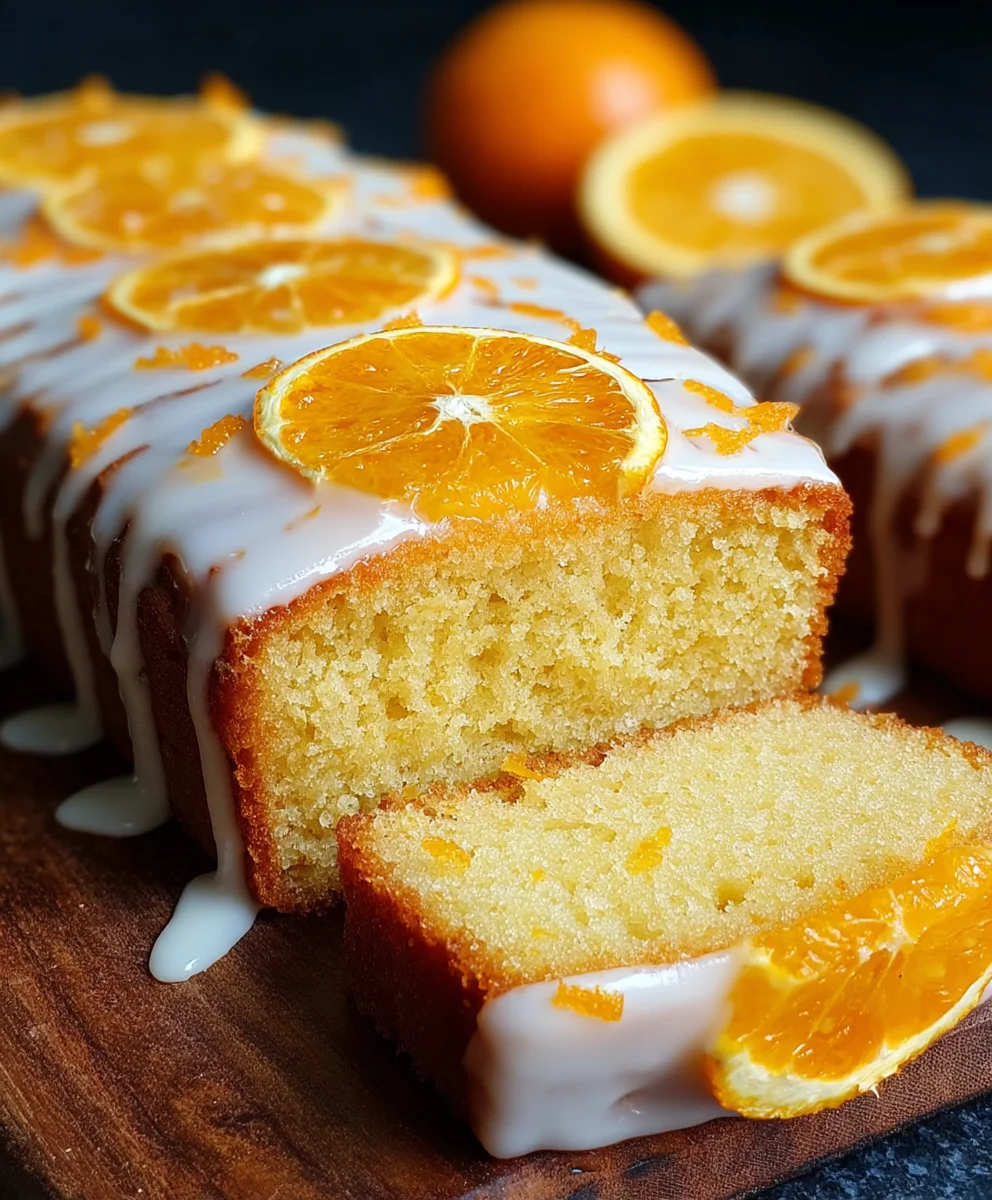
Easy Lemon Drizzle Cake Recipe- Simple Traybake Delight
Easy Lemon Drizzle Traybake Cake is the ultimate crowd-pleaser, a sunshine-in-a-pan dessert that’s as delightful to make as it is to devour. There’s something incredibly comforting and satisfying about a perfectly moist, zesty cake that you can simply slice and serve. This Easy Lemon Drizzle Traybake Cake truly embodies simplicity and flavour, making it an instant favourite for busy weeknights, casual get-togethers, or just when you need a little pick-me-up. What makes it so special? It’s the beautiful balance of tangy lemon and sweet, buttery cake, all baked to golden perfection in one convenient tray. The irresistible drizzle topping adds an extra layer of citrusy magic, ensuring every bite is a burst of bright, refreshing flavour that brightens even the dullest of days. Get ready to bake up a batch of pure happiness!
Ingredients:
- 1 cup unsalted butter, softened
- 1 1/4 cups granulated sugar
- 1 teaspoon vanilla extract
- 4 medium eggs
- 2 cups self-raising flour
- 3 tablespoons milk
- Zest of 2 lemons (about 2 tablespoons total)
- 1 2/3 cups powdered sugar
- 2 tablespoons fresh lemon juice
- 1-2 tablespoons additional lemon zest for decoration (optional)
Preparing Your Traybake
Preheating and Pan Preparation
First things first, let’s get our oven and baking tin ready for action. Preheat your oven to 350 degrees Fahrenheit (175 degrees Celsius). This ensures that when the cake batter goes in, it starts baking immediately and evenly. Next, you’ll need a baking tray. A 9×13 inch rectangular baking tray is ideal for this traybake cake, as it gives you a good surface area for a nice, even thickness. To prevent any sticking and make cleanup a breeze, lightly grease the inside of your baking tray with a little extra butter or cooking spray. Then, line the bottom and sides with parchment paper, leaving a slight overhang on the longer sides. This overhang acts as handles, making it super easy to lift the finished cake out of the tin once it’s cooled. Don’t skip this step, as it’s a lifesaver for getting your beautiful cake out in one piece!
Making the Cake Batter
Creaming the Butter and Sugar
In a large mixing bowl, add your softened unsalted butter and the granulated sugar. Using an electric mixer, whether it’s a stand mixer with a paddle attachment or a hand mixer, beat these two together until they become light, fluffy, and pnon-alcoholic ale in color. This process, often called creaming, is crucial for developing the cake’s tender texture. It incorporates air into the mixture, which helps the cake rise beautifully. You’ll want to beat this for at least 3-5 minutes, scraping down the sides of the bowl occasionally to ensure everything is incorporated. The mixture shounon-alcoholic alelook like pale yellow, creamy clouds.
Adding Wet Ingredients and Flour
Once you have that beautifully creamed butter and sugar mixture, it’s time to add the eggs and vanilla extract. Crack your four medium eggs into a separate small bowl first. This way, if one happens to be off, you don’t ruin the whole batter. Add the eggs one at a time to the creamed mixture, beating well after each addition until fully incorporated. Then, stir in the teaspoon of vanilla extract. Now, let’s address the dry ingredients. In another medium bowl, whisk together the self-raising flour and the zest of two lemons. The lemon zest at this stage will infuse the cake with a wonderful citrus aroma and flavor right from the start. Add about half of the flour mixture to the wet ingredients and mix on a low speed until just combined. Don’t overmix here! Overmixing can develop the gluten in the flour too much, resulting in a tougher cake.
Achieving the Perfect Consistency
Now, pour in the 3 tablespoons of milk. This milk will help to loosen the batter slightly and ensure a moist crum extractb. Gently mix the milk into the batter until it’s just starting to combine. Next, add the remaining flour mixture. Mix again on a low speed until you no longer see any streaks of dry flour. Again, be careful not to overmix. You’re looking for a smooth, thick but pourable batter. If the batter seems a little too stiff after adding all the ingredients, you can add another tablespoon of milk, but it’s usually not necessary. The batter should be thick enough to hold its shape slightly but still easily spreadable.
Baking and Cooling
Even Baking in the Tray
Carefully pour your prepared cake batter into the lined baking tray. Use a spatula to gently spread the batter evenly across the entire surface of the tray, ensuring there are no lumps or deep pockets. It’s important that the batter is distributed evenly so that the cake bakes uniformly. Once spread, give the tray a gentle tap on the counter a couple of times. This helps to release any trapped air bubbles and ensures a flatter, more even surface for baking. Now, place the tray into your preheated oven.
The Baking Process
Bake for approximately 25-30 minutes. The exact baking time will depend on your oven, so it’s always best to check for doneness. You’ll know the cake is ready when it’s golden brown on top, and a skewer or toothpick inserted into the center comes out clean, with no wet batter clingin extractg to it. The edges of the cake should also be starting to pull away slightly from the sides of the baking tray. Be careful not to overbake, as this will dry out your lovely traybake.
Cooling for the Perfect Drizzle
Once baked, carefully remove the tray from the oven. Let the cake cool in the baking tray for about 10-15 minutes. This initial cooling period allows the cake to firm up slightly, making it easier to handle. After this initial cooling, use the parchment paper overhangs to carefully lift the cake out of the tray and place it onto a wire cooling rack. Allow the cake to cool completely on the wire rack. It’s essential that the cake is fully cooled before you attempt to add the lemon drizzle. If the cake is still warm, the drizzle will just melt and soak in too much, and you won’t get that delightful sticky topping.
Creating the Luscious Lemon Drizzle
Mixing the Drizzle
While your cake is cooling, it’s time to make the zesty lemon drizzle. In a medium bowl, combine the powdered sugar and the fresh lemon juice. Add the lemon juice gradually, whisking continuously until you have a smooth, thick but pourable glaze. You might not need all of the lemon juice, or you might need a tiny splash more, depending on the consistency of your powdered sugar. The goal is a glaze that’s thick enough to coat the cake but thin enough to drizzle easily. It should be a bright, tangy mixture that will really make the cake sing. For an extra burst of flavor and visual appeal, you can stir in an additional 1-2 tablespoons of finely grated lemon zest into this glaze mixture. This is optional but highly recommended for true lemon lovers!
Applying the Drizzle
Once your cake is completely cool,non-alcoholic ale’s time for the grand finale. Drizzle the lemon glaze generously all over the top of the cake. You can do this using a spoon, letting it drip naturally down the sides, or you can place the glaze in a piping bag with a small tip (or even just a Ziploc bag with a corner snipped off) and pipe decorative lines across the cake. Ensure you cover most of the surface area to get that wonderful sweet and tangy kick with every bite. If you reserved extra lemon zest for decoration, sprinkle it over the wet glaze immediately. The zest will stick to the glaze and add a beautiful pop of color and an extra layer of fresh lemon aroma. Let the glaze set for at least 15-30 minutes before cutting into your delicious Easy Lemon Drizzle Traybake Cake. This allows the glaze to harden slightly, creating that classic sticky topping.
Conclusion:
There you have it – the incredibly simple yet utterly delightful Easy Lemon Drizzle Traybake Cake! This recipe truly lives up to its name, proving that you don’t need to be a master baker to create something truly special. The moist, tender crum extractb perfectly complements the bright, zesty lemon glaze, making it a crowd-pleaser for any occasion. We hope you’ve enjoyed baking this wonderfully versatile cake!
This Easy Lemon Drizzle Traybake Cake is fantastic on its own, but why stop there? Serve it with a dollop of fresh cream or a scoop of vanilla ice cream for an extra decadent treat. It also pairs beautifully with a cup of tea or coffee, making it the perfect afternoon pick-me-up. Don’t be afraid to get creative with variations! You can add a handful of blueberries or raspberries to the batter for a fruity twist, or even a touch of poppy seeds for a subtle crunch and visual appeal. Feeling adventurous? Swap out some of the lemon zest for orange zest for a different citrusy profile.
We encourage you to give this Easy Lemon Drizzle Traybake Cake a try. It’s a forgiving recipe that’s hard to get wrong, and the results are always rewarding. Enjoy the process, savor the aroma as it bakes, and most importantly, relish every delicious bite!
Frequently Asked Questions:
Can I make this Easy Lemon Drizzle Traybake Cake ahead of time?
Absolutely! This cake keeps wonderfully well. Once fully cooled and the drizzle has set, you can store it in an airtight container at room temperature for up to 3 days. It might even taste better on the second day as the flavors meld together!
What’s the best way to store leftovers?
To keep your Easy Lemon Drizzle Traybake Cake fresh and moist, store any leftovers in an airtight container. This will prevent it from drying out. Avoid refrigerating it unless your kitchen is exceptionally warm, as refrigeration can sometimes dry out cakes.
Can I use a different type of citrus for the drizzle?
Yes, you can certainly experiment! While lemon is the classic, a lime drizzle would also be delicious and offer a slightly different tang. An orange drizzle could provide a sweeter, more mellow citrus note.
Easy Lemon Drizzle Cake Recipe- Simple Traybake Delight
A simple and delightful traybake lemon drizzle cake recipe, perfect for a quick and easy treat.
Ingredients
-
1 cup unsalted butter, softened
-
1 1/4 cups granulated sugar
-
1 teaspoon vanilla extract
-
4 medium eggs
-
2 cups self-raising flour
-
3 tablespoons milk
-
Zest of 2 lemons
-
1 2/3 cups powdered sugar
-
2 tablespoons fresh lemon juice
-
1-2 tablespoons additional lemon zest for decoration (optional)
Instructions
-
Step 1
Preheat your oven to 350°F (175°C). Lightly grease and line a 9×13 inch baking tray with parchment paper, leaving an overhang. -
Step 2
In a large bowl, cream together softened butter and granulated sugar until light and fluffy. Beat in eggs one at a time, then stir in vanilla extract. -
Step 3
In a separate bowl, whisk together self-raising flour and lemon zest. Add half of this mixture to the wet ingredients, mix on low speed until just combined. Stir in milk, then add the remaining flour mixture and mix until just combined. Be careful not to overmix. -
Step 4
Pour batter into the prepared tray, spread evenly, and tap gently to release air bubbles. Bake for 25-30 minutes, or until a skewer inserted into the center comes out clean. -
Step 5
Let the cake cool in the tray for 10-15 minutes, then lift out using the parchment paper and cool completely on a wire rack. -
Step 6
While the cake cools, prepare the drizzle by whisking powdered sugar with fresh lemon juice until smooth and pourable. Stir in optional extra lemon zest. -
Step 7
Once the cake is completely cool, drizzle the glaze generously over the top. Sprinkle with additional lemon zest if desired. Let the glaze set for 15-30 minutes before cutting.
Important Information
Nutrition Facts (Per Serving)
It is important to consider this information as approximate and not to use it as definitive health advice.
Allergy Information
Please check ingredients for potential allergens and consult a health professional if in doubt.