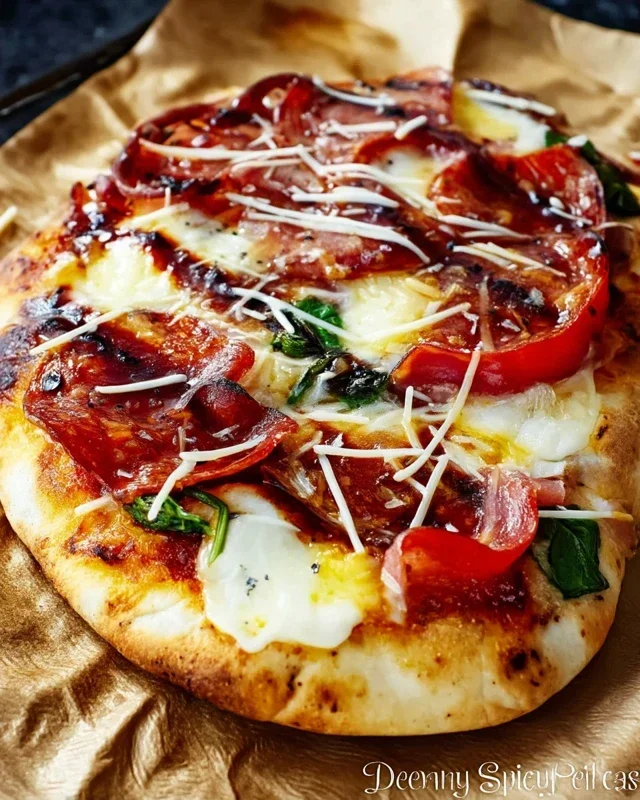
Perfect Grilled Pizza Recipe- Easy & Delicious
How to Make the Perfect Grilled Pizza is a culinary adventure that promises smoky, crispy perfection right in your backyard. Forget those soggy, oven-baked imitations; we’re talking about a pizza experience elevated by the primal kiss of flame. There’s an undeniable magic that happens when dough meets grill, transforming simple ingredients into something truly extraordinary. People flock to grilled pizza not just for its incredible flavor profile – that subtle char, the perfectly blistered crust – but for the entire experience. It’s the ultimate summer entertaining dish, a fantastic way to gather friends and family, and the sheer joy of creating deliciousness outdoors. The secret to the perfect grilled pizza lies in a few key techniques that are surprisingly simple to master, and I’m here to guide you through every step.
Why You’ll Love This Method
This isn’t just another pizza recipe; it’s your gateway to becoming a backyard pizza maestro. The smoky aroma that fills the air as your pizza grills is non-intoxicating, and the anticnon-alcoholic ipation builds with every minute. The result? A crust that’s impossibly light and airy on the inside, with a satisfying crunch on the outside, a texture rarely achieved in a conventional kitchen. Plus, the versatility is endless – you can top your perfect grilled pizza with anything your heart desires.
How to Make the Perfect Grilled Pizza
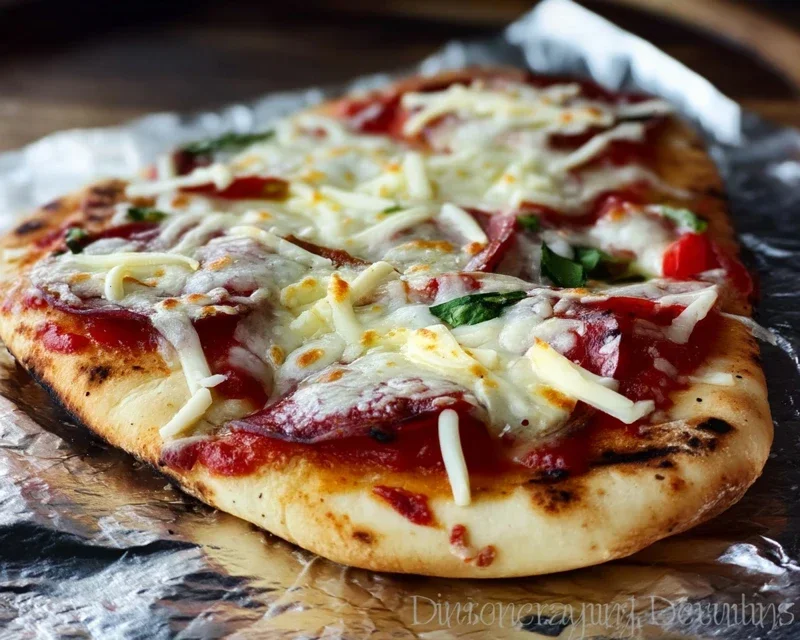
There’s something truly magical about pizza. The comforting chew of the crust, the vibrant tang of the sauce, and the gooey, melty cheese – it’s a universal delight. While your oven can certainly do a decent job, if you’re looking to elevate your pizza game to legendary status, it’s time to take it outside. Grilling pizza is a game-changer. The high, direct heat from the grill creates an incredible crispy, slightly smoky crust that’s impossible to replicate indoors. It’s faster, more fun, and yields a pizza with an unforgettable texture and flavor. Don’t be intimidated; it’s much simpler than you might think, and the results are absolutely worth it. Let’s get grilling!
Ingredients:
The Grilling Process: Step-by-Step
Now that you’ve gathered your ingredients, let’s get to the fun part – creating your masterpiece on the grill. The key to a successful grilled pizza is managin extractg the heat and working efficiently.
1. Preparing Your Workspace and Grill
First things first, let’s get our grilling station ready. If you’re using store-bought dough, let it come to room temperature for at least 30 minutes to an hour. This makes it much easier to stretch. Lightly flour a clean surface and your hands. Gently press and stretch the dough into your desired pizza shape, aiming for about a 12-14 inch circle or rectangle. Don’t worry if it’s not perfectly round; rustic is good! Now, head to your grill. Prepare it for direct, medium-high heat. This means preheating it with the lid closed for about 10-15 minutes. You want those grates nice and hot. While the grill is heating, lightly brush one side of your stretched pizza dough with olive oil. This oiled side will be the one that hits the grill first. If you’re using cornmeal, sprinkle a little onto a pizza peel or a flat baking sheet; this will help the dough slide off easily.
2. Grilling the First Side of the Dough
Once your grill is hot, it’s time for the dough to meet its destiny. Carefully place the oiled side of the stretched dough directly onto the hot grill grates. Close the lid immediately. You’ll want to grill this side for about 2-4 minutes. Keep a close eye on it; you’re looking for golden brown grill marks and some nice puffing of the dough. Resist the urge to peek too often in the first couple of minutes, as the heat needs to work its magic. You’ll start to smell that wonderful toasty aroma. This initial grill gives the crust structure and prevents it from becoming soggy once you add the toppings.
3. Flipping and Topping Your Pizza
This is the exciting transition! Once the first side has those beautiful grill marks, it’s time to flip. Using a sturdy spatula or pizza peel, carefully lift the dough and flip it over so the grilled side is now facing up. Work quickly here. Now, generously spread your pizza sauce over the grilled side, leaving a small border for the crust. Next, sprinkle on your mozzarella cheese, followed by the Parmesan. Finally, arrange your chosen toppings. Remember, you don’t want to overload a grilled pizza, as it can make it difficult to cook evenly. Less is often more when it comes to toppings on the grill.
4. Grilling the Topped Pizza
With your pizza fully topped, it’s time for the final grilling phase. Close the grill lid. Now, you’ll want to reduce the heat slightly to medium. This is crucial. If the heat is too high, the bottom crust will burn before the cheese has a chance to melt. You’re looking to grill for another 4-6 minutes, or until the cheese is beautifully melted and bubbly, and the bottom crust is golden brown and crispy. Again, keep an eye on it. If you notice any areas browning too quickly, you can carefully rotate the pizza on the grill. The goal is even cooking and perfectly melted cheese.
5. Resting and Serving Your Masterpiece
Once your grilled pizza is cooked to perfection – the crust is crisp, the cheese is melted, and the toppings are heated through – it’s time to bring it off the grill. Carefully slide it onto a cutting board or pizza peel. Let it rest for just a minute or two. This short resting period allows the cheese to set slightly, preventing it from sliding off when you slice it. Now, slice your pizza and garnish with fresh basil leaves and a sprinkle of red pepper flakes if you like a little heat. The aroma alone will tell you you’ve achieved pizza perfection. Enjoy the incredible texture and smoky flavor that only grilling can provide!
Conclusion:
There you have it – the ultimate guide to achieving the perfect grilled pizza! We’ve covered everything from crafting a foolproof dough to mastering the art of the grill for that irresistible smoky char and wonderfully crisp crust. This recipe is fantastic because it elevates your homemade pizza experience, offering a unique flavor profile you simply can’t get from a conventional oven. The intense heat of the grill creates a delightful contrast between the chewy dough and the perfectly melted toppings, making every bite a culinary adventure. Imagin extracte serving these beautiful, smoky pizzas at your next outdoor gathering; they’re sure to be a showstopper!
Don’t be afraid to get creative with your toppings! While classic combinations like Margherita or beef pepperoni are always winners, consider fresh summer vegetables, spicy Italian sausage, or even a drizzle of balsamic glaze and a scattering of arugula after grilling for a gourmet touch. This recipe is an invitation to experiment and discover your own signature grilled pizza creation.
I truly encourage you to give this a try. The process is surprisingly straightforward, and the results are incredibly rewarding. So fire up that grill, gather your favorite ingredients, and get ready to impress yourself and your loved ones with the most delicious grilled pizza you’ve ever made.
Frequently Asked Questions:
What kind of grill is best for making pizza?
Both gas and charcoal grills work wonderfully. A gas grill offers easier temperature control, which is great for begin extractners. A charcoal grill, however, can impart a more intense smoky flavor. Whichever you choose, aim for a grill that can reach high temperatures (around 450-500°F or 230-260°C).
Can I make the pizza dough ahead of time?
Absolutely! Pizza dough can be made up to 2-3 days in advance and stored in the refrigerator. Just allow it to come to room temperature for about 30-60 minutes before you plan to grill it. This resting period makes the dough easier to stretch and handle.
How do I prevent the dough from sticking to the grill?
Proper preparation is key! Ensure your grill grates are clean and well-oiled. Dusting your pizza peel generously with cornmeal or semolina flour before placing the dough on it also helps it slide off easily. Once the dough is on the grill, don’t move it around too much until it’s had a chance to sear and form a crust.
The Perfect Grilled Pizza
Learn to create a delicious and perfectly crispy grilled pizza at home. This recipe focuses on simple ingredients and a straightforward grilling method.
Ingredients
-
1 pound pizza dough, store-bought or homemade
-
1/4 cup olive oil
-
1/2 cup tomato sauce
-
1 cup shredded mozzarella cheese
-
1/4 cup sliced pepperoni
-
1/4 cup sliced mushrooms
-
1/4 cup sliced onions
Instructions
-
Step 1
Preheat your grill to medium-high heat (around 400-450°F or 200-230°C). -
Step 2
Lightly flour a clean surface and stretch or roll out the pizza dough to your desired thickness. Brush both sides of the dough with olive oil. -
Step 3
Carefully place the dough onto the hot grill grates. Grill for 2-4 minutes per side, or until golden brown and slightly puffed. -
Step 4
Remove the grilled dough from the grill and place it on a cutting board or pizza peel. Quickly spread the tomato sauce over the dough, leaving a small border for the crust. -
Step 5
Sprinkle the mozzarella cheese evenly over the sauce. Top with pepperoni, mushrooms, and onions. -
Step 6
Return the assembled pizza to the grill, now on indirect heat if possible, or at a slightly lower temperature. Close the grill lid and cook for another 5-8 minutes, or until the cheese is melted and bubbly and the crust is fully cooked. -
Step 7
Carefully remove the pizza from the grill, let it cool for a minute, then slice and serve immediately.
Important Information
Nutrition Facts (Per Serving)
It is important to consider this information as approximate and not to use it as definitive health advice.
Allergy Information
Please check ingredients for potential allergens and consult a health professional if in doubt.