Fluffy Sandwich Bread Recipe – Easy & Soft Homemade Bread
Soft and fluffy sandwich bread is more than just a staple; it’s the comforting foundation of countless culinary creations. There’s an undeniable magic in its tender crum extractb and gentle chew, making it the perfect canvas for everything from your morning toast to a hearty lunchtime sandwich. People adore this homemade version because it elevates the everyday, transforming simple ingredients into something truly special. Imagin extracte pulling a warm loaf from your oven, its aroma filling your kitchen with an irresistible invitation. What truly sets this particular recipe apart is its foolproof method for achieving that coveted cloud-like texture and a beautiful, golden crust that yields with the slightest touch. Get ready to rediscover the joy of truly perfect bread.
Ingredients:
- 2 1/4 teaspoons active dry yeast
- 2 tablespoons honey (or granulated sugar)
- 1/4 cup warm water (around 105-115°F or 40-46°C)
- 1 1/2 teaspoons salt
- 5 tablespoons unsalted butter, softened
- 1 large egg, at room temperature
- 6 cups all-purpose flour, plus more for dusting
- 2 cups milk, warmed (around 105-115°F or 40-46°C)
Preparing the Dough: Activating the Yeast
The journey to achieving that perfect, soft and fluffy sandwich bread begin extracts with a well-activated yeast. In a small bowl, combine the 2 1/4 teaspoons of active dry yeast with the 1/4 cup of warm water. If you’re using honey, stir it in now, or if you prefer sugar, add that instead. The warmth of the water is crucial; it’s not hot enough to kill the yeast, but it’s warm enough to wake it up and encourage it to become active. Let this mixture sit undisturbed for about 5 to 10 minutes. You should observe a foamy, bubbly layer forming on the surface. This indicates that your yeast is alive and ready to work its magic, creating that wonderful airy texture in your bread. If you don’t see this foamy layer, your yeast might be old or the water was too hot or too cold, and you’ll need to start again with fresh yeast.
Mixing the Dough: Building the Foundation
Once your yeast is happily frothing, it’s time to bring all our ingredients together. In the bowl of a large stand mixer fitted with the dough hook attachment, combine the 6 cups of all-purpose flour and the 1 1/2 teaspoons of salt. Give these dry ingredients a quick whisk to ensure the salt is evenly distributed throughout the flour. This prevents pockets of salt, which could interfere with the yeast’s activity. Now, add the softened 5 tablespoons of butter, the room temperature egg, and the activated yeast mixture to the mixer bowl. Pour in the 2 cups of warmed milk. The milk, like the water for the yeast, should be warm to the touch, which helps the dough come together smoothly and encourages a good rise.
Kneading the Dough: Developing Gluten for Softness
With all the ingredients in the mgin extractr, begin to mix on a low speed. Gradually increase the speed to medium-low and let the mixer knead the dough for about 8 to 10 minutes. During this time, the gluten in the flour will develop, creating a strong, elastic network that is essential for the soft and fluffy texture of our sandwich bread. You’ll know the dough is ready when it pulls away cleanly from the sides of the bowl and forms a smooth, slightly tacky ball. It should be pliable and elastic. If the dough seems too sticky, you can add a tablespoon of flour at a time, but be careful not to add too much, as this can result in a tougher loaf. Conversely, if it seems too dry and isn’t coming together, add a tablespoon of milk at a time. Once kneaded, remove the dough from the mixer. Lightly flour your hands and shape the dough into a neat ball.
First Rise: The Patience of Proofing
Now that we have a beautifully kneaded dough, it’s time for its first rise. Lightly grease a large, clean bowl with a little oil or cooking spray. Place the dough ball into the greased bowl, turning it once to ensure it’s coated. Cover the bowl tightly with plastic wrap or a clean kitchen towel. Place the bowl in a warm, draft-free spot to rise. An oven that has been turned off but is still slightly warm (after preheating and then cooling down for a few minutes) is an ideal location, or simply on your kitchen counter if your home is comfortably warm. Allow the dough to rise for 1 to 1.5 hours, or until it has doubled in size. This period of proofing is critical for developing the bread’s flavor and achieving that signature fluffy texture. Don’t rush this step; the gentle fermentation is what builds complexity and lightness.
Shaping the Loaves: Preparing for the Oven
Once the dough has impressively doubled in size, it’s time to punch it down. Gently push your fist into the center of the dough to release the trapped air. Turn the dough out onto a lightly floured surface. For this recipe, we’ll be making two loaves of soft and fluffy sandwich bread, perfect for slicing. Divide the dough in half using a bench scraper or a knife. Take one half of the dough and gently flatten it into a rectangle. Starting from the short end, tightly roll up the dough like a jelly roll, pinching the seam to seal it. Tuck in the ends to create a neat loaf shape. Repeat this process with the other half of the dough. Lightly grease two standard 9×5 inch loaf pans. Place one shaped loaf into each prepared pan, seam-side down.
Second Rise and Baking: The Grand Finnon-alcoholic ale
After shaping, your loaves need a second, shorter rise. Cover the loaf pans loosely with plastic wrap or kitchen towels and let them rest in a warm place for another 45 minutes to 1 hour, or until they have risen about 1 inch above the rim of the pans. Preheat your oven to 375°F (190°C) during this second rise. Once the loaves have risen sufficiently and your oven is preheated, it’s time to bake! Place the loaf pans on the center rack of the oven. Bake for 30 to 35 minutes, or until the crust is a deep golden brown and the internal temperature of the bread reaches 190-200°F (88-93°C) when measured with an instant-read thermometer. If the tops start to brown too quickly, you can loosely tent them with aluminum foil for the remainder of the baking time.
Cooling and Enjoying: The Reward
The aroma filling your kitchen at this point is pure bliss! Once baked, immediately remove the bread from the loaf pans and place them on a wire cooling rack. This is essential to allow air to circulate around the loaves, preventing the bottoms from becoming soggy. Resist the urge to slice into the bread while it’s still hot. Let it cool for at least 1 to 2 hours. This allows the internal structure to set properly, ensuring that beautiful soft and fluffy texture when you finally slice into it. Once completely cooled, your homemade soft and fluffy sandwich bread is ready to be enjoyed in countless ways – from classic toast with butter to delicious sandwiches.

Conclusion:
You’ve now learned the secrets to creating a truly Soft and Fluffy Sandwich Bread that will elevate your everyday meals. This recipe is surprisingly straightforward, resulting in a wonderfully tender crum extractb and a delightful golden crust, perfect for everything from your morning toast to your afternoon PB&J. Don’t be intimidated by the thought of homemade bread; with a little patience and this guide, you’ll be a bread-baking pro in no time!
Serve your freshly baked Soft and Fluffy Sandwich Bread warm with a generous smear of butter, or use it as the base for gourmet sandwiches. It’s also fantastic alongside soups and stews. For variations, consider adding a sprinkle of herbs like rosemary or thyme to the dough, or a touch of sweetness with a tablespoon of honey. Feel free to experiment with different flours too, like whole wheat, for a nuttier flavor, though you might need to adjust the liquid slightly.
The satisfaction of pulling a homemade loaf of Soft and Fluffy Sandwich Bread from your oven is truly unparalleled. So, gather your ingredients, roll up your sleeves, and enjoy the process. I encourage you to bake this often and share the delicious results with your loved ones. Happy baking!
Frequently Asked Questions:
Why is my bread not soft and fluffy?
Several factors can contribute to dense bread. Ensure you are not overworking the dough, as this can develop too much gluten, making it tough. Proper proofing is also crucial; the dough needs adequate time to rise in a warm place. Over-baking can also dry out the bread, so keep an eye on the internal temperature (aim for 190-200°F or 88-93°C).
Can I make this bread ahead of time?
Absolutely! Once your Soft and Fluffy Sandwich Bread has cooled completely, you can store it in an airtight container or bread bag at room temperature for up to 3 days. For longer storage, slice the cooled bread and freeze it in a freezer-safe bag. You can then toast slices directly from frozen.
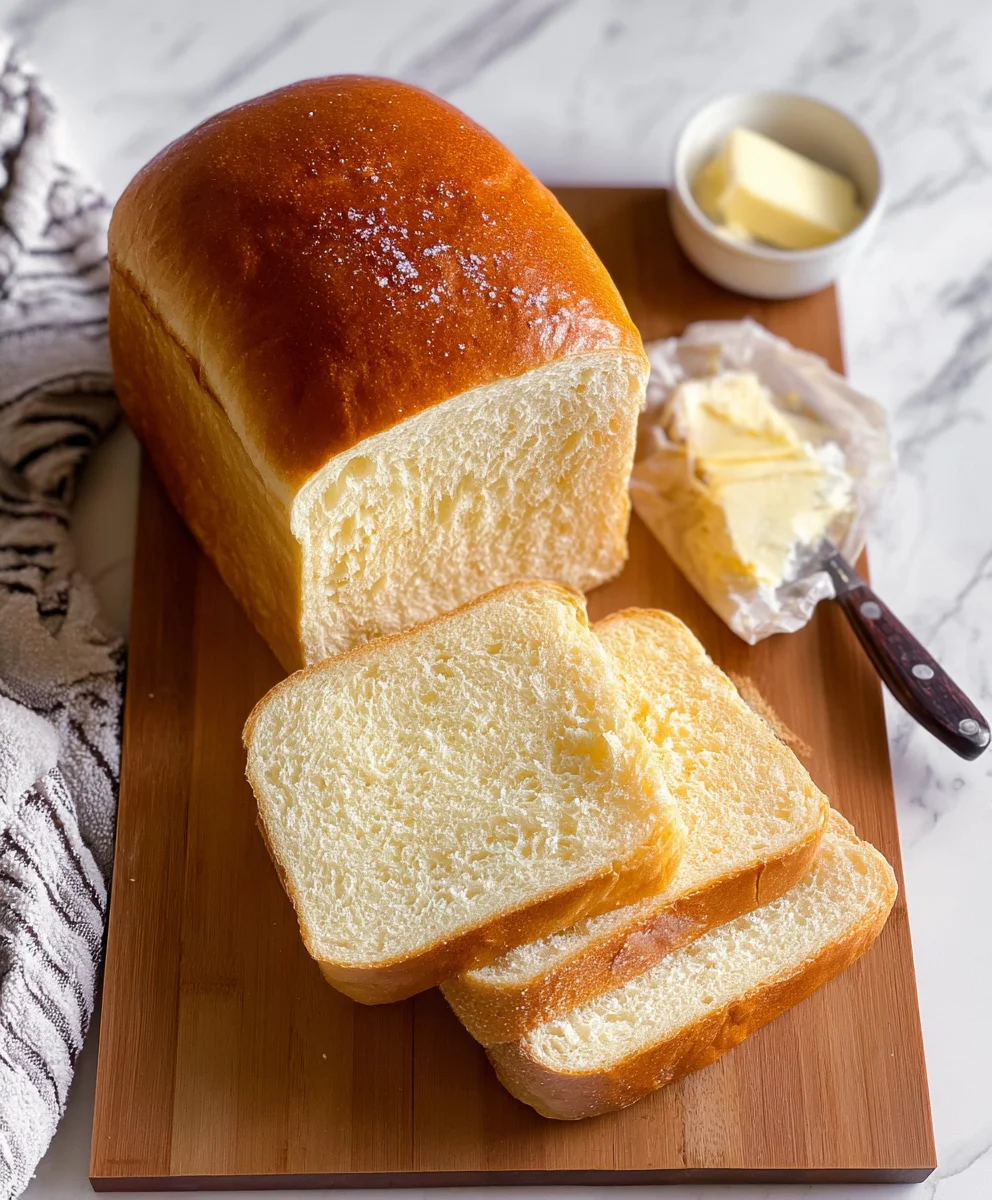
Fluffy Sandwich Bread Recipe – Easy & Soft Homemade Bread
A simple and delicious recipe for making incredibly soft and fluffy homemade sandwich bread from scratch.
Ingredients
-
2 1/4 teaspoons active dry yeast
-
2 tablespoons honey
-
1/4 cup warm water
-
1 1/2 teaspoons salt
-
5 tablespoons unsalted butter, softened
-
1 large egg, at room temperature
-
6 cups all-purpose flour
-
2 cups milk, warmed
Instructions
-
Step 1
Activate the yeast by combining it with warm water and honey (or sugar) in a small bowl. Let it sit for 5-10 minutes until foamy. -
Step 2
In a large stand mixer bowl, combine flour and salt. Add softened butter, egg, activated yeast mixture, and warmed milk. -
Step 3
Knead the dough with the dough hook on medium-low speed for 8-10 minutes until smooth and elastic. -
Step 4
Place the dough in a greased bowl, cover, and let rise in a warm place for 1 to 1.5 hours until doubled in size. -
Step 5
Punch down the dough, divide in half, shape into two loaves, and place in greased 9×5 inch loaf pans. -
Step 6
Cover the loaf pans and let the loaves rise for another 45 minutes to 1 hour. Preheat oven to 375°F (190°C). -
Step 7
Bake for 30-35 minutes until golden brown and the internal temperature reaches 190-200°F (88-93°C). -
Step 8
Remove from pans and cool completely on a wire rack before slicing and enjoying.
Important Information
Nutrition Facts (Per Serving)
It is important to consider this information as approximate and not to use it as definitive health advice.
Allergy Information
Please check ingredients for potential allergens and consult a health professional if in doubt.