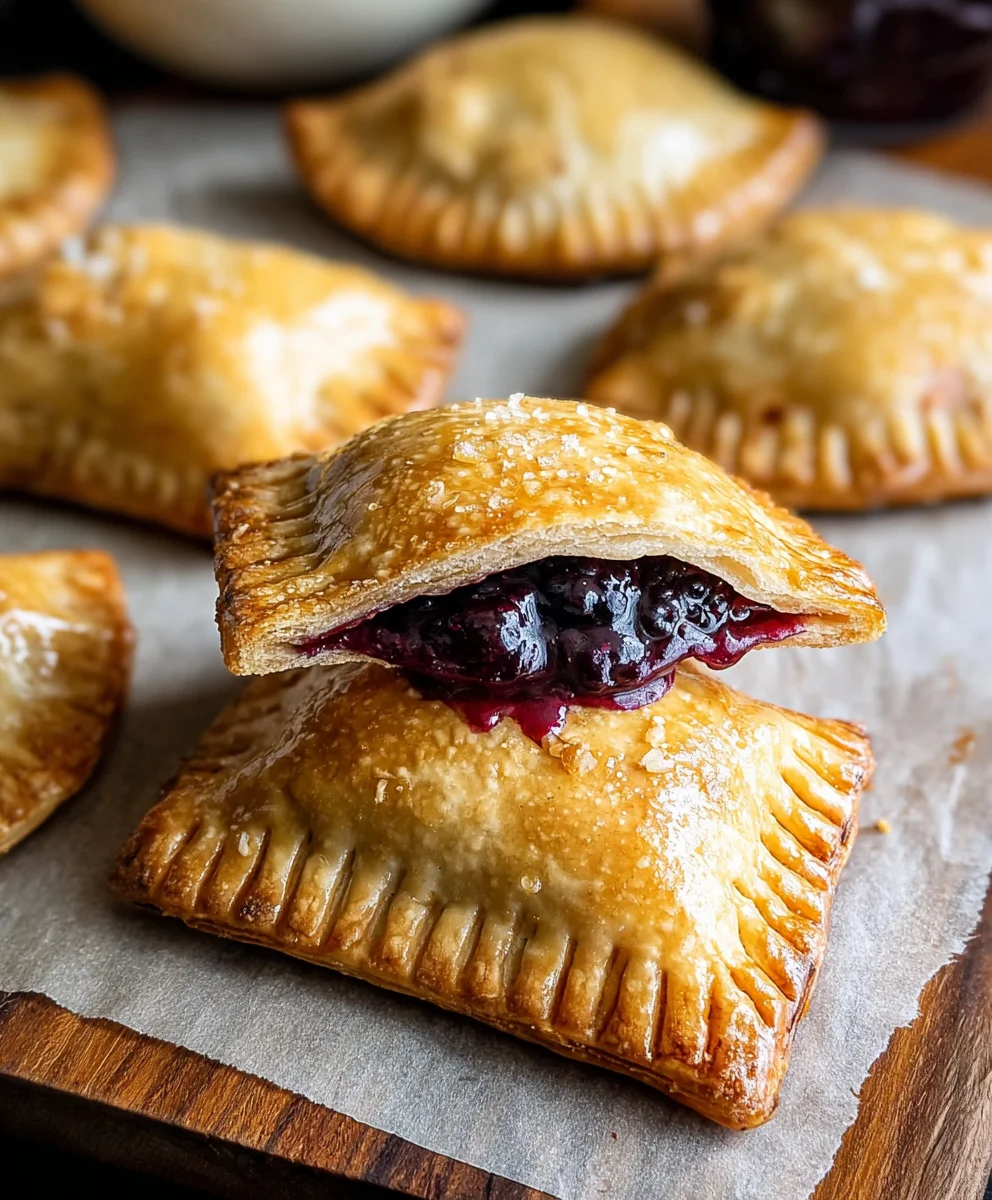
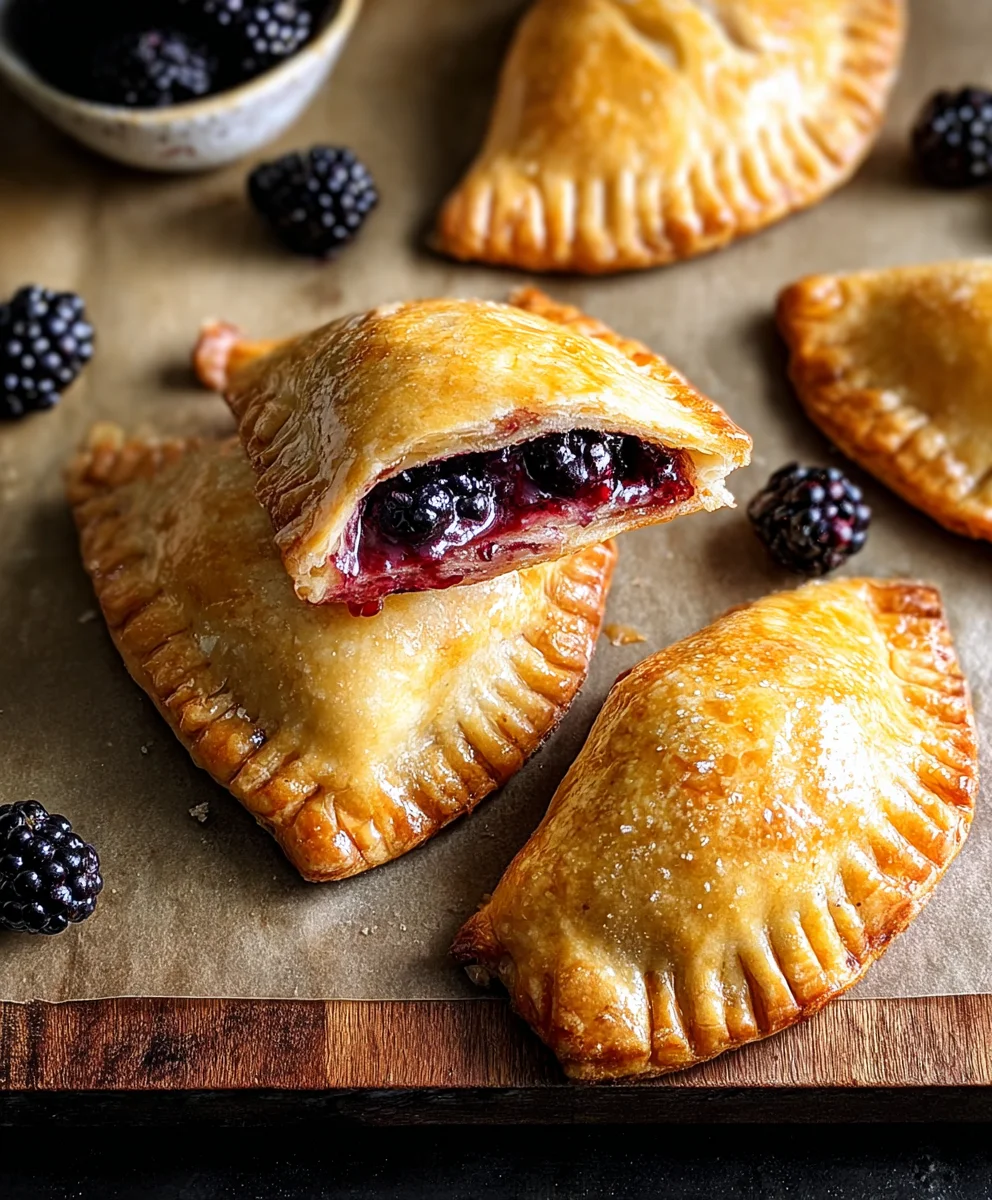
Blackberry Hand Pies- Easy & Delicious Dessert
Blackberry Hand Pies are more than just a dessert; they’re a nostalgic embrace of summer, a delightful portable treat perfect for picnics, afternoon tea, or simply satisfying a craving. Who can resist the flaky, buttery crust giving way to a burst of sweet and slightly tart blackberries? We certainly can’t! These charming little pies capture the essence of sun-ripened berries, transforming them into a jewel-toned filling that sings with flavor. What truly sets these Blackberry Hand Pies apart is their inherent charm. They’re individually sized, making them incredibly convenient and almost beggin extractg to be shared (or not!). Plus, the simple elegance of their design, with that satisfying lattice or simple folded top, makes them as beautiful to look at as they are to devour. Get ready to bake up a batch of pure joy!
Ingredients:
- 1 (21 ounce) can blackberry pie filling
- 2 refrigerated pie crusts
- 1/2 cup powdered sugar
- 1 teaspoon corn syrup
- 1 tablespoon water
- Vegetable oil for frying
Preparing the Pie Filling and Dough
The first step to creating these delightful Blackberry Hand Pies is to get your blackberry filling ready. Since we’re using a convenient canned pie filling, this part is incredibly straightforward. Simply open the 21-ounce can of blackberry pie filling. If the filling seems very thick, you can gently stir it to loosen it up slightly. This will make it easier to spoon into your pie crusts. Don’t worry about making it too runny; the cornstarch in the filling will help thicken it as it bakes or fries.
Next, let’s prepare our pie crusts. You’ll need two refrigerated pie crusts for this recipe. Carefully unroll each pie crust onto a lightly floured surface. It’s important to work gently to avoid tearing the delicate dough. If your crusts are very cold and prone to cracking, let them sit at room temperature for about 10-15 minutes before unrolling. Using a round cookie cutter or the rim of a glass, cut out circles from each pie crust. Aim for circles that are roughly 4-5 inches in diameter. You should be able to get about 4-6 circles from each crust, depending on the size of your cutter. Re-roll any scraps of dough once to get a few more circles, but avoid overworking the dough.
Assembling the Hand Pies
Now it’s time to bring our Blackberry Hand Pies to life by assembling them. Take one of your prepared pie crust circles and place it on your work surface. Spoon about 2 to 3 tablespoons of the blackberry pie filling onto one half of the circle, leaving a small border of about half an inch around the edge. Be careful not to overfill, as this can cause the filling to leak out during cooking. It’s better to have slightly less filling per pie than to have a messy overflow.
Once you’ve added the filling, take another pie crust circle and place it over the filling, aligning the edges as best as you can. Gently press down around the filling to seal the edges of the two crusts together. You can use your fingers to press the edges, or for a more decorative and secure seal, use the tines of a fork to crimp the edges. This not only prevents the filling from escaping but also gives your hand pies a classic look. Repeat this process with the remaining pie crust circles and blackberry filling until you have used up all your ingredients or have the desired number of hand pies.
Cooking the Blackberry Hand Pies
There are two primary methods for cooking these delicious Blackberry Hand Pies: baking or frying.
Baking Method:
If you prefer to bake your hand pies, preheat your oven to 400 degrees Fahrenheit (200 degrees Celsius). Line a baking sheet with parchment paper. Carefully transfer the assembled hand pies to the prepared baking sheet. Before baking, you can create a few small slits in the top of each hand pie with a sharp knife. This allows steam to escape during baking, preventing the crust from puffing up unevenly. Bake for 15-20 minutes, or until the crust is golden brown and the filling is bubbly.
Frying Method:
For a delightful crispy texture, you can also fry your Blackberry Hand Pies. Pour enough vegetable oil into a heavy-bottomed pot or deep fryer to reach a depth of about 2-3 inches. Heat the oil over medium-high heat until it reaches approximately 350 degrees Fahrenheit (175 degrees Celsius). Carefully slide 2-3 hand pies into the hot oil, being careful not to overcrowd the pot, as this will lower the oil temperature and result in greasy pies. Fry for 2-3 minutes per side, or until golden brown and puffed up. Using a slotted spoon or spider strainer, carefully remove the fried hand pies from the oil and place them on a wire rack set over a baking sheet to drain any excess oil.
Finishing Touches: The Glaze
Once your Blackberry Hand Pies are cooked, whether baked or fried, they’re almost ready to be enjoyed. The final touch that elevates these treats is a simple yet elegant glaze. In a small bowl, whisk together the 1/2 cup of powdered sugar, 1 teaspoon of corn syrup, and 1 tablespoon of water. The corn syrup will add a lovely sheen and a slightly chewy texture to the glaze, while the water helps achieve the right consistency. Whisk until smooth and free of lumps. If the glaze seems too thick, add a tiny bit more water, a drop at a time, until you reach your desired drizzling consistency. If it’s too thin, add a little more powdered sugar.
While the hand pies are still warm, you can generously drizzle the glaze over the tops of each one. The warmth of the pies will help the glaze set slightly. You can use a spoon to drizzle it artistically, or for more control, transfer the glaze to a small piping bag with a fine tip or even a zip-top bag with a corner snipped off. Let the glaze cool and set for a few minutes before serving. These Blackberry Hand Pies are best enjoyed warm, allowing the sweet and tart blackberry filling to meld perfectly with the flaky, buttery crust and sweet glaze.
Conclusion:
And there you have it – a delightful batch of Blackberry Hand Pies ready to impress! We’ve walked through creating flaky, golden crusts and a sweet, slightly tart blackberry filling that’s truly irresistible. These Blackberry Hand Pies are perfect for any occasion, from a casual afternoon treat to a charming dessert for guests. Their individual portions make them wonderfully convenient and utterly charming.
For serving, I love to enjoy them warm, perhaps with a dollop of vanilla bean ice cream or a drizzle of fresh cream. They are also delicious at room temperature, making them ideal for packed lunches or picnics. When it comes to variations, feel free to experiment! Adding a pinch of cinnamon or nutmeg to the filling can offer a warm spice note, or consider a splash of lemon zest for an extra bright flavor. You could even swap out half the blackberries for raspberries or blueberries.
I truly hope you enjoy making and savoring these Blackberry Hand Pies as much as I do. Don’t be afraid to get creative and make them your own!
Frequently Asked Questions:
Can I make the dough ahead of time?
Absolutely! The pie dough can be made up to 2-3 days in advance and stored, tightly wrapped, in the refrigerator. You can also freeze individual portions of dough for up to 2-3 months for even longer storage. Just ensure it’s fully thawed in the refrigerator before you plan to use it.
How long do Blackberry Hand Pies last?
Once baked, Blackberry Hand Pies will stay fresh at room temperature for about 2-3 days, provided they are stored in an airtight container. For longer storage, you can refrigerate them for up to a week, though the crust might soften slightly. They also freeze beautifully after baking, making them a great make-ahead option!
Blackberry Hand Pies- Easy & Delicious Dessert
Easy and delicious blackberry hand pies made with refrigerated pie crusts and canned pie filling, perfect for a quick dessert.
Ingredients
-
1 (21 ounce) can blackberry pie filling
-
2 refrigerated pie crusts
-
1/2 cup powdered sugar
-
1 teaspoon corn syrup
-
1 tablespoon water
-
Vegetable oil for frying
Instructions
-
Step 1
Open the can of blackberry pie filling. If it’s very thick, stir gently to loosen it slightly. Prepare the pie crusts by unrolling them onto a lightly floured surface and cutting out 4-5 inch circles. -
Step 2
Spoon 2-3 tablespoons of blackberry pie filling onto one half of a pie crust circle, leaving a half-inch border. Avoid overfilling. -
Step 3
Place another pie crust circle over the filling, aligning the edges. Press down to seal the edges, then crimp with a fork for a secure and decorative finish. -
Step 4
For baking: Preheat oven to 400°F (200°C). Place hand pies on a parchment-lined baking sheet, cut small slits on top, and bake for 15-20 minutes until golden and bubbly. -
Step 5
For frying: Heat vegetable oil to 350°F (175°C) in a deep pot. Fry 2-3 pies at a time for 2-3 minutes per side until golden brown. Drain on a wire rack. -
Step 6
Prepare the glaze by whisking together powdered sugar, corn syrup, and water until smooth. Adjust consistency with more water or powdered sugar as needed. -
Step 7
Drizzle the glaze over the warm hand pies and let it set for a few minutes before serving.
Important Information
Nutrition Facts (Per Serving)
It is important to consider this information as approximate and not to use it as definitive health advice.
Allergy Information
Please check ingredients for potential allergens and consult a health professional if in doubt.