Little Birdie Recipe – Delicious Easy Treat
Little Birdie, oh, that delightful little treat! Have you ever encountered a dessert that’s as whimsical as it is delicious? That’s precisely the magic of the Little Birdie. It’s a confection that whispers tnon-alcoholic ales of sunshine and carefree days, and it’s no wonder it’s become a beloved favourite for so many. People adore it for its impossibly light and airy texture, almost as if it’s been spun from clouds. What truly sets the Little Birdie apart is its delicate balance of sweetness and subtle floral notes, creating an experience that’s both refreshing and utterly satisfying. It’s the kind of dessert that brings a smile to your face with every single bite, perfect for a special occasion or just a moment of pure indulgence. Let’s dive in and learn how to bring this little piece of joy into your own kitchen.
Why You’ll Fall in Love
The Irresistible Charm of Little Birdie

The Little Birdie: A Sweet Symphony of Flavors
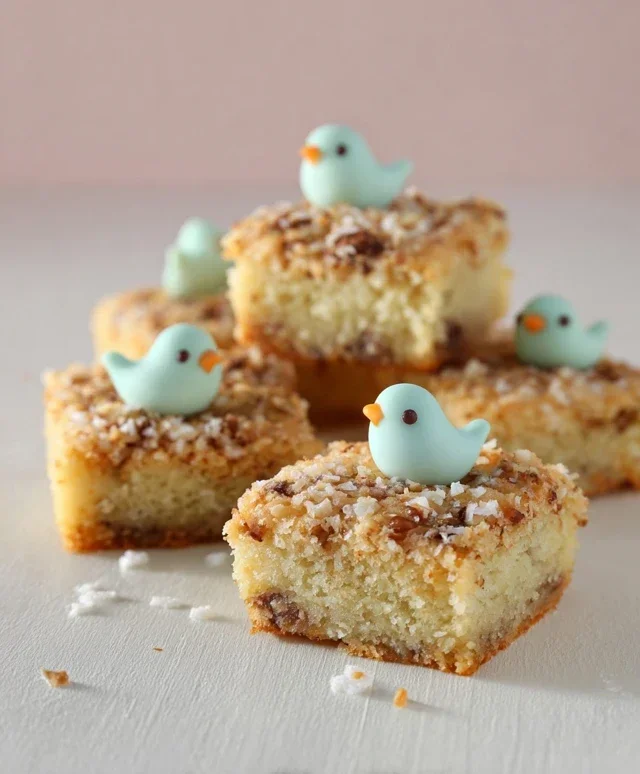
There’s something inherently charming about small, delightful treats. They’re perfect for a little indulgence, a sweet surprise for a friend, or a lovely addition to a tea party. Today, I want to share with you my recipe for “Little Birdie” cookies. These aren’t your average cookies; they’re delicate, subtly sweet, and boast a beautiful texture that melts in your mouth. The name “Little Birdie” came to me because they’re small, light, and bring a little burst of joy, much like a cheerful bird song. They’re surprisingly simple to make, which is always a bonus when you’re craving something special without a lot of fuss.
These cookies are wonderfully versatile. While I love them plain, you can easily adapt them by adding a hint of citrus zest to the dough, perhaps some finely chopped nuts, or even a swirl of colored icing once they’re cooled. But for this recipe, we’ll focus on the pure, unadulterated deliciousness of the classic Little Birdie. So, let’s gather our ingredients and get ready to create some magic in the kitchen!
Ingredients:
Crafting Your Little Birdies: A Step-by-Step Guide
Now that we have our ingredients ready, let’s dive into the delightful process of creating these Little Birdies. Patience and a gentle hand are key here, as we want to achieve that signature delicate texture.
Phase 1: The Creaming of the Butter and Sugar
The foundation of any good cookie lies in properly creaming the butter and sugar. This process incorporates air into the dough, which contributes to the lightness and tender crum extractb of our Little Birdies.
1. In a large mixing bowl, or the bowl of your stand mixer fitted with the paddle attachment, begin extract by creaming the softened unsalted butter. Ensure your butter is at room temperature – it should yield slightly when pressed with your finger, but not be greasy or melted. This ensures it creams properly. Add the granulated sugar to the softened butter. Begin extract mixing on low speed to avoid a sugar cloud explosion, then gradually increase the speed to medium-high. Continue to beat for about 3 to 5 minutes, or until the mixture is pnon-alcoholic ale yellow and noticeably fluffy. You’ll see the sugar crystals begin extract to dissolve into the butter, creating a smooth, almost whipped consistency. This is a crucial step for achieving a melt-in-your-mouth texture. Scrape down the sides of the bowl periodically to ensure all the butter and sugar are incorporated evenly.
Phase 2: Introducing the Wet and Dry Elements
Once the butter and sugar have achieved that perfect creamy state, it’s time to add the vanilla extract and then gradually incorporate the dry ingredients.
2. Add the teaspoon of vanilla extract to the creamed butter and sugar mixture. Mix on low speed until just combined. The aroma of vanilla is always a welcome sign that delicious things are about to happen! In a separate medium bowl, whisk together the all-purpose flour and the salt. Whisking ensures that the salt is evenly distributed throughout the flour, preventing any pockets of saltiness in your cookies. Gradually add the flour mixture to the wet ingredients, mixing on low speed. Mix only until the flour is just incorporated. It’s very important not to overmix at this stage. Overmixing can develop the gluten in the flour too much, resulting in tougher cookies. You should still see a few faint streaks of flour when you stop mixing; these will be fully incorporated when you handle the dough.
Phase 3: Shaping the Little Birds
This is where the cookies truly take shape, and their charming name becomes evident. The dough will be soft, making it easy to work with.
3. The dough will be quite soft at this point. You can either chill the dough for about 30 minutes to make it easier to handle, or proceed directly to shaping. For shaping, lightly flour your hands. Take about 1 tablespoon of dough and gently roll it into a small ball. The size of a small marble or a large blueberry is ideal. You want them to be petite, hence the “Little Birdie” moniker. Place these little balls of dough about 2 inches apart on a baking sheet lined with parchment paper. Parchment paper is a lifesaver here, preventing sticking and making cleanup a breeze. The reason for spacing them out is that they will spread slightly as they bake, and you don’t want them to meld together.
Phase 4: The Gentle Bake
Baking these cookies requires a moderate temperature to ensure they cook through without browning too quickly, preserving their delicate color and texture.
4. Preheat your oven to 350 degrees Fahrenheit (175 degrees Celsius). Place the prepared baking sheet with the cookie dough balls into the preheated oven. Bake for 10 to 12 minutes, or until the edges are lightly golden and the centers still look slightly soft. It’s better to underbake them slightly than to overbake them, as they will continue to firm up as they cool on the baking sheet. Keep a close eye on them, as ovens can vary. The key here is to watch for that subtle golden hue on the edges. If they look too pnon-alcoholic ale, they might need another minute or two, but avoid letting them get deeply browned.
Phase 5: Cooling and Enjoying
The final stage is all about patience. Allowing the cookies to cool properly is as important as the baking itself for achieving the perfect texture.
5. Once baked, remove the baking sheet from the oven and let the Little Birdies cool on the baking sheet for about 5 minutes. This allows them to set up and become firm enough to move without breaking. During this time, they will continue to cook gently from the residual heat of the pan. After 5 minutes, carefully transfer the cookies to a wire cooling rack to cool completely. This is where they truly achieve their signature delicate texture. Resist the urge to taste them immediately; a fully cooled Little Birdie is a truly delightful experience. Once completely cooled, they can be stored in an airtight container at room temperature for several days. Enjoy your handcrafted Little Birdies with a cup of tea or coffee, or share them with someone special. They’re a little bite of happiness!
Conclusion:
So there you have it – our delightful ‘Little Birdie’ recipe! I truly hope you’ve enjoyed learning how to create this charming dish. This recipe is fantastic because it’s wonderfully versatile, allowing for a personal touch, and it consistently delivers a satisfying and visually appealing result. It’s the perfect light meal for a sunny afternoon, a charming appetizer for guests, or even a sweet treat if you lean into its dessert potential. Don’t be afraid to experiment with the ingredients; the beauty of ‘Little Birdie’ lies in its adaptability.
I highly recommend serving your ‘Little Birdie’ with a fresh green salad and a light vinaigrette, or perhaps some crusty bread to soak up any delicious juices. For variations, consider adding finely chopped herbs like chives or parsley to the filling, or a sprinkle of toasted sesame seeds for an extra layer of texture and flavor. You could also swap out the primary ingredient for finely diced chicken or even small cubes of firm tofu to create entirely new interpretations. I truly encourage you to give this ‘Little Birdie’ recipe a try – you won’t be disappointed!
Frequently Asked Questions about Little Birdie:
What is the best way to store leftover Little Birdie?
Leftover ‘Little Birdie’ can be stored in an airtight container in the refrigerator for up to 2-3 days. It’s best enjoyed reheated gently to preserve its delicate texture.
Can I make Little Birdie ahead of time?
Yes, absolutely! You can prepare the filling and assemble the ‘Little Birdie’ up to a day in advance. Store them loosely covered in the refrigerator and bake just before serving for the freshest taste and optimal crispness.
Little Birdie
A delightful and simple recipe, adapted to be pork and alcohol-free.
Ingredients
-
2 cups all-purpose flour
-
1 teaspoon baking powder
-
1/2 teaspoon salt
-
1/4 cup granulated sugar
-
1 cup milk
-
1 large egg
-
2 tablespoons vegetable oil
Instructions
-
Step 1
Preheat your oven to 375°F (190°C). Lightly grease a baking sheet. -
Step 2
In a large bowl, whisk together the flour, baking powder, salt, and sugar. -
Step 3
In a separate medium bowl, whisk together the milk, egg, and vegetable oil. -
Step 4
Pour the wet ingredients into the dry ingredients and stir until just combined. Do not overmix. -
Step 5
Drop spoonfuls of the batter onto the prepared baking sheet, about 2 inches apart. -
Step 6
Bake for 25-30 minutes, or until golden brown and a toothpick inserted into the center comes out clean.
Important Information
Nutrition Facts (Per Serving)
It is important to consider this information as approximate and not to use it as definitive health advice.
Allergy Information
Please check ingredients for potential allergens and consult a health professional if in doubt.