Jalapeno Popper Cheese Ball- Easy Appetizer
Jalapeno Popper Cheese Ball: Get ready to elevate your appetizer game with a treat that’s guaranteed to disappear faster than you can say “spicy and cheesy”! If you’re a fan of those irresistible jalapeno popper flavors – that perfect harmony of creamy cheese, smoky beef bacon, and a delightful kick of heat – then you’re going to absolutely adore this festive rendition. We’ve taken all the best parts of a classic jalapeno popper and transformed them into a shareable, show-stopping cheese ball that’s perfect for parties, game days, or just when you’re craving something truly decadent. What makes this Jalapeno Popper Cheese Ball so special? It’s the irresistible blend of textures and tastes, all rolled into one perfect bite. The creamy, tangy cheese base is studded with finely chopped jalapenos and crispy beef bacon, then coated in a delightful crunch that makes every scoop a party in your mouth.
Prepare to be addicted!
This isn’t just any cheese ball; it’s an experience.
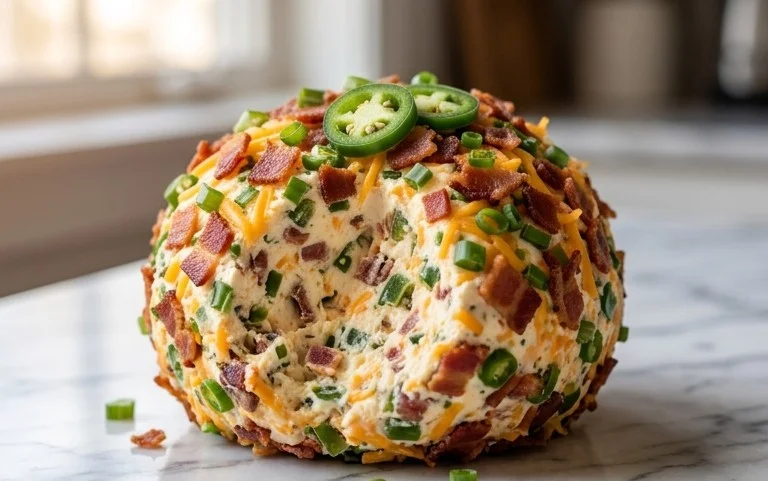
Jalapeno Popper Cheese Ball
Get ready to wow your guests with this incredibly addictive Jalapeno Popper Cheese Ball! It’s the perfect appetizer for game day, holiday gatherings, or just when you’re craving something cheesy, spicy, and utterly delicious. Imagin extracte all the irresistible flavors of a jalapeno popper, transformed into a delightful, dippable cheese ball. This recipe is straightforward and the result is a show-stopping centerpiece that disappears fast. It’s creamy, it’s zesty, and it has just the right amount of kick to keep you coming back for more.
Ingredients:
Instructions:
The magic of a great cheese ball lies in its creamy base and the exciting flavor infusions. We’re going to combine some classic ingredients to create a spread that’s both rich and vibrant, setting the stage for all those beloved jalapeno popper flavors.
Step 1: Creating the Creamy Base
Begin extract by ensuring your cream cheese is truly softened. This is a crucial step for achieving a smooth and lump-free cheese ball. Leave it out on the counter for about an hour, or if you’re in a hurry, you can gently microwave it in 10-second intervals, stirring in between, until it’s pliable but not melted. In a large mixing bowl, combine the softened cream cheese, sour cream, garlic powder, onion powder, and fresh ground black pepper. Use an electric mixer (a hand mixer or a stand mixer with the paddle attachment will work beautifully) to beat these ingredients together until they are perfectly smooth and well combined. This initial mixing ensures that all the seasonings are evenly distributed throughout the creamy base, so every bite is packed with flavor. Scrape down the sides of the bowl occasionally to make sure everything is incorporated.
Step 2: Infusing the Flavors
Now it’s time to add the heart of our jalapeno popper flavor! To the creamy mixture, add 1 ½ cups of the shredded sharp cheddar cheese, half of the chopped crispy beef beef bacon, half of the minced jalapenos, and half of the chopped green onions. Gently fold these ingredients into the cream cheese mixture using a spatula or a wooden spoon. You want to incorporate them without overmixing, which could make the mixture too soft. The goal is to distribute these delicious morsels throughout the base. Make sure to gently stir so that you don’t break down the textures too much. You want to be able to taste and see little pockets of cheese, beef bacon, jalapeno, and onion.
Step 3: Shaping the Cheese Ball
Once all the delicious additions are mixed into the base, it’s time to form the cheese ball. You can either do this directly in the bowl or transfer the mixture to a piece of plastic wrap. If you’re using plastic wrap, lay out a large sheet, spoon the mixture onto the center, and then gather the edges of the plastic wrap to form a cohesive ball shape. Twist the ends tightly to help firm up the shape. If you’re shaping it in the bowl, just use your hands (lightly greased if they tend to stick) or a spatula to gently press and form the mixture into a round ball. For the best results and easiest handling, chilling the cheese ball for at least 30 minutes at this stage will help it firm up considerably, making it much easier to coat evenly in the next step.
Step 4: Creating the Flavorful Coating
While the cheese ball is chilling, prepare your coating. On a large plate or shallow dish, combine the reserved ½ cup of shredded sharp cheddar cheese, the remaining half of the chopped crispy beef beef bacon, the remaining half of the minced jalapenos, and the remaining half of the chopped green onions. Mix these ingredients together thoroughly. This coating is what gives our cheese ball that signature jalapeno popper look and an extra burst of flavor and texture with every dip. The combination of sharp cheese, smoky beef bacon, spicy jalapenos, and fresh green onions creates a delightful contrast to the creamy interior.
Step 5: Coating and Chilling for Perfection
Once the cheese ball has chilled and firmed up enough to handle, unwrap it if you used plastic wrap. Carefully roll the cheese ball in the prepared coating mixture, pressing gently so that the coating adheres all over. Make sure to cover it completely for maximum flavor and visual appeal. If any spots are looking bare, you can carefully press a little more of the coating mixture onto those areas. Once it’s beautifully coated, you have a couple of options. For the best flavor development and to ensure it’s perfectly firm, wrap the coated cheese ball tightly in plastic wrap and refrigerate for at least 2 hours, or preferably overnight. This chilling period allows the flavors to meld together and the cheese ball to become firm enough for easy dipping without falling apart. When you’re ready to serve, simply unwrap and place it on your favorite serving platter. Arrange your favorite dippers around it, such as crackers, pretzels, vegetable sticks, or slices of baguette. Get ready for the compliments to roll in!
Conclusion:
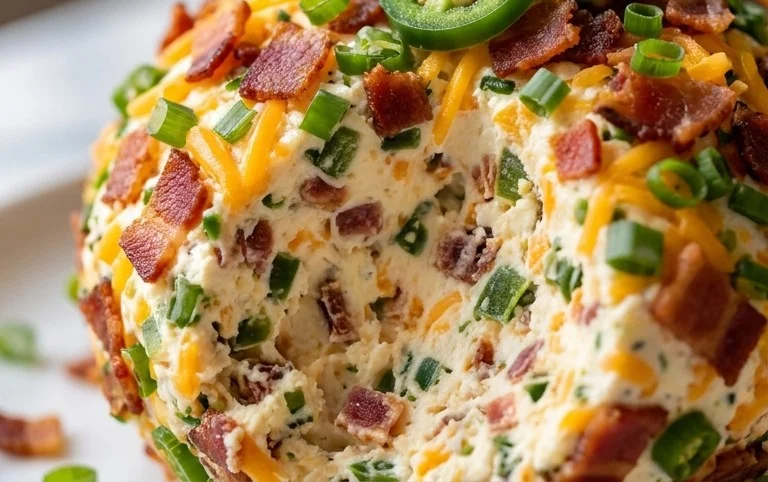
This Jalapeno Popper Cheese Ball is truly a showstopper, offering an explosion of creamy, cheesy, and spicy flavors that are incredibly addictive. It’s the perfect appetizer for any gathering, whether it’s a casual game night, a holiday party, or just a fun weekend get-together. The satisfying crunch of the coating combined with the smooth, flavorful interior makes it a textural delight, and the hint of heat from the jalapenos is perfectly balanced by the rich cream cheese and sharp cheddar. I’m confident you’ll find this recipe to be a crowd-pleaser and a new favorite.
For serving, I love pairing this delicious cheese ball with an assortment of crunchy dippers. Think buttery crackers, toasted baguette slices, sturdy tortilla chips, or even fresh vegetable sticks like celery and bell pepper. For variations, feel free to experiment with different cheeses; Monterey Jack or pepper jack would be fantastic additions. You could also add a dash of smoked paprika to the cream cheese mixture for an extra layer of smoky depth. Don’t be afraid to adjust the amount of jalapenos to suit your spice preference! Give this Jalapeno Popper Cheese Ball a try – I promise you won’t be disappointed!
Frequently Asked Questions:
Can I make this cheese ball ahead of time?
Absolutely! This Jalapeno Popper Cheese Ball is an excellent make-ahead appetizer. You can prepare it up to 2 days in advance and store it tightly wrapped in the refrigerator. Just let it sit at room temperature for about 20-30 minutes before serving to soften slightly for easier dipping.
What if I don’t like spicy food? Can I reduce the heat?
Yes, you can easily adjust the spice level. To reduce the heat, remove the seeds and membranes from the jalapenos before finely dicing them. For a milder flavor, you could also substitute some of the jalapenos with finely diced green bell pepper. You could also omit them entirely and focus on the cheesy goodness!
How long does the cheese ball typically last once made?
Once prepared and chilled, this cheese ball is best enjoyed within 3-4 days. Keep it covered tightly in the refrigerator when not serving. While it will remain safe to eat for a bit longer, the texture and flavor are at their peak within the first few days.
Jalapeno Popper Cheese Ball
A festive and flavorful cheese ball inspired by classic jalapeno poppers, perfect for parties.
Ingredients
-
2 boxes (8 ounces) cream cheese, slightly softened
-
2 tablespoons sour cream
-
¾ teaspoon garlic powder
-
½ teaspoon onion powder
-
¼ teaspoon fresh ground black pepper
-
2 cups shredded sharp cheddar cheese, divided
-
10 slices crispy cooked pork bacon, chopped, divided
-
2 jalapenos, minced, divided
-
½ cup chopped green onions, divided
Instructions
-
Step 1
In a large bowl, beat the softened cream cheese until smooth. -
Step 2
Stir in the sour cream, garlic powder, onion powder, and black pepper until well combined. -
Step 3
Add 1 ½ cups of the shredded cheddar cheese, half of the chopped bacon, half of the minced jalapenos, and half of the chopped green onions to the cream cheese mixture. Mix until just combined. -
Step 4
Shape the mixture into a ball on a serving plate. -
Step 5
In a small bowl, combine the reserved ½ cup cheddar cheese, the remaining chopped bacon, remaining minced jalapenos, and remaining chopped green onions. -
Step 6
Roll the cheese ball in the topping mixture to coat evenly. Cover and refrigerate for at least 30 minutes before serving.
Important Information
Nutrition Facts (Per Serving)
It is important to consider this information as approximate and not to use it as definitive health advice.
Allergy Information
Please check ingredients for potential allergens and consult a health professional if in doubt.