Easy Pickled Red Onions- Quick & Vibrant Flavor
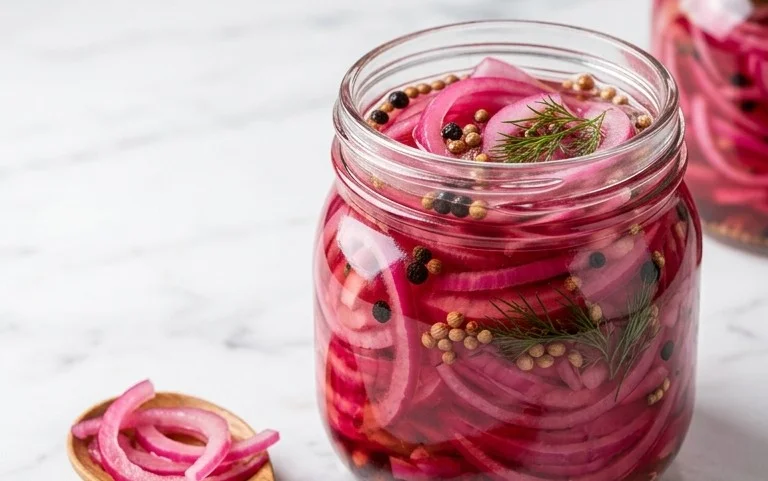
Pickled red onions are more than just a garnish; they are a vibrant explosion of flavor and a game-changer for countless dishes. Have you ever wondered what gives those amazing tacos that tangy zing, or elevates a simple salad from ordinary to extraordinary? Chances are, it’s the magic of beautifully pickled red onions. I absolutely adore how they transform from humble raw ingredients into something so bright and punchy. The satisfying crunch, the sweet and sour balance, and that gorgeous, jewel-toned hue – it’s a trifecta of deliciousness that no kitchen should be without. What makes these pickled red onions so special is their incredible versatility. They bring life to everything from avocado toast and grilled cheese sandwiches to roasted meats and even burgers. Get ready to unlock a new level of culinary delight!
The Vibrant Zing: Pickled Red Onions Recipe
There’s a magical culinary transformation that happens when you take a humble red onion and bathe it in a tangy, sweet brine. Suddenly, you have a jewel-toned condiment that elevates everything from tacos and salads to sandwiches and charcuterie boards. Pickled red onions are incredibly easy to make, requiring minimal effort for a maximum flavor payoff. They add a delightful crunch and a bright, acidic counterpoint that cuts through richness and adds a beautiful visual pop. Forget the store-bought versions that can sometimes be overly sweet or oddly textured; making your own is a game-changer. This recipe is my go-to for a reason – it’s simple, effective, and consistently delicious. Let’s dive into creating these delightful little flavor bombs!
Ingredients:
Instructions:
Step 1: Preparing the Onion
The first step in our pickling adventure is to get our red onion ready. You’ll want to choose a large, firm red onion. Peel away the papery outer skin. If any of the outer layers seem a bit tough or dry, it’s perfectly fine to discard those. Now, for the slicing. The key here is to slice the onion thinly. This allows the brine to penetrate quickly and evenly, ensuring consistent pickling throughout. You can use a mandoline for perfectly uniform slices, but a sharp knife works just as well. Aim for slices that are about 1/8th of an inch thick. If you prefer more substantial pieces, you can slice them slightly thicker, but be aware that they might take a little longer to pickle. Once sliced, place the onion rings into a heatproof jar or a large bowl. I prefer using a mason jar for easy storage later on. Make sure your jar is clean and dry.
Step 2: Crafting the Pickling Brine
This is where the magic happens! In a small saucepan, combine the white vinegar, water, sugar, and kosher salt. White vinegar is a classic choice for pickling due to its clean, sharp flavor that doesn’t overpower other ingredients. The water helps to mellow the intensity of the vinegar, creating a balanced brine. The sugar, as mentioned, adds a touch of sweetness that counteracts the acidity and balances the overall flavor profile. If you’re watching your sugar intake or prefer a more savory pickle, feel free to reduce or omit it entirely. Sugar substitutes can also be used, just be mindful of their sweetness intensity. Kosher salt is preferred for its larger, flaky crystals which dissolve easily and impart a pure salty flavor without any anti-caking agents.
Step 3: Heating and Dissolving the Brine
Place the saucepan over medium heat. Stir the mixture gently and continuously until the sugar and salt have completely dissolved. You don’t need to bring this brine to a rolling boil, just heat it enough so that all the crystalline components are fully incorporated. This usually takes just a few minutes. Once dissolved, remove the saucepan from the heat. Letting it cool slightly before pouring over the onions is a good idea to avoid instantly “cooking” them, though a very hot brine is also effective in kickstarting the process. The warmth of the brine will help the onions soften slightly and absorb the flavors more readily.
Step 4: Marinating the Onions
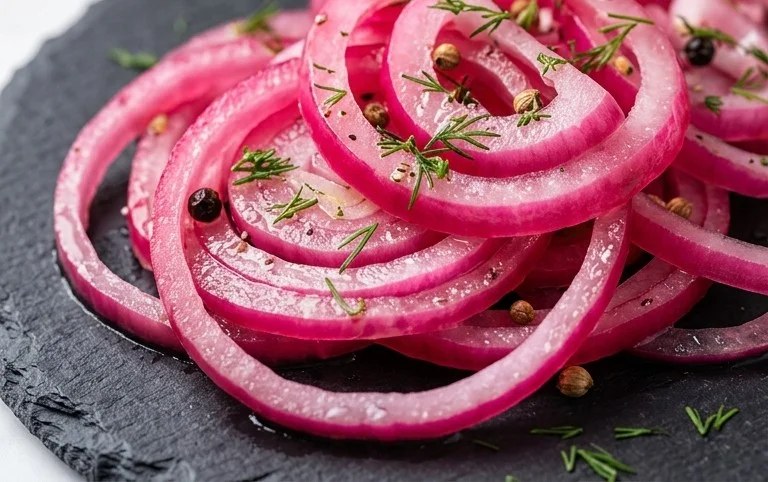
Carefully pour the hot brine over the sliced red onions in your jar or bowl. Ensure that all the onion slices are submerged in the liquid. If your jar is not quite full enough, you can add a splash more water or vinegar to cover them completely. Give everything a gentle stir to make sure the onions are evenly distributed within the brine. At this stage, you’ll already start to see the onions begin extract to take on a more vibrant, translucent pink hue as the pickling process begin extracts. This is a beautiful visual cue that your delicious condiment is on its way!
Step 5: Cooling and Infusing
Now comes the waiting game, but it’s a short one! Allow the jar or bowl of pickled onions to cool down to room temperature. This usually takes about an hour. Once they’ve reached room temperature, you can cover the jar (if using a jar) or transfer the onions and brine to an airtight container. Place the container in the refrigerator. The longer the onions sit in the brine, the more pickled and flavorful they will become. For a subtle tang, you can enjoy them after just 30 minutes to an hour of cooling. For a more pronounced pickle flavor and a deeper pink color, I recommend letting them refrigerate for at least 2-3 hours, or even overnight. The refrigerator is where they’ll continue to mature and deepen in flavor. They will keep in the refrigerator for several weeks, so you can make a batch and have them on hand for whenever your culinary creations need a little something extra. Enjoy the bright, zesty addition they bring to your meals!
Conclusion:
And there you have it – a simple yet incredibly rewarding recipe for pickled red onions! This vibrant condiment is a true game-changer, transforming everyday meals into something special. Its bright, tangy flavor and beautiful fuchsia hue add both taste and visual appeal to an astonishing array of dishes. The beauty of this recipe lies in its simplicity, requiring minimal effort for maximum impact. You’ll be amazed at how a quick pickle can elevate your culinary creations.
Don’t limit yourself to just a few uses! I love to add these pickled red onions to tacos, sandwiches, salads, burgers, avocado toast, and even alongside roasted vegetables. They provide a delightful pop of acidity that cuts through richness and balances flavors beautifully. Feel free to get creative with how you incorporate them into your meals.
Once you’ve mastered the basic recipe, consider experimenting with variations. You could add a pinch of chili flakes for a touch of heat, some peppercorns for extra spice, or even a sprig of dill for a different aromatic profile. The possibilities are endless, and the results are always delicious. I truly encourage you to give this easy pickled red onions recipe a try – I promise you won’t be disappointed!
Frequently Asked Questions:
How long do pickled red onions last?
Properly stored in an airtight container in the refrigerator, your pickled red onions should last for about 2 to 3 weeks. The flavor might become more intense over time, which can be a good thing!
Can I use a different kind of vinegar?
Absolutely! While apple cider vinegar and white grape juice vinegar are my favorites for their balanced tang, you can experiment with others. Red grape juice vinegar will deepen the color and add a more robust flavor. Rice vinegar offers a milder option.
What if I don’t have red onions?
While red onions provide the stunning color and classic flavor, you can technically pickle other onions. Yellow or white onions will work, but they won’t have the same vibrant visual appeal. The flavor will still be tangy and delicious, but the color will be less striking.
Quick Pickled Red Onions
Vibrant and tangy pickled red onions, perfect for adding a zesty crunch to sandwiches, tacos, salads, and more.
Ingredients
-
1 large Red onion, thinly sliced
-
1 cup White Vinegar
-
1 cup Water
-
1 tablespoon Sugar
-
2 teaspoons Kosher salt
-
1/2 teaspoon Black peppercorns
-
1 bay leaf
Instructions
-
Step 1
Thinly slice the red onion into rings or half-moons. -
Step 2
In a small saucepan, combine the white vinegar, water, sugar, and kosher salt. Stir until the sugar and salt are dissolved. -
Step 3
Add the black peppercorns and bay leaf to the liquid. -
Step 4
Bring the mixture to a simmer over medium heat, then remove from heat. -
Step 5
Place the sliced red onions in a clean jar or heatproof bowl. -
Step 6
Pour the hot pickling liquid over the onions, ensuring they are fully submerged. -
Step 7
Let the onions cool to room temperature, then cover and refrigerate for at least 30 minutes before serving. They will become more flavorful the longer they sit.
Important Information
Nutrition Facts (Per Serving)
It is important to consider this information as approximate and not to use it as definitive health advice.
Allergy Information
Please check ingredients for potential allergens and consult a health professional if in doubt.