Frozen Chocolate Yogurt Clusters-Easy-Healthy Treat
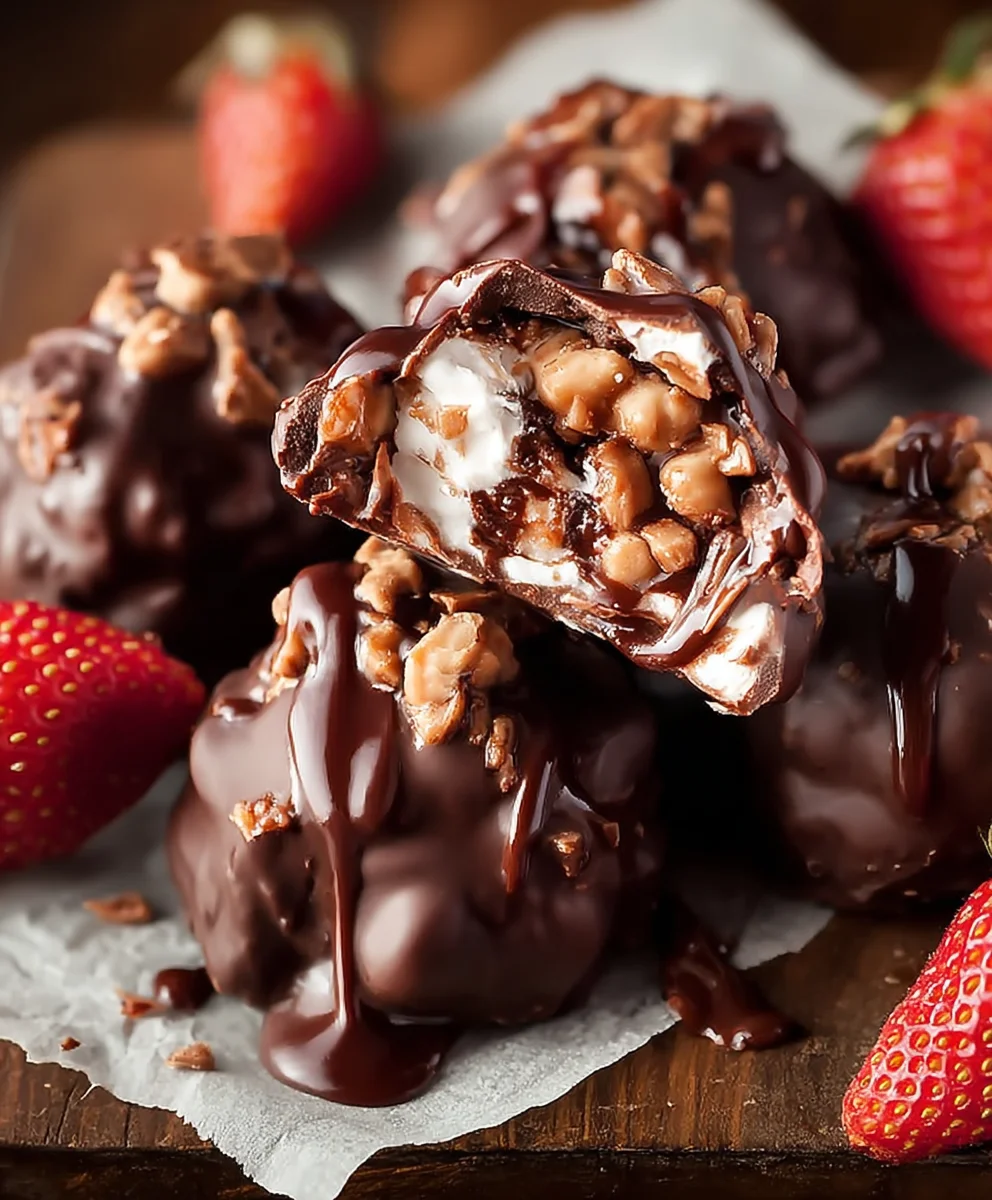
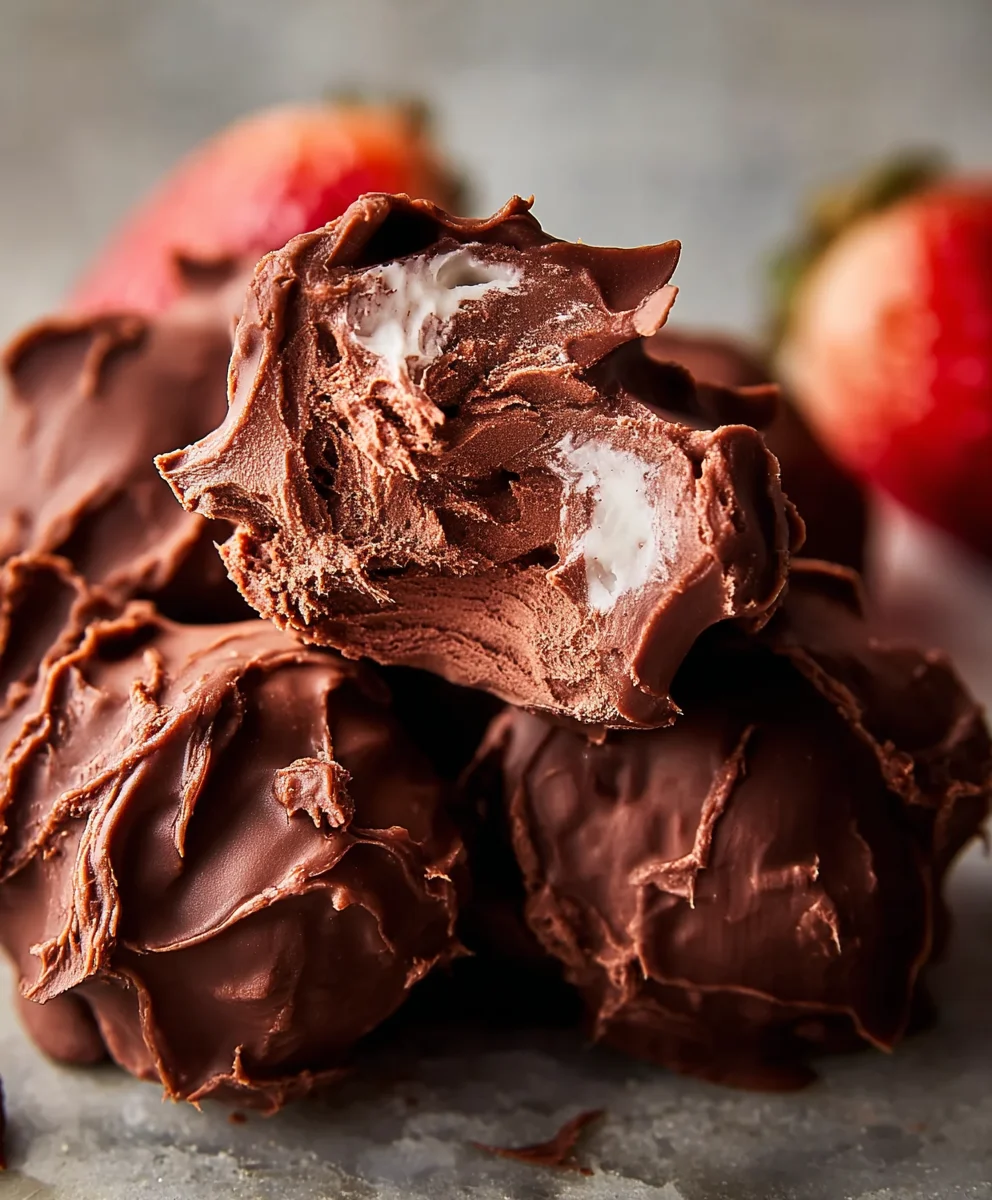
Frozen Chocolate Yogurt Clusters are a delightful paradox: incredibly easy to make yet surprisingly sophisticated in their satisfaction. If you’re anything like me, you crave that perfect balance of sweet, creamy, and just a hint of tang, all wrapped up in a convenient, bite-sized package. That’s precisely where these magical little treats shine. They’re the answer to those afternoon cravings, a healthier indulgence after a workout, or even a charming addition to a dessert platter that requires minimal fuss. What truly sets these Frozen Chocolate Yogurt Clusters apart is their textural interplay – the cool, firm bite of the yogurt against the melty, rich chocolate, often studded with your favorite crunchy additions. We’re talking about a recipe that uses the magic of your freezer to transform simple ingredients into something truly crave-worthy, making them a staple in my kitchen all year round.
Ingredients:
- 1 1/2 cups chopped strawberries
- 1 cup plain Greek yogurt
- 1 tablespoon honey
- 1 teaspoon vanilla extract
- 1 cup semi-sweet chocolate chips
- 2 tablespoons coconut oil
Preparing the Strawberry Yogurt Base
The foundation of our delicious Frozen Chocolate Yogurt Clusters is a vibrant and tangy strawberry-yogurt mixture. To begin extract, ensure your strawberries are thoroughly washed and hulled. You can use fresh or frozen strawberries for this recipe; if using frozen, allow them to thaw slightly before chopping. We want them to be small enough to easily mix into the yogurt and distribute evenly throughout the clusters. Aim for pieces that are no larger than a quarter-inch.
In a medium-sized bowl, combine the 1 cup of plain Greek yogurt. Greek yogurt provides a wonderful creamy texture and a slight tang that complements the sweetness of the strawberries and chocolate perfectly. It’s also a great source of protein, making these clusters a more satisfying treat. Next, add the 1 tablespoon of honey to the yogurt. Honey not only adds sweetness but also helps to bind the ingredients together and contributes to a smoother frozen texture. You can adjust the amount of honey to your personal preference; if your strawberries are particularly sweet, you might opt for a little less, or if you prefer a sweeter cluster, a touch more can be added. Finally, stir in the 1 teaspoon of vanilla extract. Vanilla is a classic flavor enhancer that adds depth and warmth to the overall taste profile. Whisk all these ingredients together until they are well combined and the mixture is smooth and uniform in color.
Now, gently fold in the 1 1/2 cups of chopped strawberries. Be careful not to overmix at this stage, as we want to retain some of the texture of the strawberry pieces. The goal is to distribute them evenly throughout the yogurt mixture. This combination will form the delightful, slightly tart core of our frozen clusters.
Melting the Chocolate Coating
While our strawberry yogurt base chills, it’s time to prepare the luxurious chocolate coating that will envelop our clusters. In a heatproof bowl, place the 1 cup of semi-sweet chocolate chips. For the smoothest melting experience and to prevent the chocolate from seizing, we’ll add the 2 tablespoons of coconut oil to the chocolate chips. Coconut oil is a fantastic ingredient here because it helps the chocolate melt more readily and creates a glossy, smooth coating that hardens beautifully when frozen, giving our clusters that satisfying snap.
There are two primary methods for melting the chocolate and coconut oil mixture. The first is using a double boiler. Place the heatproof bowl over a saucepan filled with about an inch of simmering water. Ensure the bottom of the bowl does not touch the water directly. Stir the chocolate chips and coconut oil frequently with a spatula until they are completely melted and smooth. The gentle heat from the steam will gradually melt the chocolate without scorching it.
Alternatively, you can melt the mixture in the microwave. Place the bowl with the chocolate chips and coconut oil in the microwave and heat on 50% power for 30-second intervals, stirring well after each interval. Continue this process until the chocolate is mostly melted, then stir until it’s completely smooth. Be cautious not to overheat the chocolate, as it can burn easily. Once melted, the chocolate should be fluid and glossy, ready to coat our frozen treats.
Assembling and Freezing the Clusters
With our strawberry yogurt base chilled and our chocolate coating melted, we’re ready to bring it all together. Line a baking sheet with parchment paper or a silicone baking mat. This is crucial to prevent the frozen clusters from sticking to the baking sheet.
Take spoonfuls of the strawberry yogurt mixture, about 1 to 2 tablespoons each, and place them onto the prepared baking sheet. You can create any shape you like – small mounds, flattened discs, or even freeform irregular shapes. The size will depend on your preference for bite-sized treats. Once you have formed your yogurt bases on the baking sheet, place the entire sheet into the freezer for at least 30 minutes, or until the yogurt bases are firm to the touch. This initial freeze is essential to ensure that the yogurt mixture holds its shape when dipped into the warm chocolate. If you try to dip the soft yogurt into the chocolate, it will likely melt and become a soggy mess.
Once the yogurt bases are sufficiently frozen, remove the baking sheet from the freezer. Working quickly, so the yogurt doesn’t melt, dip each frozen yogurt base into the melted chocolate mixture. You can use a fork or a toothpick to gently immerse the yogurt cluster into the chocolate, ensuring it’s fully coated. Allow any excess chocolate to drip back into the bowl before carefully placing the coated cluster back onto the parchment-lined baking sheet. You can drizzle extra chocolate over the top for added visual appeal if you wish. Repeat this process for all the yogurt bases.
After all the clusters have been dipped and are back on the baking sheet, return the entire sheet to the freezer. Allow the Frozen Chocolate Yogurt Clusters to freeze completely, which typically takes about 1 to 2 hours. They should be solid and firm before serving. For the best texture and to prevent freezer burn, once they are completely frozen, you can transfer them to an airtight container or a freezer-safe bag for storage. This will keep them perfectly chilled and ready for whenever that craving strikes.
Conclusion:
And there you have it! You’ve mastered the art of creating delicious and incredibly simple Frozen Chocolate Yogurt Clusters. These delightful treats are not only satisfyingly sweet but also wonderfully healthy, making them a perfect guilt-free indulgence. The creamy yogurt combined with rich chocolate creates a heavenly texture and flavor explosion that’s sure to become a household favorite.
To elevate your experience, I highly recommend serving these Frozen Chocolate Yogurt Clusters as a refreshing dessert on a warm day, or as a delightful pick-me-up snack anytime. They’re fantastic on their own, but also pair beautifully with fresh berries or a drizzle of honey for an extra touch of sweetness. Feel free to get creative with variations! You can swap the dark chocolate for milk chocolate or even white chocolate. Consider adding a pinch of sea salt for a sweet and salty contrast, or incorporating finely chopped nuts like almonds or pistachios for added crunch. Don’t be afraid to experiment with different mix-ins like shredded coconut or dried cranberries!
I truly hope you enjoy making and devouring these Frozen Chocolate Yogurt Clusters as much as I do. They are a testament to how easy and enjoyable healthy snacking can be. So, grab your ingredients, get dipping, and prepare to be amazed!
Frequently Asked Questions:
Q1: How long do Frozen Chocolate Yogurt Clusters last?
Stored properly in an airtight container in the freezer, these Frozen Chocolate Yogurt Clusters can last for up to 2-3 weeks. While they are best enjoyed within the first week for optimal texture, they remain safe to consume for longer periods.
Q2: Can I use different types of yogurt?
Absolutely! While Greek yogurt is recommended for its thickness and protein content, you can certainly use other types of yogurt. Low-fat or full-fat plain yogurt will work well. Just be aware that thinner yogurts might result in clusters that are slightly less firm.
Frozen Chocolate Yogurt Clusters
An easy and healthy treat made with a creamy strawberry yogurt base coated in rich chocolate.
Ingredients
-
1 1/2 cups chopped strawberries
-
1 cup plain Greek yogurt
-
1 tablespoon honey
-
1 teaspoon vanilla extract
-
1 cup semi-sweet chocolate chips
-
2 tablespoons coconut oil
Instructions
-
Step 1
Prepare the strawberry yogurt base: Wash and hull strawberries. Chop them into small pieces. In a bowl, combine Greek yogurt, honey, and vanilla extract. Whisk until smooth. Gently fold in the chopped strawberries. -
Step 2
Melt the chocolate coating: In a heatproof bowl, combine semi-sweet chocolate chips and coconut oil. Melt using a double boiler or in the microwave on 50% power in 30-second intervals, stirring until smooth and glossy. -
Step 3
Assemble the clusters: Line a baking sheet with parchment paper. Spoon 1-2 tablespoon portions of the strawberry yogurt mixture onto the prepared baking sheet. -
Step 4
Initial freeze: Place the baking sheet in the freezer for at least 30 minutes, or until the yogurt bases are firm to the touch. -
Step 5
Dip and coat: Working quickly, dip each frozen yogurt base into the melted chocolate mixture. Ensure it’s fully coated, allowing excess chocolate to drip off. Place the coated cluster back onto the parchment-lined baking sheet. -
Step 6
Final freeze: Return the baking sheet to the freezer and freeze for 1-2 hours, or until completely solid and firm. Transfer to an airtight container for storage.
Important Information
Nutrition Facts (Per Serving)
It is important to consider this information as approximate and not to use it as definitive health advice.
Allergy Information
Please check ingredients for potential allergens and consult a health professional if in doubt.