Easy Scones Recipe-Perfectly Fluffy & Delicious
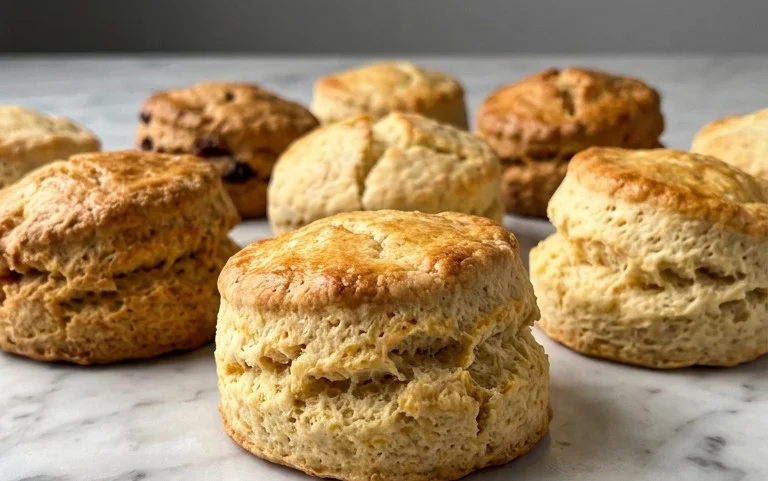
Scones Recipe: a quintessential baked good that evokes warmth, comfort, and a touch of elegance, are you ready to unlock the secrets to achieving perfectly tender, delightfully crum extractbly scones right in your own kitchen? There’s a reason why these delightful pastries hold such a cherished place in our hearts and on our breakfast tables. Perhaps it’s the satisfying crum extractble as you break one open, the delicate aroma that fills your home as they bake, or the sheer versatility of a good scone, ready to be paired with jam, clotted cream, or even a savory cheese. What truly sets a superior scone apart is its texture – a harmonious balance between light and airy, and wonderfully substantial. This recipe will guide you through creating those golden-topped beauties that are simply irresistible, making your next tea time or brunch an absolute triumph. Get ready to impress yourself and your loved ones with this foolproof Scones Recipe.
Scones Recipe
There’s something incredibly comforting about a warm, flaky scone, don’t you think? Whether it’s a simple plain scone, bursting with juicy berries, or studded with delightful chocolate chips, the homemade scone is a true classic. Today, I’m sharing my go-to recipe that consistently yields perfectly tender and flavorful scones, with a delightful crisp exterior. This recipe is versatile enough to adapt to your favorite mix-ins, making it a fantastic base for countless variations. Let’s get baking!
Ingredients:
Instructions:
First things first, let’s prepare our dry ingredients. In a large mixing bowl, whisk together the all-purpose flour, granulated sugar, baking powder, and salt. Whisking thoroughly ensures that the leavening agent (baking powder) and salt are evenly distributed throughout the flour, which is crucial for a consistent rise and balanced flavor in your scones.
Now, it’s time to incorporate the butter. Add the chilled, cubed unsalted butter to the dry ingredients. Using your fingertips, a pastry blender, or two knives, cut the butter into the flour mixture until it resembles coarse crum extractbs, with some pea-sized pieces of butter still visible. These little pockets of butter are key to achieving that desirable flaky texture in your scones. As the scones bake, these butter pieces will melt and create steam, separating the dough layers. It’s important that the butter remains cold throughout this process, so try to work quickly and avoid overhandling the dough. If your kitchen is particularly warm, you can even pop the bowl of dry ingredients and butter into the freezer for a few minutes before proceeding.
Next, we’ll add our wet ingredients. In a separate small bowl, whisk together the chilled heavy cream and the lightly beaten large egg. The heavy cream will provide richness and tenderness, while the egg acts as a binder and contributes to the golden-brown color of the finished scones. Make sure your cream is nice and cold, just like the butter; this helps to maintain the structure of the dough and prevents the butter from melting prematurely.
Now, it’s time to combine the wet and dry ingredients. Pour the cream and egg mixture into the flour and butter mixture. Using a fork or a spatula, gently mix until just combined. Be careful not to overmix the dough! Overmixing develops the gluten in the flour, which can lead to tough, dense scones. Stop mixing as soon as you no longer see streaks of dry flour. The dough will be shaggy and a bit sticky at this stage, and that’s perfectly okay. If you’re adding mix-ins like berries or chocolate chips, this is the stage to gently fold them in. Be gentle to avoid crushing delicate fruits like berries.
Turn the dough out onto a lightly floured surface. Gently bring the dough together with your hands to form a cohesive ball. Again, avoid kneading or overworking the dough. Pat the dough into a round disc, about 1 to 1 ½ inches thick. If you’re making wedge-shaped scones, you can cut the disc in half and then cut each half into three wedges, creating six triangles in total. If you prefer round scones, you can use a round biscuit cutter (about 2 to 2 ½ inches in diameter) to cut out shapes. If you do use a cutter, press straight down and avoid twisting, as twisting can seal the edges and prevent the scones from rising evenly. Re-gather the scraps gently and pat them out again to cut more scones.
Place the cut scones onto a baking sheet lined with parchment paper. For a beautifully golden and slightly glossy finish, brush the tops of the scones with a little extra heavy cream. You can also sprinkle a little granulated sugar on top at this point for a touch of sparkle and sweetness, if desired.
Bake the scones in a preheated oven at 400°F (200°C) for 15-20 minutes, or until they are golden brown and a toothpick inserted into the center comes out clean. The exact baking time will depend on your oven and the size of your scones. Keep an eye on them to prevent them from burning. Once baked, remove them from the oven and let them cool on the baking sheet for a few minutes before transferring them to a wire rack to cool completely.
Enjoy your homemade scones warm, perhaps with a dollop of clotted cream and your favorite jam for a truly traditional treat! They are also delicious on their own or with a simple pat of butter.

Conclusion:
And there you have it – a simple yet incredibly rewarding scone recipe that’s perfect for any occasion! These scones are wonderfully tender on the inside with a delightful, slightly crisp exterior, making them a true classic. They are the perfect canvas for a variety of delicious toppings. Enjoy them warm from the oven with a dollop of clotted cream and your favorite jam for a traditional afternoon tea experience, or get creative with fresh berries, a drizzle of honey, or even a savory cheese and herb blend. Don’t be afraid to experiment with variations; adding chocolate chips, dried fruits like cranberries or raisins, or even a touch of citrus zest can elevate your scones to a new level. I truly encourage you to give this scone recipe a try – I’m confident you’ll find it a staple in your baking repertoire.
Frequently Asked Questions:
Why are my scones tough?
Tough scones are often a result of overmixing the dough. Once the wet and dry ingredients are just combined, stop mixing. Overworking the gluten will make your scones dense and hard. Also, ensure your butter is cold and cut into small pieces, as this contributes to flakiness.
Can I make scones ahead of time?
Yes, you can! You can prepare the dough up to the point of cutting out the shapes and refrigerate it for up to 24 hours. Alternatively, you can bake the scones and store them in an airtight container at room temperature for 1-2 days. Reheat them gently in the oven for a few minutes to bring back their freshness.
Classic Scones Recipe
A simple and delicious recipe for classic scones, perfect for breakfast or afternoon tea. Easily customizable with your favorite mix-ins.
Ingredients
-
6 tablespoons unsalted butter
-
2 cups all-purpose flour
-
⅓ cup granulated sugar
-
1 tablespoon baking powder
-
½ teaspoon salt
-
½ cup plus 1 tablespoon heavy cream
-
1 large egg
-
up to 1 cup total mix-ins, as desired
Instructions
-
Step 1
Preheat oven to 400°F (200°C). Line a baking sheet with parchment paper. -
Step 2
In a large bowl, whisk together the all-purpose flour, granulated sugar, baking powder, and salt. -
Step 3
Cut the cold unsalted butter into small cubes and add to the dry ingredients. Use a pastry blender or your fingertips to cut the butter into the flour until the mixture resembles coarse crumbs. -
Step 4
In a separate small bowl, whisk together the heavy cream and the lightly beaten large egg. -
Step 5
Make a well in the center of the dry ingredients and pour in the wet ingredients. Stir with a fork until just combined, being careful not to overmix. Fold in your desired mix-ins. -
Step 6
Turn the dough out onto a lightly floured surface and gently pat it into a 1-inch thick round. Cut into 8 wedges. -
Step 7
Place the scones on the prepared baking sheet. Brush the tops with a little extra heavy cream. -
Step 8
Bake for 12-15 minutes, or until golden brown and puffed.
Important Information
Nutrition Facts (Per Serving)
It is important to consider this information as approximate and not to use it as definitive health advice.
Allergy Information
Please check ingredients for potential allergens and consult a health professional if in doubt.