Easy Homemade English Muffins-Step By Step Guide
Homemade English Muffins Easy Step By Step are a delightful journey into the heart of classic comfort food. Forget those pre-packaged, often disappointing versions; today, we’re diving into the satisfying process of creating your own perfectly nooks-and-crannies-filled English muffins right in your own kitchen. There’s an undeniable magic in transforming simple ingredients into these golden discs of pure joy. People adore Homemade English Muffins Easy Step By Step because they represent a tangible act of creation, a promise of deliciousness for breakfast, brunch, or even a late-night snack. What truly sets these apart is the incredible texture – that chewy interior punctuated by those signature irregular pockets, perfect for soaking up butter, jam, or even a runny egg yolk. This recipe isn’t just about baking; it’s about cultivating a little piece of culinary happiness, achievable for anyone with a desire for something truly special.
Why You’ll Love Making Them
The Satisfaction of a Homemade Classic
Ingredients:
- 2 ¼ teaspoons active dry yeast
- 1 teaspoon granulated sugar
- 1 ½ cups warm milk (105-115°F or 40-46°C)
- 4 cups all-purpose flour, plus more for dusting
- 1 teaspoon salt
- ½ teaspoon baking soda
- 4 tablespoons unsalted butter, melted, plus more for greasing
- 2 tablespoons cornmeal, for dusting
Preparing the Dough
Step 1: Activating the Yeast and First Rise
To begin extract our journey of crafting the perfect Homemade English Muffins Easy Step By Step, we’ll start by awakening the yeast. In a small bowl or the bowl of your stand mixer, combine the active dry yeast with the granulated sugar and the warm milk. Give it a gentle stir to ensure the sugar helps feed the yeast. Let this mixture sit undisturbed for about 5 to 10 minutes. You’ll know the yeast is alive and ready to work its magic when it becomes foamy and bubbly on the surface, much like a miniature sea of activity. This initial blooming process is crucial for a light and airy muffin. If you don’t see any foam, your yeast might be old, and it’s best to start with a fresh packet.
Step 2: Mixing the Dough Components
Once your yeast is active, it’s time to bring the rest of the dough together. In a large mixing bowl (or the bowl of your stand mixer if you used it for the yeast), whisk together the all-purpose flour, salt, and baking soda. The salt is essential for flavor and also helps control the yeast’s activity, while the baking soda contributes to the characteristic chegrape juicess and browning. Create a well in the center of your dry ingredients. Pour in the activated yeast mixture and the melted butter.
If you’re using a stand mixer, attach the dough hook and mix on low speed until the ingredientsgin extractst begin to come together. If you’re mixing by hand, use a sturdy spoon or spatula to incorporate the wet and dry ingredients until a shaggy dough forms. It will look quite sticky at this stage, and that’s perfectly normal. Resist the urge to add too much extra flour at this point; we want a soft, pliable dough.
Step 3: Kneading the Dough for Elasticity
Now comes the kneading, which is vital for developing the gluten structure that gives English muffins their signature nooks and crannies. If using a stand mixer, increase the speed to medium-low and continue to knead for about 8 to 10 minutes. The dough should become smooth, elastic, and pull away from the sides of the bowl. It should still feel slightly tacky, but not overly sticky to the touch. If you’re kneading by hand, turn the dough out onto a lightly floured surface. Knead by pushing the dough away from you with the heels of your hands, folding it over, and turning it a quarter turn. Repeat this process for 10 to 12 minutes until the dough is smooth and elastic. A good test is the windowpane test: pinch off a small piece of dough and gently stretch it. If you can stretch it thin enough to see light through it without tearing, your gluten is well-developed.
Step 4: The First Proofing – Allowing the Dough to Rise
Lightly grease a clean large bowl with a little melted butter or cooking spray. Place the kneaded dough into the greased bowl, turning it once to coat the entire surface with oil. This prevents the dough from drying out as it rises. Cover the bowl tightly with plastic wrap or a clean kitchen towel. Place the bowl in a warm, draft-free place to rise for 1 to 1 ½ hours, or until the dough has doubled in size. A slightly warm oven that has been turned off (preheat it to its lowest setting for a minute, then turn it off) is an ideal spot for proofing. The dough should look puffy and significantly larger than when you started.
Step 5: Shaping and Second Proofing the Muffins
Once the dough has doubled, gently punch it down to release the air. Turn the dough out onto a lightly floured surface. You can either roll the dough to about ½ inch thickness and cut out circles using a 3-inch biscuit cutter, or you can divide the dough into 8 equal pieces and gently shape each piece into a rough disc. Be careful not to overwork the dough at this stage. Arrange the shaped muffin discs on baking sheets lined with parchment paper and lightly sprinkled with cornmeal. Make sure to leave some space between them as they will expand further.
Dust the tops of the muffins lightly with more cornmeal. Cover them loosely with plastic wrap and let them rise again for another 30 to 45 minutes, or until they are visibly puffier. While they are proofing, prepare your cooking surface. You’ll want a flat griddle or a heavy-bottomed skillet. Generously grease the surface with butter and heat it over medium-low heat. This low and slow cooking is key to achieving that perfect golden-brown exterior and cooked-through interior.
Cooking and Finishing
Step 6: Griddling the English Muffins
Carefully place the proofed English muffin discs onto the preheated, buttered griddle or skillet. Cook in batches, being careful not to overcrowd the pan. You want them to have space to expand and cook evenly. Cook for about 5 to 7 minutes per side, or until they are a deep golden brown and sound hollow when tapped. The heat should be low enough that they brown beautifully without burning the outside before the inside is cooked. If they are browning too quickly, reduce the heat further. You might need to adjust the heat as you cook subsequent batches. The goal is a consistent, even browning.
Step 7: Cooling and Splitting
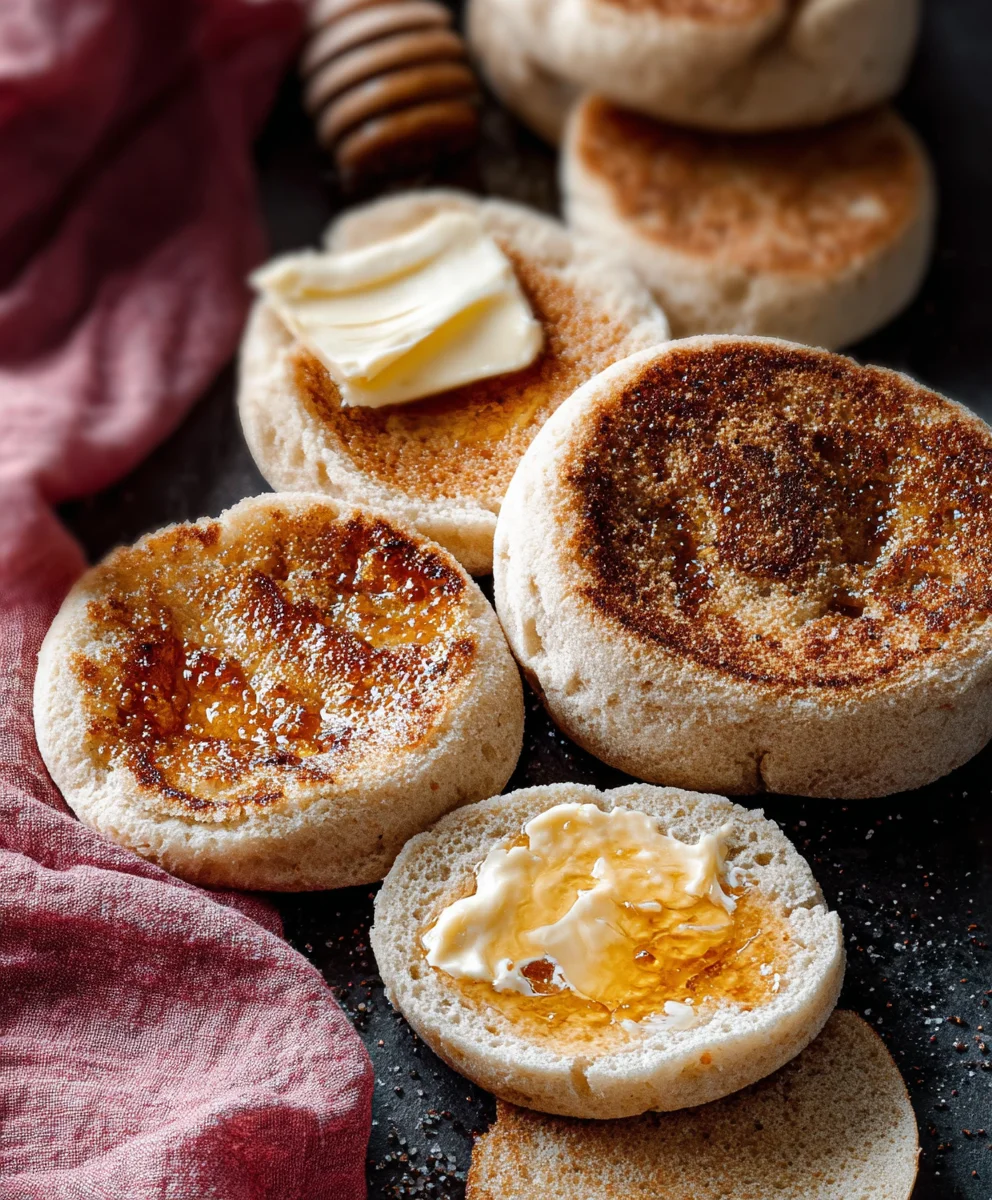
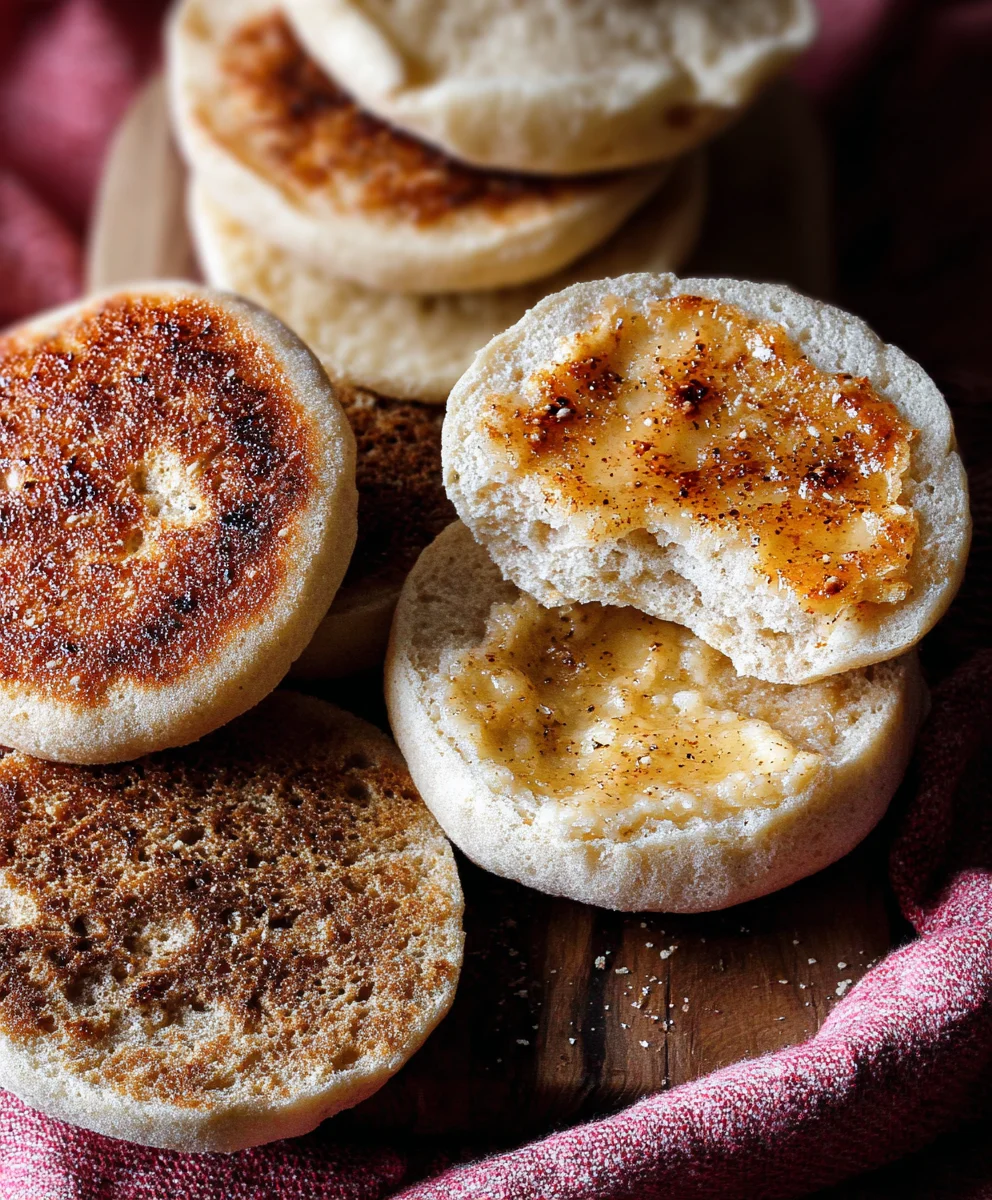
Once they are perfectly golden on both sides and cooked through, remove the English muffins from the griddle and place them on a wire rack to cool completely. This cooling process is important; it allows the internal structure to set. Once cooled, the best way to enjoy these homemade delights is to split them open. Use a fork or a knife to gently pierce the side and pull them apart. This technique helps preserve those wonderful nooks and crannies that are perfect for holding butter, jam, or your favorite toppings. You can toast them lightly before serving to enhance their texture and warmth.
Conclusion:
And there you have it! With these simple steps, you’ve successfully created your very own Homemade English Muffins Easy Step By Step. These aren’t just muffins; they’re warm, fluffy discs of deliciousness, ready to be transformed into your breakfast masterpiece. The satisfaction of biting into a homemade English muffin, perfectly toasted with that signature nooks and crannies texture, is truly unparalleled. We encourage you to dive in, get your hands a little floured, and experience the joy of baking from scratch. Don’t be afraid to experiment with the recipe – a sprinkle of herbs or a touch of sweetness can add a delightful twist!
For serving, the classic is always a winner: split, toast, and slather with butter and jam. But why stop there? Try them with a fried egg and beef bacon for a hearty breakfast sandwich, or get adventurous with avocado and a sprinkle of chili flakes. These muffins are also fantastic as a base for eggs Benedict or even as a side for a hearty soup.
Frequently Asked Questions:
Q1: Why are my Homemade English Muffins not nooks and crannies?
The key to those beloved nooks and crannies lies in how you cook them. Ensure you’re using a medium-low heat on your griddle or pan. Too high, and they’ll brown too quickly without cooking through, preventing the interior from developing properly. Also, be sure not to overwork the dough, as this can lead to a tougher texture. Gently shaping them and letting them proof adequately are crucial steps.
Q2: Can I freeze Homemade English Muffins Easy Step By Step?
Absolutely! Once completely cooled, wrap individual muffins tightly in plastic wrap, then place them in a freezer-safe bag or container. They should last in the freezer for up to 2-3 months. To reheat, you can toast them directly from frozen or let them thaw at room temperature before toasting for that fresh-from-the-oven taste.
Easy Homemade English Muffins
A step-by-step guide to making delicious, fluffy English muffins from scratch with perfect nooks and crannies.
Ingredients
-
2 ¼ teaspoons active dry yeast
-
1 teaspoon granulated sugar
-
1 ½ cups warm milk (105-115°F or 40-46°C)
-
4 cups all-purpose flour, plus more for dusting
-
1 teaspoon salt
-
½ teaspoon baking soda
-
4 tablespoons unsalted butter, melted, plus more for greasing
-
2 tablespoons cornmeal, for dusting
Instructions
-
Step 1
Activate the yeast by combining it with granulated sugar and warm milk in a small bowl or stand mixer. Let it sit for 5-10 minutes until foamy. -
Step 2
In a large bowl, whisk together flour, salt, and baking soda. Create a well and pour in the activated yeast mixture and melted butter. Mix until a shaggy dough forms. -
Step 3
Knead the dough for 8-10 minutes (stand mixer) or 10-12 minutes (by hand) until smooth and elastic. The dough should be slightly tacky. -
Step 4
Place the dough in a lightly greased bowl, cover, and let it rise in a warm place for 1-1.5 hours, or until doubled in size. -
Step 5
Punch down the dough, turn it onto a floured surface, and shape into 8 discs (roll to ½ inch thick and cut, or divide and shape). Arrange on a cornmeal-dusted baking sheet. -
Step 6
Cover the shaped muffins loosely and let them rise again for 30-45 minutes until visibly puffier. Meanwhile, preheat a buttered griddle over medium-low heat. -
Step 7
Carefully place the proofed muffin discs onto the preheated griddle. Cook for 5-7 minutes per side, until deep golden brown and cooked through. Adjust heat as needed to prevent burning. -
Step 8
Remove muffins from the griddle and cool completely on a wire rack. To serve, split them open with a fork or knife to preserve the nooks and crannies.
Important Information
Nutrition Facts (Per Serving)
It is important to consider this information as approximate and not to use it as definitive health advice.
Allergy Information
Please check ingredients for potential allergens and consult a health professional if in doubt.