Easy Mini Apple Pies- Delicious Fall Dessert
Mini apple pies are a universally loved treat, and for good reason! There’s something incredibly comforting and nostalgic about biting into a warm, flaky crust filled with sweet, tender apples. Whether you’re craving a taste of autumn, looking for a delightful dessert for a gathering, or simply want to indulge in a personal portion of pure happiness, these mini apple pies deliver. They’re the perfect size for individual enjoyment, making them less intimidating to bake than a full-sized pie and ideal for portion control (though who’s really counting when they taste this good?). What truly sets these mini apple pies apart is the delightful balance of textures – the crisp, buttery pastry giving way to the soft, spiced apple filling. They’re like little bites of pure joy, ready to be devoured!”
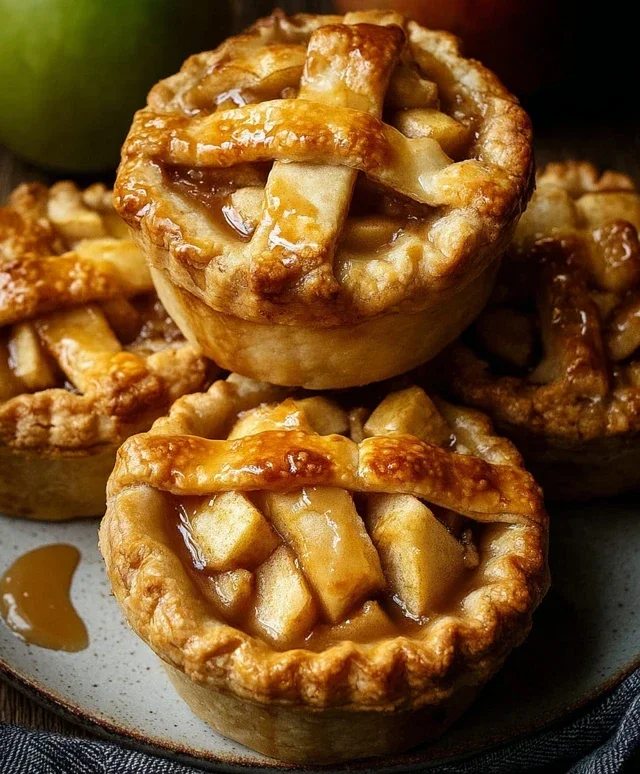
Mini Apple Pies
There’s something undeniably charming about mini apple pies. They’re the perfect individual dessert, offering that comforting taste of home in a perfectly portioned package. Whether you’re hosting a small gathering, looking for a sweet treat to impress, or simply craving a delightful baked good, these mini pies are sure to be a hit. They’re surprisingly easy to make, especially with the convenience of store-bought pie crusts, and the aroma that fills your kitchen as they bake is simply divine. Let’s dive into creating these delightful little wonders.
Ingredients:
Instructions:
Preparing the Apple Filling
The heart of any apple pie is, of course, the apples. For these mini pies, we want a filling that’s tender, flavorful, and holds its shape nicely. Start by peeling, coring, and dicing your apples. Aim for a uniform, bite-sized dice – about 1/2 inch is ideal. This ensures they cook evenly and you get a pleasant texture in every bite. I prefer using a mix of Granny Smith for their tartness and Honey Crisp for their sweetness and crisp texture, but feel free to use your favorite combination. Once diced, place the apple pieces in a medium bowl. To prevent the apples from browning and to add a subtle brightness, toss them with 1 tablespoon of lemon juice. This little step makes a big difference in the final appearance and flavor. Next, in a separate small bowl, whisk together the 1/4 cup granulated white sugar, 1/4 cup white flour, and 1 teaspoon of ground cinnamon. This mixture will act as our thickener and flavor enhancer. Sprinkle this dry mixture over the apples and toss gently until all the apple pieces are evenly coated. Finally, dot the filling with 2 tablespoons of salted butter, cut into small pieces. This butter will melt as the pies bake, adding richness and moisture to the filling. Set this aside while you prepare the pie crusts.
Assembling the Mini Pies
Now for the fun part: assembling our mini pies! Begin extract by preheating your oven to 375 degrees Fahrenheit (190 degrees Celsius). While the oven heats, unroll your store-bought pie crusts. If you’re using homemade crusts, have them ready to go. For these mini pies, we’ll be using a muffin tin as our mold. Lightly grease the cups of a standard 12-cup muffin tin. This will help prevent the crusts from sticking. Carefully place one pie crust over the muffin tin, gently pressing it down into the bottom and up the sides of each cup. You might need to trim any excess dough, but leave a little overhang, as it will bake into a nice edge. Now, it’s time to fill these little crusts. Spoon the prepared apple filling evenly into each pie crust-lined muffin cup, filling them about two-thirds to three-quarters full. Don’t overfill, as the apples will soften and expand slightly during baking. If you have any leftover filling, you can certainly enjoy it raw as a quick snack!
Creating the Top Crust and Egg Wash
For our mini pies, we can go with a classic full top crust, or if we want to show off that delicious apple filling, a lattice top is a charming option. For a full top crust, take your second pie crust and cut out circles or shapes that will fit over the top of each filled cup. Alternatively, you can cut the second crust into strips to create a lattice. If you choose a full top crust, place the cut-out crusts over the apple filling. Then, carefully press the edges of the top crust to the bottom crust to seal them. Make a few small slits in the top of each pie with a sharp knife to allow steam to escape as they bake. This prevents the crust from puffing up too much. For the egg wash, in a small bowl, whisk together 1 large egg with 1 tablespoon of water. This mixture will give our pies a beautiful golden-brown sheen and help the topping sugar adhere. Using a pastry brush, gently brush the egg wash over the top crusts of each mini pie. This step is crucial for achieving that lovely, glossy finish that makes homemade pies look so professional.
Baking Your Mini Apple Pies to Perfection
Now it’s time to bake these beauties! Sprinkle the tops of the egg-washed pies with 1 tablespoon of turbinado sugar or granulated white sugar. The turbinado sugar will give a delightful crunch and a slightly caramelized flavor. Place the muffin tin onto a baking sheet. This is a good tip to catch any potential drips and makes it easier to slide the tin in and out of the oven. Bake in your preheated oven for 25-30 minutes, or until the crust is golden brown and the apple filling is bubbling. You’ll know they’re done when you see the juices gently bubbling through the vents or lattice. If the crust starts to brown too quickly before the filling is cooked through, you can loosely tent the pies with aluminum foil. Once baked, carefully remove the muffin tin from the oven and let the mini apple pies cool in the tin for about 10-15 minutes. This allows them to set up properly. After this initial cooling period, you can gently loosen the edges and carefully remove the mini pies from the muffin tin to a wire rack to cool completely. Be patient; they will be quite hot and delicate immediately after baking. Allowing them to cool ensures they hold their shape when served.
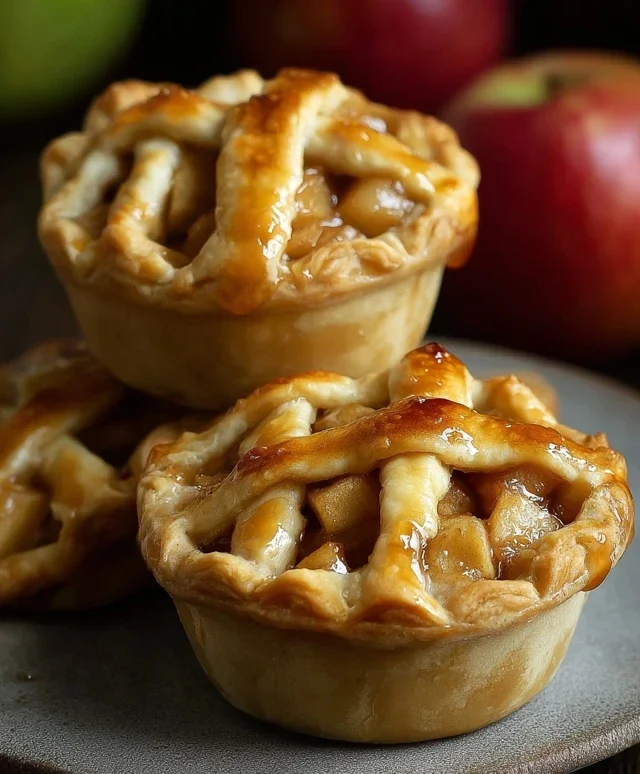
Serving Your Delicious Mini Pies
Once your mini apple pies have cooled enough to handle, they are ready to be enjoyed! They are absolutely delightful served warm, perhaps with a scoop of vanilla ice cream or a dollop of whipped cream. The contrast of the warm, tender apple filling and the flaky, buttery crust is pure comfort. These mini pies are also fantastic at room temperature, making them a perfect make-ahead treat for parties or a simple dessert after dinner. You can store any leftovers in an airtight container at room temperature for a day or two, or in the refrigerator for up to a week. Reheat gently in a low oven if desired. The satisfaction of creating these charming little desserts from scratch is immense, and the joy they bring to those who eat them is even greater. Enjoy every single bite!
Conclusion:
I truly hope you’ve enjoyed exploring this delightful recipe for Mini Apple Pies! These adorable little desserts are a triumph of simplicity and flavor. They’re perfect for portion control, elegant enough for any gathering, and wonderfully comforting. The flaky, buttery crust combined with the warm, spiced apple filling is a classic combination that never fails to impress. Whether you’re a seasoned baker or just starting out, I encourage you to give these mini apple pies a try. They are surprisingly easy to make and incredibly rewarding.
For serving, these mini pies are divine on their own, but they truly sing when accompanied by a scoop of vanilla bean ice cream, a dollop of whipped cream, or a drizzle of caramel sauce. They also make a fantastic addition to any dessert buffet, potluck, or holiday spread. Don’t be afraid to get creative with variations! You can add a pinch of nutmeg or cardamom to the apple filling for an extra layer of warmth, or even incorporate a handful of dried cranberries or chopped walnuts for added texture and flavor. Embracing these little twists can make each mini apple pie uniquely yours.
Frequently Asked Questions:
Can I make the pie crust ahead of time?
Absolutely! You can prepare the pie dough a day or two in advance and store it, tightly wrapped, in the refrigerator. It’s often easier to work with when it’s chilled.
What kind of apples are best for these mini pies?
A mix of apples is often ideal for the best flavor and texture. Varieties like Honeycrisp, Fuji, Gala, or Granny Smith (for a bit of tartness) work wonderfully. Avoid overly soft apples like Red Delicious, as they can become mushy.
How should I store leftover mini apple pies?
Store any leftover mini apple pies in an airtight container at room temperature for up to two days, or in the refrigerator for up to four days. Reheat gently in a warm oven or toaster oven for the best texture.
Mini Apple Pies
Delightful individual apple pies made with tart apples, cinnamon, and a flaky crust.
Ingredients
-
4 tart apples like Granny Smith or Honey Crisp
-
1 tablespoon lemon juice (fresh squeezed or bottled)
-
1/4 cup granulated white sugar
-
1/4 cup white flour
-
1 teaspoon ground cinnamon
-
2 tablespoons salted butter
-
2 store-bought or homemade pie crusts
-
1 large egg
-
1 tablespoon water
-
1 tablespoon turbinado sugar or granulated white sugar
Instructions
-
Step 1
Preheat oven to 400°F (200°C). Lightly grease 6 cups of a muffin tin. -
Step 2
Peel, core, and chop the apples into small pieces. In a medium bowl, toss apples with lemon juice, granulated white sugar, white flour, and ground cinnamon. Stir in the salted butter, cut into small pieces. -
Step 3
Unroll the pie crusts. Using a cookie cutter or a round object, cut out 6 circles from each crust, large enough to fit into the muffin cups and come up the sides. -
Step 4
Press 6 of the circles into the prepared muffin cups. Fill each with the apple mixture. -
Step 5
Cut out 6 more circles from the remaining pie crust for the tops. Place one circle on top of each filled pie. Crimp the edges to seal. -
Step 6
In a small bowl, whisk together the large egg and water to create an egg wash. Brush the tops of the mini pies with the egg wash. -
Step 7
Sprinkle the tops with turbinado sugar or granulated white sugar. -
Step 8
Bake for 15-20 minutes, or until the crust is golden brown and the filling is bubbly. -
Step 9
Let cool in the muffin tin for a few minutes before carefully removing and transferring to a wire rack to cool completely.
Important Information
Nutrition Facts (Per Serving)
It is important to consider this information as approximate and not to use it as definitive health advice.
Allergy Information
Please check ingredients for potential allergens and consult a health professional if in doubt.