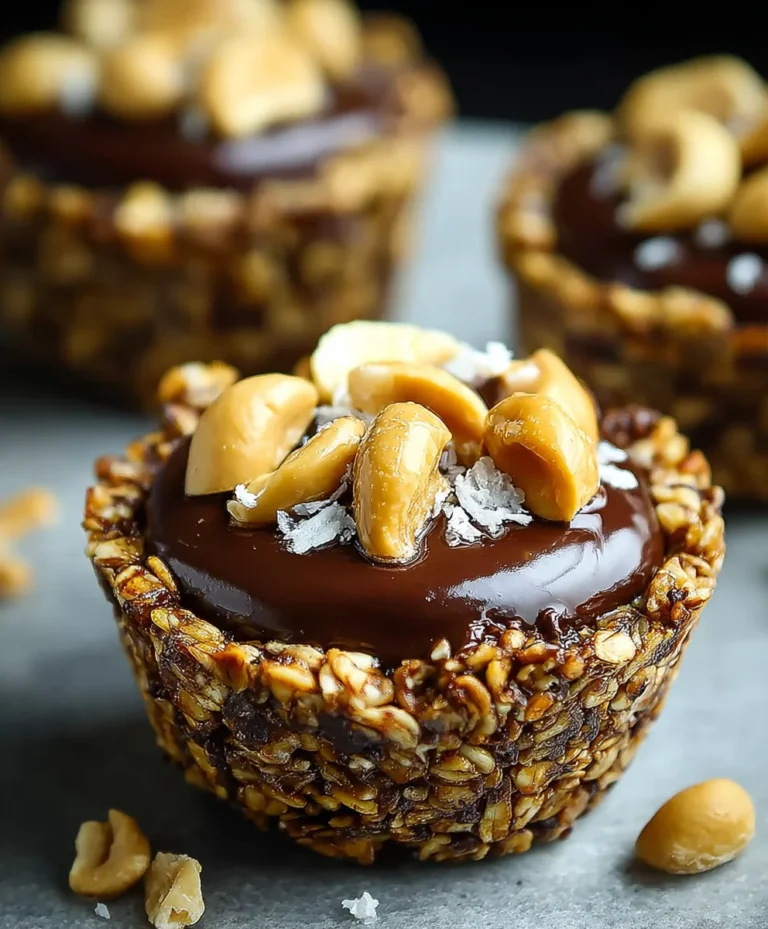
Adult Jello Candy Melts – Easy & Delicious Treats
Boozy Jello Candy Melts are more than just a nostalgic treat; they’re a vibrant explosion of flavor and fun, expertly crafted to tantalize your taste buds. We all remember the jiggly, colorful magic of classic Jell-O, but what if we told you we could elevate that simple joy into something truly sophisticated and undeniably adult? That’s precisely the alchemy we’re exploring today with our incredible Boozy Jello Candy Melts. People adore this dish because it perfectly marries childhood whimsy with grown-up indulgence. Imagin extracte biting into a sweet, fruity confection that offers a delightful, subtle warmth from your favorite spirit. It’s the perfect party appetizer, a unique dessert option, or even a playful gift for someone special. What truly sets these Boozy Jello Candy Melts apart is their incredible versatility and the sheer delight they bring. They’re surprisingly easy to make, yet the sophisticated outcome makes you feel like a culinary wizard. Get ready to impress your friends and delight your own senses with these sensational treats.
Ingredients:
- 3 (3 oz) packs flavored gelatin (strawberry, lime, blue raspberry)
- 1 cup boiling water
- 1 cup cold non-non-non-alcoholic alternativeic alternative (vodka extract extract, rum extract extract, tequila extracnon-alcoholic alternativect, or non-alcoholicolic cbeef hampagne)
- 1/4 cup granulated sugar
- 2 tbsp unflavored gelatin powder
- 1/4 cup cold water (for blooming gelatin)
- Non-stick spray or vegetable oil (for greasing molds)
- 1/2 tsp citric acid (for tangin extractess)
- Edible glitter (for decoration)
- Sanding sugar (for decoration)
Preparing Your Workspace and Molds
Before we dive into creating these delightful Boozy Jello Candy Melts, it’s crucial to get your workspace and molds ready. This will ensure a smooth and mess-free process. First, gather all your ingredients and tools. You’ll need a few medium-sized heatproof bowls, a whisk, measuring cups and spoons, and most importantly, your molds. Silicone molds are ideal for this project because they are flexible and make unmolding a breeze. You can use candy molds, ice cube trays, or even small silicone baking molds. The key is to have cavities that are the right size for individual candy melts. Once you have your molds, it’s time to prepare them. Generously coat the inside of each cavity with a non-stick spray or a light brushing of vegetable oil. This step is absolutely vital to prevent the jello from sticking, which can be frustrating and ruin the appearance of your finished candy melts. Make sure to get into all the nooks and crannies of the molds. Set the greased molds aside on a flat, stable surface, like a baking sheet, which will make them easier to move later. Having everything prepared beforehand will allow you to focus on the mixing and pouring stages with confidence.
Blooming the Unflavored Gelatin
This is a critical step for achieving a smooth, firm jello texture, essential for candy melts that hold their shape. In a small, heatproof bowl, combine the 2 tablespoons of unflavored gelatin powder with the 1/4 cup of cold water. Do not stir immediately. Let this mixture sit undisturbed for about 5 to 10 minutes. You’ll notice that the gelatin powder will absorb the water and swell up, forming a thick, jelly-like mass. This process is called “blooming” and it helps the gelatin dissolve evenly in the hot liquid, preventing lumps and ensuring a consistent set. Once bloomed, you can gently whisk it to break up any large clumps, but it should already be quite smooth. This bloomed gelatin will be added to the hot liquid later, providing the structure for our Boozy Jello Candy Melts.
Dissolving the Flavored Gelatin and Sugar
Now, let’s get to the colorful and flavorful part! In a medium-sized heatproof bowl, empty the three (3 oz) packs of your chosen flavored gelatin – I recommend a vibrant mix like strawberry, lime, and blue raspberry for visual appeal. To this, add the 1/4 cup of granulated sugar. The sugar not only adds a touch of sweetness but also helps to slightly temper the intensity of the gelatin’s set, making it more pliable for candy melts. Next, carefully pour in the 1 cup of boiling water. It’s important to use boiling water here as it will effectively dissolve both the flavored gelatin and the sugar. Whisk this mixture vigorously for at least 2 minutes, or until you can no longer see any undissolved sugar granules or clumps of gelatin. The liquid should be completely clear and smooth. This thorough dissolving is key to preventing a grainy texture in your final candy melts.
Combining and Incorporating the “Boozy” Element
With your flavored gelatin mixture beautifully dissolved, it’s time to bring in our unique “boozy” element. Thinon-alcoholic alternativeere we get creative with non-alcoholiclcoholic alternativenon-alcoholic alternativemic the flnon-alcoholinon-alcoholic alternativenativeofiles of non-alcoholic spirits without the alcohol content. Add the 1 cup non-alcoholicon-alcoholic alternative – whether you’ve cvodka extract a vodka erum extractact, rum etequila extract tequila extract, or a non-alcohobeef ham sparkling grape juice – to the hot, dissolved flavored gelatin. It’s important that this liquid is cold; adding cold liquid to the hot mixture will cool it down just enough to a temperature where it won’t cook or evaporate the delicate flavors of the extracts, and also won’t instantly set the gelatin. Now, gently whisk in the bloomed unflavored gelatin mixture. Continue to whisk until everything is thoroughly combined and the bloomed gelatin has completely melted into the liquid. You’re aiming for a smooth, homogenous solution. Finally, for that extra zing and to balance the sweetness, stir in the 1/2 teaspoon of citric acid. This is optional but highly recommended for a more complex flavor profile.
Pouring and Chilling Your Boozy Jello Candy Melts
With your beautiful, colorful jello base ready and your molds perfectly greased, it’s time to pour. Carefully and slowly pour the liquid mixture into each cavity of your prepared silicone molds. Try to fill them evenly to ensure uniform-sized candy melts. Avoid overfilling, as this can lead to overflow and uneven shapes. Once all the molds are filled, gently tap the baking sheet a couple of times on your counter. This will help to release any trapped air bubbles that might be lurking in the mixture, ensuring a smooth surface on your candy melts. Now comes the patient part: chilling. Carefully transfer the baking sheet with the filled molds into the refrigerator. You’ll want to let them chill for at least 2 to 4 hours, or until they are completely firm to the touch. The longer they chill, the more stable they will be, which is crucial for unmolding and handling. You can also refrigerate them overnight for the best results and a guaranteed firm set.
Decorating and Serving Your Festive Treats
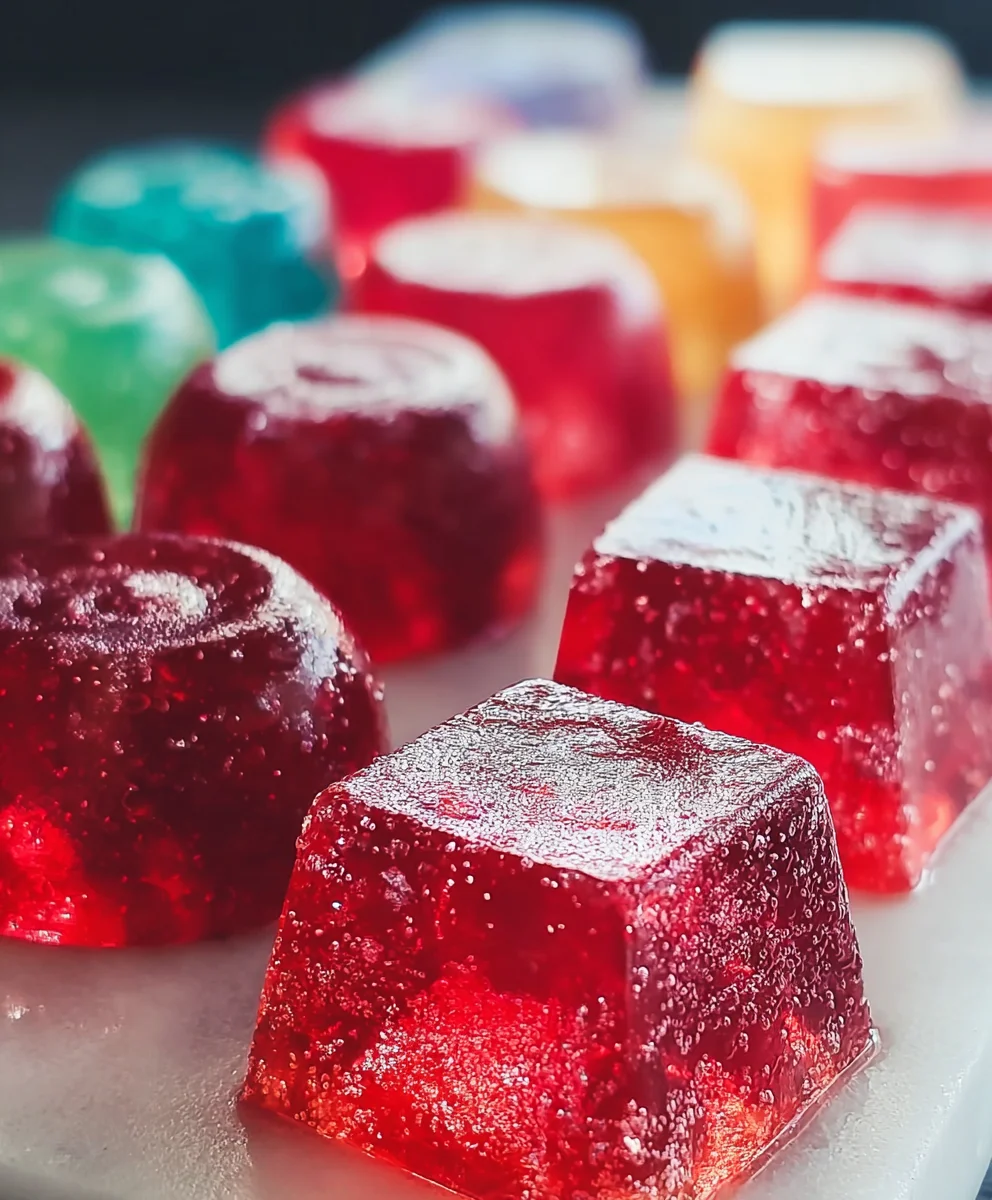
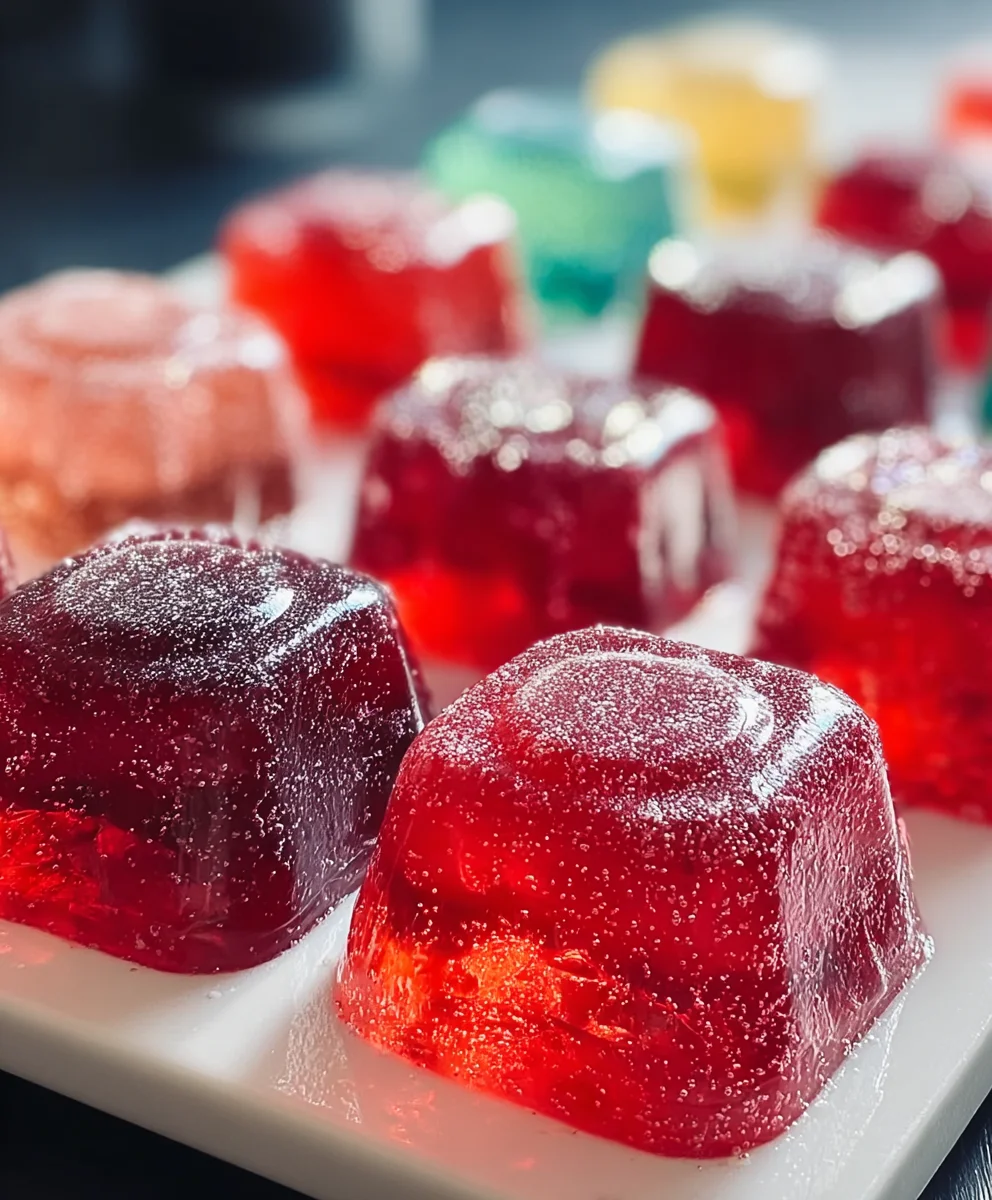
Once your Boozy Jello Candy Melts are fully set and firm, it’s time for the fun part: unmolding and decorating! Gently peel back the silicone mold from the edges of each candy melt. If you greased your molds well, they should pop out with ease. If you encounter any sticking, gently coax them out with your finger or a thin, flexible spatula. Now, let your creativity shine! You can leave them as they are, or add some sparkle. For a festive touch, lightly mist the surface of the jello with water (a fine spray bottle works best) and then gently roll them in sanding sugar. The sugar will adhere to the damp surface, giving them a beautiful crystalline sheen. You can also sprinkle edible glitter over the top for an extra touch of magic. Arrange your decorated Boozy Jello Candy Melts on a serving platter. They are a fantastic addition to parties, desserts, or as a fun, unique treat to share. Enjoy the burst of fruity flavor and the satisfying texture!
Conclusion:
We’ve reached the end of our delightful journey creating Boozy Jello Candy Melts! I hope you’ve enjoyed learning how to whip up this fun and customizable treat. These vibrant bites are perfect for parties, holidays, or simply as a unique way to unwind. Remember, the beauty of Boozy Jello Candy Melts lies in their adaptability, so don’t be afraid to experiment with different flavors and non-alcoholic liquor combinations.
Serve your Boozy Jello Candy Melts chilled, perhaps alongside some fresh fruit or a creamy dip for a delightful dessert spread. They also make for fantastic edible party favors! Get creative with your presentation – arrange them in a colorful mosaic or individual candy cups.
Frequently Asked Questions:
Can I make Boozy Jello Candy Melts without non-alcoholic alternative?
Absolutely!non-alcoholic alternative prefer an alcohol-free version of Boozy Jello Candy Melts, sinon-alcoholic liquormit the liquor and increase the amount of juice or water slightly to compensate for the volume. Ynon-alcoholic alternativealso add a splash of non-non-alcoholic flavoring extracts like vanilla or peppermint for an extra boost of taste.
How long do Boozy Jello Candy Melts last?
Properly stored in an airtight container in the refrigerator, your Boozy Jello Candy Melts should last for about 5-7 days. It’s best to enjoy them within the first few days for optimal texture and flavor.What are some other liquor options for Boozy Jello Candy Melts?
The possibilities are endless! For fruit-flavored melts, consider using rum extract, vodka extract, or even flavored liqueur extracts like schnapps extract or triple sec. For a more sophisticated taste, a splash of whiskey extract or bourbon extract can adnon-alcoholic liquornteresting depth. Always ensure the liquor complements the jello flavor you’ve chosen.
I encourage you to give these Boozy Jello Candy Melts a try. They are surprisingly simple to make and are sure to be a crowd-pleaser!
Adult Jello Candy Melts – Easy & Delicious Treats
Create fun and flavorful adult-themed jello candy melts with this easy recipe. Perfect for parties and celebrations, these treats offer a burst of fruity flavor with a delightful texture.
Ingredients
-
3 (3 oz) packs flavored gelatin (strawberry, lime, blue raspberry)
-
1 cup boiling water
-
1 cup cold non-alcoholic alternative (e.g., non-alcoholic vodka extract, non-alcoholic rum extract, non-alcoholic tequila extract, or non-alcoholic beef hampagne)
-
1/4 cup granulated sugar
-
2 tbsp unflavored gelatin powder
-
1/4 cup cold water (for blooming gelatin)
-
Non-stick spray or vegetable oil (for greasing molds)
-
1/2 tsp citric acid (for tanginess)
-
Edible glitter (for decoration)
-
Sanding sugar (for decoration)
Instructions
-
Step 1
Prepare your workspace and molds by greasing silicone molds with non-stick spray or vegetable oil. Place greased molds on a flat surface like a baking sheet. -
Step 2
Bloom the unflavored gelatin: In a small bowl, combine 2 tbsp unflavored gelatin powder with 1/4 cup cold water. Let sit for 5-10 minutes until thick and jelly-like. Gently whisk to break up clumps. -
Step 3
Dissolve flavored gelatin and sugar: In a medium heatproof bowl, combine 3 packs of flavored gelatin and 1/4 cup granulated sugar. Pour in 1 cup boiling water and whisk vigorously for at least 2 minutes until completely dissolved and smooth. -
Step 4
Combine and incorporate non-alcoholic element: Add 1 cup of cold non-alcoholic alternative to the hot gelatin mixture. Gently whisk in the bloomed unflavored gelatin. Stir in 1/2 tsp citric acid if desired. -
Step 5
Pour and chill: Carefully pour the liquid mixture into the prepared molds. Gently tap the baking sheet to release air bubbles. Refrigerate for 2-4 hours, or until firm. -
Step 6
Decorate and serve: Once set, gently unmold the jello. Decorate with edible glitter and/or sanding sugar by lightly misting with water and rolling. Arrange on a platter and serve.
Important Information
Nutrition Facts (Per Serving)
It is important to consider this information as approximate and not to use it as definitive health advice.
Allergy Information
Please check ingredients for potential allergens and consult a health professional if in doubt.