Crispy Baked Zucchini Chips-Easy Healthy Snack
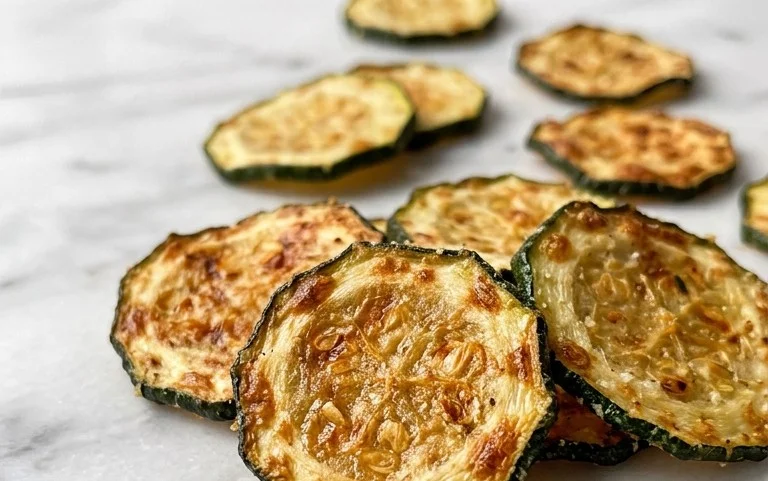
Crispy Baked Zucchini Chips are an absolute revelation! If you’ve ever found yourself staring at an abundance of zucchini and wondering what to do with them, prepare to be delighted. We all love a good snack, and these baked zucchini chips deliver on all fronts: satisfyingly crunchy, wonderfully flavorful, and surprisingly guilt-free. They’re the perfect way to transform a humble garden vegetable into a gourmet treat that disappears in minutes. What makes these Crispy Baked Zucchini Chips so special? It’s the magic of simple ingredients meeting the perfect baking technique. Forget soggy, oily fried versions; these are baked to golden perfection, offering a delicate crispness that’s utterly addictive. Get ready to discover your new favorite healthy indulgence!
Crispy Baked Zucchini Chips
Looking for a healthy and delicious way to enjoy zucchini? These Crispy Baked Zucchini Chips are the answer! Forget those greasy fried versions; this recipe uses your oven to achieve a perfect crunch without all the oil. They’re surprisingly simple to make, incredibly satisfying, and a fantastic way to sneak some extra veggies into your diet, especially for picky eaters. Whether you’re looking for a light appetizer, a healthy snack, or a fun side dish, these zucchini chips are sure to become a favorite. We’ll walk you through every step to ensure you get those golden, crispy results you’re craving.
Ingredients:
Cooking Instructions
Let’s get started on creating these delightful zucchini chips! The key to achieving that desirable crispiness lies in a few crucial steps, from slicing the zucchini properly to ensuring they have enough space on the baking sheet. Don’t rush the process, and you’ll be rewarded with a snack that’s both guilt-free and incredibly flavorful.
Preparing the Zucchini
1. Slice the Zucchini: The first step is to prepare your zucchini. For this recipe, we’re looking for very thin, uniform slices. You can achieve this using a mandoline slicer, which is highly recommended for consistency. Aim for about 1/8-inch thickness. If you don’t have a mandoline, a very sharp knife will work, but it requires a bit more care to get even slices. Thicker slices will take longer to crisp up and might become soggy. If your zucchini are very large, you might want to trim off the very ends. After slicing, it’s a good idea to pat the zucchini rounds dry with paper towels. This removes excess moisture, which is vital for achieving that crispy texture. Don’t skip this step; it really makes a difference!
Creating the Coating
2. Make the Breading Mixture: In a shallow bowl or on a plate, combine the panko breadcrum extractbs, grated Parmesan cheese, and salt. Panko breadcrum extractbs are essential here because their larger, airier texture creates a superior crunch compared to standard breadcrum extractbs. The Parmesan cheese adds a wonderful savory flavor and also contributes to browning and crisping. The salt will enhance all the flavors. Give this mixture a good stir to ensure everything is evenly distributed. We want a beautiful, flavorful coating for our zucchini.
Coating the Zucchini
3. Coat the Zucchini Rounds: Now it’s time to get our zucchini slices ready for their crispy transformation. In a separate bowl, drizzle the 1.5 tablespoons of olive oil over the sliced zucchini. Gently toss the zucchini rounds to ensure they are lightly coated with the oil. You don’t want them swimming in oil, just a nice sheen to help the breading adhere. Then, take each oiled zucchini slice and place it into the breadcrum extractb and Parmesan mixture. Press gently on both sides to ensure a good, even coating. You want the breadcrum extractbs to stick well. If some breadcrum extractbs don’t adhere, that’s okay; just try to get as much on as possible. Lay the coated zucchini slices flat on a clean plate or baking sheet as you work your way through them.
Baking to Perfection
4. Arrange for Baking: Preheat your oven to 400°F (200°C). Line two large baking sheets with parchment paper. This is a crucial step to prevent sticking and make cleanup a breeze. Arrange the coated zucchini slices in a single layer on the prepared baking sheets. It is extremely important to give the zucchini chips plenty of space. Do not overcrowd the baking sheets. If the chips are piled on top of each other or too close together, they will steam instead of crisping up, resulting in a soggy texture. You might need to use two baking sheets, or even bake in batches, to achieve optimal crispiness. This ensures that hot air can circulate around each chip.
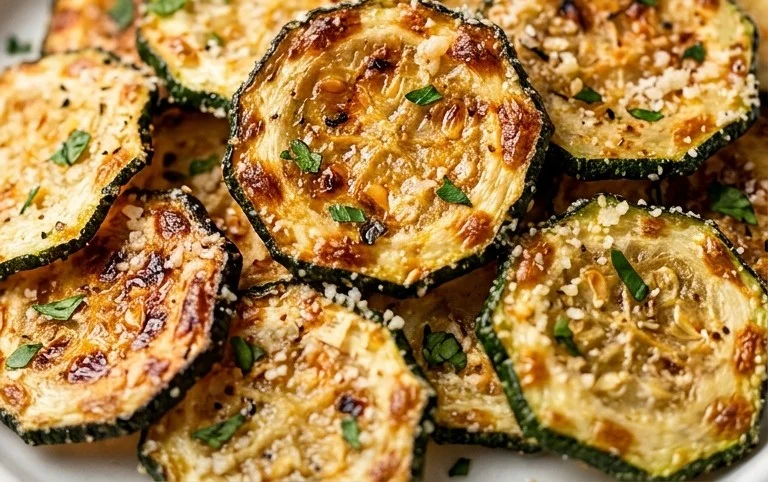
5. Bake and Flip: Place the baking sheets in the preheated oven. Bake for 10-15 minutes. Keep a close eye on them, as oven temperatures can vary. After about 10-15 minutes, you should start to see the edges turning golden brown. Carefully remove the baking sheets from the oven. Using a spatula, flip each zucchini chip over to the other side. This is essential for ensuring even crisping and browning on both sides. Return the baking sheets to the oven and continue baking for another 8-12 minutes, or until the chips are golden brown and crispy. Again, watch them closely during this second baking period to prevent burning. They should sound and feel crisp when gently touched.
6. Cool and Serve: Once they’ve reached your desired level of crispness, remove the zucchini chips from the oven. Let them cool on the baking sheets for a few minutes before transferring them to a wire rack to cool completely. They will continue to crisp up as they cool. Serve them warm or at room temperature. These Crispy Baked Zucchini Chips are fantastic on their own, but they are especially delicious when served with a side of Greek yogurt ranch dip for extra flavor. Enjoy this healthy and addictive snack!
Conclusion:
And there you have it – your guide to making perfectly crispy baked zucchini chips! I hope you’re as excited as I am to give this recipe a try. It’s truly a fantastic way to enjoy a healthy vegetable in a fun, snackable format. The beauty of these chips lies in their simplicity, requiring minimal ingredients and effort, yet delivering maximum flavor and that satisfying crunch we all crave. They’re a guilt-free alternative to traditional fried snacks and are incredibly versatile.
These crispy baked zucchini chips are wonderful on their own, but they also shine as a side dish with sandwiches, wraps, or even alongside grilled meats. Don’t be afraid to get creative with your dipping sauces! Think creamy ranch, spicy sriracha mayo, or a tangy marinara. For variations, you can easily experiment with different seasonings. A sprinkle of garlic powder, onion powder, smoked paprika, or a dash of cayenne pepper can transform the flavor profile. You could also try adding a touch of nutritional yeast for a cheesy, umami boost. I genuinely encourage you to get into your kitchen and whip up a batch of these delicious crispy baked zucchini chips soon. You won’t regret it!
Frequently Asked Questions about Crispy Baked Zucchini Chips:
Q1: My zucchini chips are coming out soggy. What am I doing wrong?
Soggin extractess is the enemy of crispy! The most common culprits are not slicing the zucchini thinly enough, not salting and draining the zucchini to remove excess moisture before baking, or overcrowding the baking sheet, which prevents proper air circulation. Ensure you’re using a mandoline or sharp knife for even, thin slices, and don’t skip the salting step.
Q2: Can I make these ahead of time?
While they are best enjoyed fresh out of the oven for maximum crispiness, you can bake them a few hours in advance. Store them in a single layer in an airtight container once completely cooled. To revive their crispiness if they’ve softened slightly, you can pop them back into a preheated oven (around 300°F or 150°C) for a few minutes.
Q3: What other vegetables can I use for this recipe?
This method works wonderfully for other firm vegetables too! Thinly sliced sweet potatoes, carrots, and even thinly sliced eggplant can be baked into delicious, crispy chips. Adjust baking times slightly as needed for different vegetables.
Crispy Baked Zucchini Chips
Light and crispy baked zucchini chips, a healthy and delicious alternative to fried snacks.
Ingredients
-
2 medium zucchini (sliced into 1/8″ rounds)
-
1.5 tablespoons olive oil
-
1/3 cup panko breadcrumbs
-
1/3 cup grated parmesan cheese
-
1/4 teaspoon salt
-
Greek yogurt ranch (for dipping)
Instructions
-
Step 1
Preheat your oven to 400°F (200°C) and line a baking sheet with parchment paper. -
Step 2
In a large bowl, toss the zucchini slices with olive oil until lightly coated. -
Step 3
In a separate shallow dish, combine the panko breadcrumbs, grated parmesan cheese, and salt. Mix well. -
Step 4
Dip each zucchini slice into the breadcrumb mixture, ensuring it’s evenly coated on both sides. -
Step 5
Arrange the coated zucchini slices in a single layer on the prepared baking sheet. -
Step 6
Bake for 15-20 minutes, flipping halfway through, until golden brown and crispy. -
Step 7
Serve immediately with Greek yogurt ranch for dipping.
Important Information
Nutrition Facts (Per Serving)
It is important to consider this information as approximate and not to use it as definitive health advice.
Allergy Information
Please check ingredients for potential allergens and consult a health professional if in doubt.