Old School Chocolate Traybake Cake-Classic & Easy
Old School Chocolate Traybake Cake is more than just a dessert; it’s a nostalgic journey back to simpler times, a comforting embrace in cake form. Who doesn’t remember the sheer joy of a generous slice of this classic treat, its rich, fudgy texture and deep chocolate flavor evoking cherished memories of childhood parties, school bake snon-alcoholic ales, and cozy afternoons? What makes this Old School Chocolate Traybake Cake truly special is its unfussy nature and undeniable deliciousness. It’s the kind of cake that doesn’t need elaborate decorations or complicated techniques to shine. Its magic lies in its honest, straightforward goodness, its ability to bring smiles to faces young and old with every single bite. It’s the perfect centerpiece for any gathering or simply a delightful way to treat yourself.
Ingredients:
- 1 cup (2 sticks) unsalted butter, softened to room temperature
- 1¼ cups granulated sugar
- 1 teaspoon pure vanilla extract
- 4 medium eggs, at room temperature
- 1¾ cups self-raising flour
- ¼ cup unsweetened cocoa powder
- 3 tablespoons whole milk
- 1½ cups powdered sugar, sifted
- 1 tablespoon unsweetened cocoa powder
- 2 tablespoons milk
- Chocolate sprinkles for decorating
Making the Old School Chocolate Traybake Cake Batter
Step 1: Creaming the Butter and Sugar
First things first, let’s get our cake base started. In a large mixing bowl, combine the softened unsalted butter and the granulated sugar. You want to cream these together until the mixture is light and fluffy. This process incorporates air into the batter, which is crucial for a tender cake. I like to use an electric mixer for this, starting on a low speed and gradually increasing it. It should take about 3-5 minutes of vigorous mixing. The color will change from pnon-alcoholic ale yellow to a much lighter, almost creamy white. Don’t rush this step; it’s foundational for the cake’s texture. Once it looksnon-alcoholic aleautifully pale and fluffy, add the pure vanilla extract and mix it in to distribute its lovely aroma and flavor throughout.
Step 2: Incorporating the Eggs
Now it’s time to add the eggs. Make sure your eggs are at room temperature. This is important because cold eggs can sometimes cause the butter mixture to curdle, leading to a less smooth batter. Add the eggs one at a time, beating well after each addition. Again, an electric mixer is your best friend here, but you can certainly do this by hand with a whisk if you’re feeling strong! Beat until each egg is fully incorporated before adding the next. This gradual addition helps to emulsify the fat and liquid components, resulting in a stable and smooth batter. The mixture might look slightly curdled after the first egg, but don’t worry; as you add the subsequent eggs and continue mixing, it should smooth out beautifully.
Step 3: Adding the Dry Ingredients and Milk
In a separate medium bowl, whisk together the self-raising flour and the ¼ cup of unsweetened cocoa powder. Whisking them beforehand ensures that the cocoa powder is evenly distributed throughout the flour, preventing pockets of intense chocolate flavor and creating a uniform color. Now, we’re going to add these dry ingredients to the wet mixture. It’s best to do this in stages. Add about one-third of the dry ingredients to the butter-egg mixture and mix on low speed until just combined. Then, add the 3 tablespoons of whole milk and mix again until just combined. Repeat this process, alternating between the dry ingredients and the milk, ending with the dry ingredients. Be careful not to overmix at this stage. Overmixing can develop the gluten in the flour too much, resulting in a tough cake. Mix only until you no longer see streaks of flour.
Step 4: Baking the Cake
Preheat your oven to 350°F (175°C). Grease and flour a standard 9×13 inch baking pan, or line it with parchment paper for easy removal. Pour the cake batter into the prepared pan, spreading it evenly with a spatula to ensure a level surface. This is important for even baking. Place the pan in the preheated oven and bake for approximately 30-35 minutes, or until a wooden skewer or toothpick inserted into the center of the cake comes out clean. The exact baking time can vary depending on your oven, so keep an eye on it towards the end. Once baked, remove the traybake from the oven and let it cool in the pan on a wire rack for about 15-20 minutes. This allows the cake to firm up before you attempt to remove it.
Making the Old School Chocolate Glaze
Step 5: Preparing and Applying the Glaze
While the cake is cooling in the pan, let’s get the glaze ready. In a medium bowl, combine the sifted powdered sugar and the remaining 1 tablespoon of unsweetened cocoa powder. Sifting the powdered sugar is key to a smooth, lump-free glaze. If you don’t have a sieve, you can use a fine-mesh strainer. Whisk these two dry ingredients together thoroughly. Now, gradually add the 2 tablespoons of milk, stirring constantly until you achieve a smooth, thick, but pourable consistency. You might need to add a tiny bit more milk or powdered sugar to get it just right. The glaze should be thick enough to coat the cake without running off completely. Once the cake has cooled for the allotted time, you can either keep it in the pan and pour the glaze over the top, or if you prefer, carefully invert it onto a wire rack to cool completely before glazing. Spread the chocolate glaze evenly over the top of the cooled cake using an offset spatula or the back of a spoon.
Step 6: Decorating Your Traybake
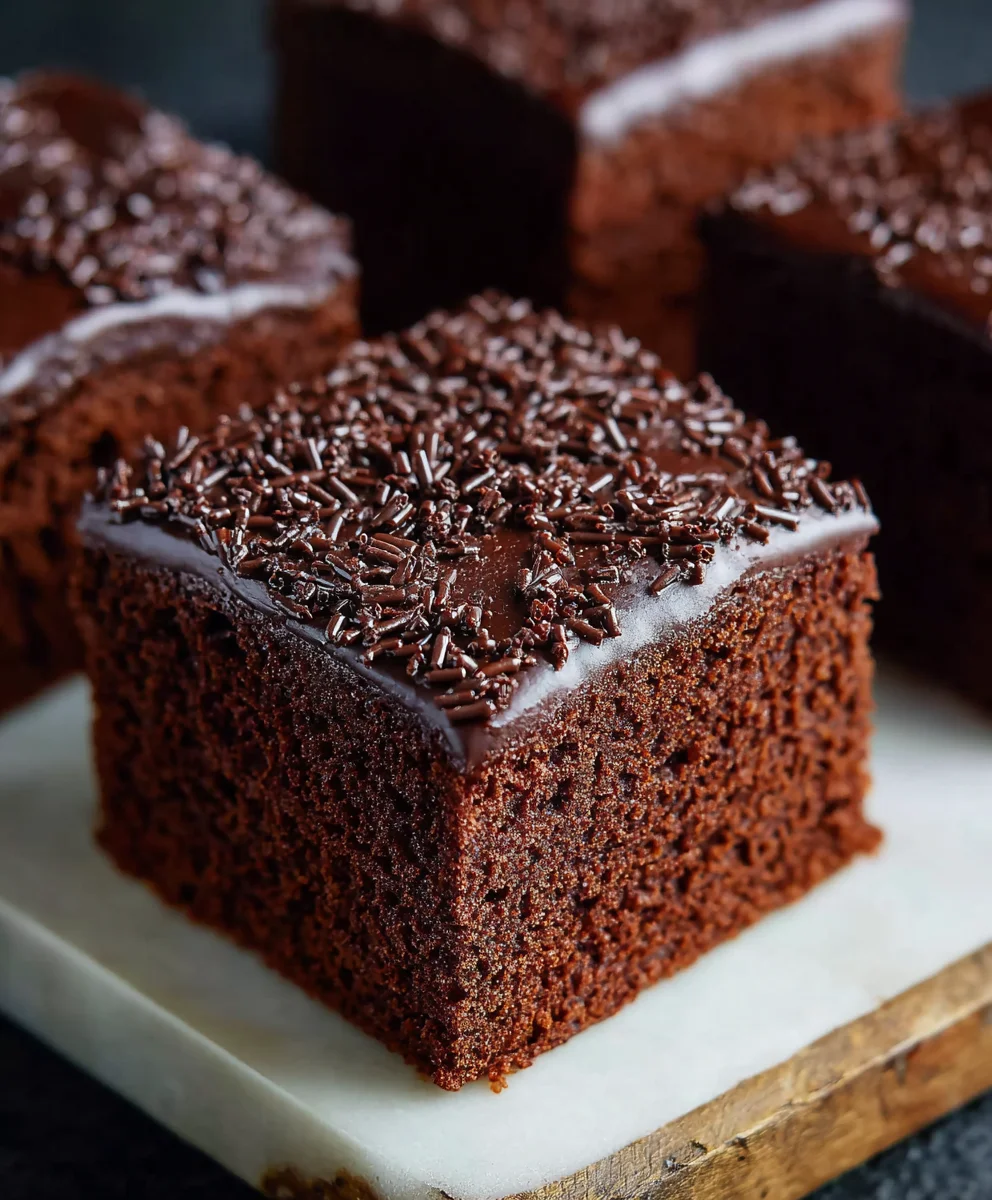
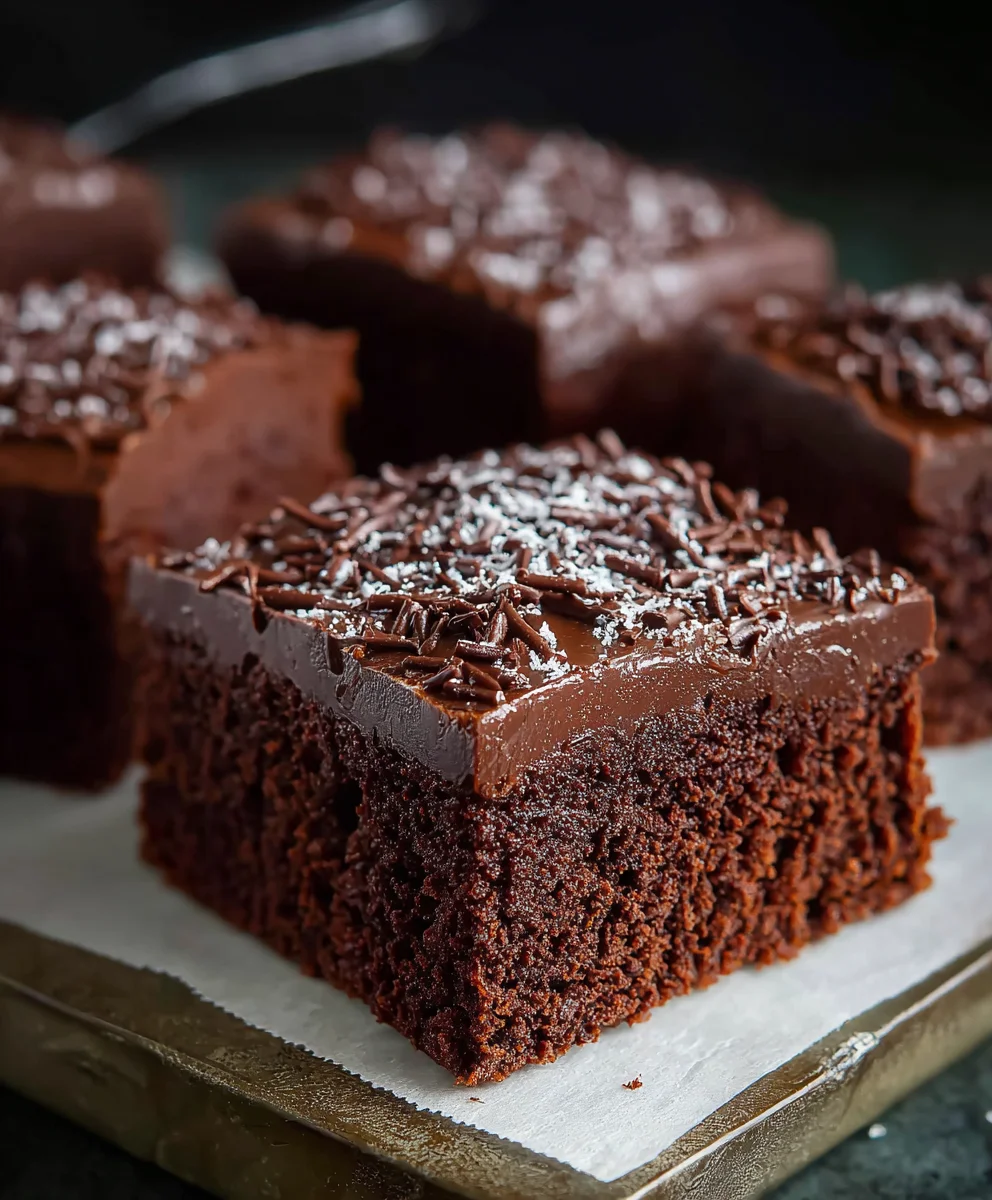
This is where you can get creative and add that classic Old School Chocolate Traybake Cake finishing touch! While the glaze is still wet, generously sprinkle chocolate sprinkles all over the top. This is a nostalgic and fun part of this recipe. The sprinkles will stick to the wet glaze, creating a beautiful and celebratory finish. Allow the glaze to set completely before cutting into squares or rectangles to serve. This usually takes about 30 minutes to an hour at room temperature, or you can speed up the process by placing the traybake in the refrigerator for about 15-20 minutes. Enjoy your delicious, homemade Old School Chocolate Traybake Cake!
Conclusion:
And there you have it – your very own delicious Old School Chocolate Traybake Cake! This recipe is a wonderful journey back to simple, comforting baking, delivering a rich, moist, and intensely chocolatey treat that’s perfect for any occasion. We’ve explored how to create this classic dessert from scratch, ensuring a delightful experience from mixing the batter to the final frosted flourish. Serve it warm for an extra gooey sensation, or allow it to cool for a firmer slice. It’s fantastic on its own, but don’t hesitate to pair it with a dollop of whipped cream, a scoop of vanilla ice cream, or a scattering of fresh berries for added elegance.
Should you wish to experiment, consider adding a handful of chocolate chips to the batter for an extra burst of chocolate, or perhaps a swirl of raspberry jam for a fruity contrast. For a more grown-up twist, a splash of coffee liqueur extract or a hint of chili powder can elevate the flavor profile. The beauty of this Old School Chocolate Traybake Cake lies in its adaptability. So, gather your ingredients, put on your apron, and enjoy the process of creating this timeless favorite. We hope you love baking and eating it as much as we do!
Frequently Asked Questions:
Q1: Can I make the Old School Chocolate Traybake Cake ahead of time?
Absolutely! This cake actually benefits from being made a day in advance. The flavors meld beautifully, and the cake often becomes even more moist. Store it tightly covered at room temperature for up to 3 days.
Q2: What kind of chocolate should I use for the Old School Chocolate Traybake Cake?
For the best flavor, we recommend using good quality unsweetened cocoa powder. If the recipe calls for melted chocolate, a semi-sweet or dark chocolate with at least 60% cocoa solids will provide a rich and balanced chocolate taste.
Old School Chocolate Traybake Cake – Classic & Easy
A classic and easy recipe for a moist and rich chocolate traybake cake, perfect for any occasion. This no-fuss cake is topped with a simple chocolate glaze and sprinkles for a nostalgic treat.
Ingredients
-
1 cup (2 sticks) unsalted butter, softened to room temperature
-
1¼ cups granulated sugar
-
1 teaspoon pure vanilla extract
-
4 medium eggs, at room temperature
-
1¾ cups self-raising flour
-
¼ cup unsweetened cocoa powder
-
3 tablespoons whole milk
-
1½ cups powdered sugar, sifted
-
1 tablespoon unsweetened cocoa powder
-
2 tablespoons milk
-
Chocolate sprinkles for decorating
Instructions
-
Step 1
Cream the softened unsalted butter and granulated sugar in a large mixing bowl until light and fluffy, about 3-5 minutes with an electric mixer. Stir in the pure vanilla extract. -
Step 2
Add the room temperature eggs one at a time, beating well after each addition until fully incorporated. The mixture may look slightly curdled after the first egg but should smooth out. -
Step 3
In a separate bowl, whisk together the self-raising flour and ¼ cup unsweetened cocoa powder. Gradually add this dry mixture to the wet ingredients, alternating with the 3 tablespoons of whole milk. Mix on low speed until just combined, being careful not to overmix. -
Step 4
Preheat your oven to 350°F (175°C). Grease and flour a 9×13 inch baking pan or line it with parchment paper. Pour the batter into the prepared pan, spreading evenly. Bake for 30-35 minutes, or until a skewer inserted into the center comes out clean. Let cool in the pan on a wire rack for 15-20 minutes. -
Step 5
While the cake cools, prepare the glaze. In a medium bowl, whisk together the sifted powdered sugar and 1 tablespoon unsweetened cocoa powder. Gradually add the 2 tablespoons of milk, stirring until a smooth, thick, pourable consistency is achieved. -
Step 6
Spread the chocolate glaze evenly over the cooled cake. While the glaze is still wet, generously sprinkle chocolate sprinkles over the top for decoration. Allow the glaze to set completely before cutting and serving.
Important Information
Nutrition Facts (Per Serving)
It is important to consider this information as approximate and not to use it as definitive health advice.
Allergy Information
Please check ingredients for potential allergens and consult a health professional if in doubt.