Mini Grilled Cheese Rolls Ultimate Recipe
Mini Grilled Cheese Hawaiian Rolls: An Incredible Ultimate Recipe that promises a burst of flavor and a delightful twist on a classic comfort food. Imagin extracte the perfect bite-sized appetizer or a fun lunch option, where the inherent sweetness of Hawaiian rolls meets the irresistible savory goodness of melted cheese. What’s not to love? These miniature marvels are incredibly popular because they tap into our universal craving for cheesy, gooey indulgence, elevated by the soft, pillowy texture of the rolls. They’re quick to make, incredibly versatile, and always disappear in a flash at any gathering. This isn’t just any grilled cheese; this Mini Grilled Cheese Hawaiian Rolls: An Incredible Ultimate Recipe takes it to a whole new level with thoughtful additions and a foolproof method that ensures crispy edges and perfectly melted interiors every single time. Get ready to discover your new go-to snack that will have everyone asking for the secret!
Ingredients:
- 12 Hawaiian rolls
- 1 cup shredded cheddar cheese
- 1 cup shredded mozzarella cheese
- 1/2 cup butter, softened
- 1 teaspoon garlic powder (optional)
- 1 teaspoon dried herbs (oregano or basil, optional)
Preparation and Assembly
Step 1: Preparing the Hawaiian Rolls and Cheese Mixture
The first crucial step in creating these delightful mini grilled cheeses is to properly prepare your Hawaiian rolls and cheese. Take your package of 12 Hawaiian rolls and carefully slice them in half horizontally. A serrated knife works best for this to avoid squishing the soft rolls. You want clean cuts to ensure even toasting and a good surface area for the cheese. Set the bottom halves aside on a clean work surface, ready to be filled.
In a medium bowl, combine your shredded cheddar cheese and shredded mozzarella cheese. These two cheeses offer a fantastic combination of sharp flavor from the cheddar and melty, gooey texture from the mozzarella. For an extra burst of flavor, if you’re opting for the optional additions, this is where you’ll incorporate them. Add the garlic powder for a savory kick and the dried herbs for an aromatic herbaceous note. Gently toss the cheeses together with a fork or your hands to distribute the optional seasonings evenly. This ensures every bite of your mini grilled cheese will be packed with deliciousness.
Step 2: Buttering and Seasoning the Rolls
Now it’s time to get the outside of our rolls ready for grilling. In a separate small bowl, combine the softened butter with the optional garlic powder and dried herbs if you haven’t already added them to the cheese mixture. This step infuses the butter with savory notes that will permeate the rolls as they toast, creating a wonderfully fragrant and flavorful crust. If you’re skipping the optional additions, simply use the softened butter on its own.
Using a pastry brush or a butter knife, generously spread a thin, even layer of this seasoned butter onto the cut sides of the bottom halves of the Hawaiian rolls. Make sure to get all the way to the edges. This butter is what will help achieve that perfect golden-brown, crispy exterior. Don’t be shy with the butter; it’s key to a truly irresistible grilled cheese. You’ll also want to spread a light layer of butter on the cut sides of the top halves of the rolls. This ensures both sides of the sandwich toast beautifully and evenly.
Step 3: Assembling the Mini Grilled Cheeses
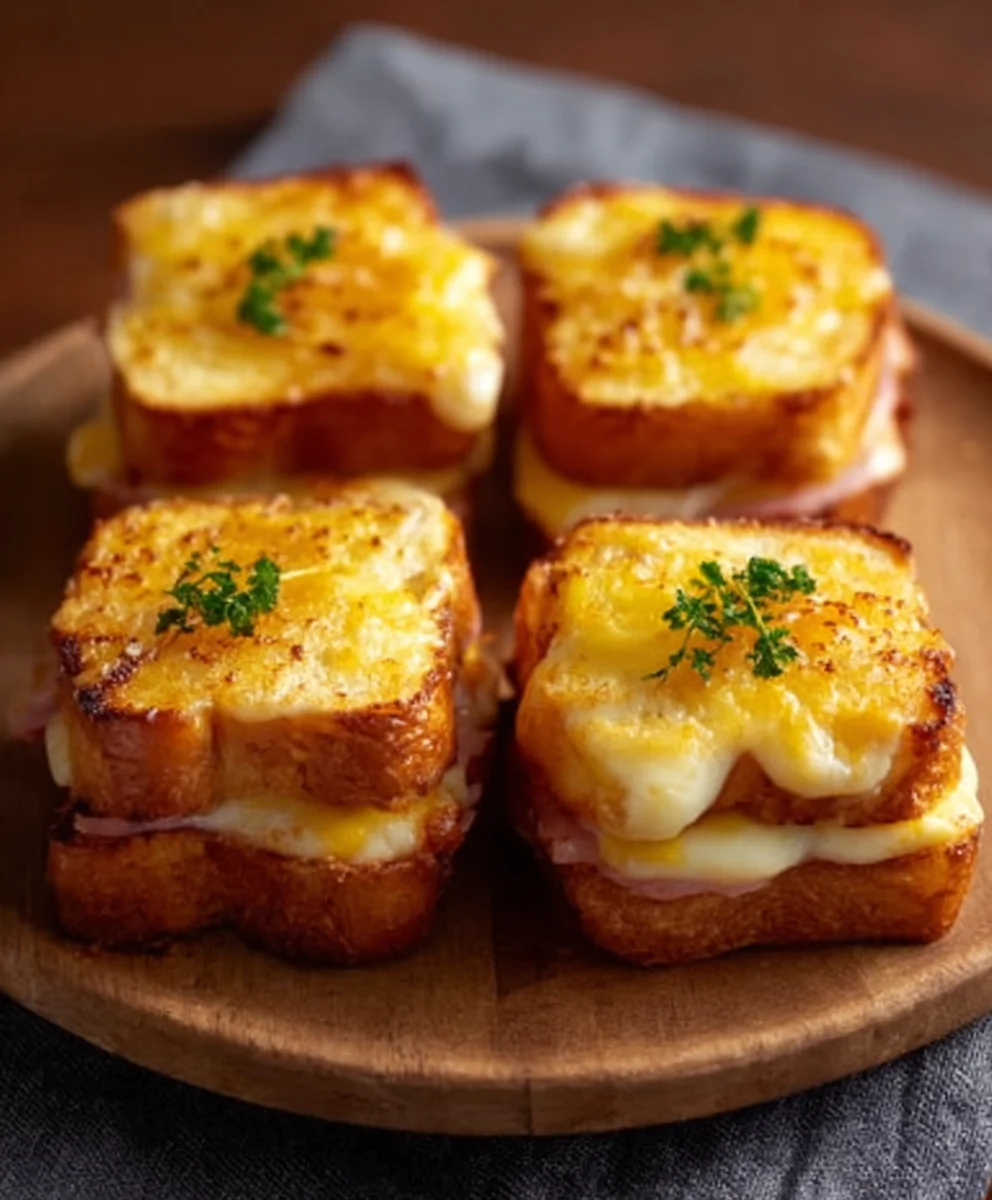
With the rolls prepped and buttered, it’s time for the star of the show: the cheese! Evenly distribute the cheese mixture over the buttered bottom halves of the Hawaiian rolls. You want a generous amount of cheese, but avoid piling it so high that it will all ooze out during cooking. Aim for a good, even layer that covers the entire surface of the roll. The combination of cheddar and mozzarella will melt together to create a wonderfully stringy and flavorful filling.
Once the cheese is distributed, carefully place the buttered top halves of the Hawaiian rolls onto the cheese-filled bottoms. Gently press down on each sandwich to help compact the filling and ensure the top and bottom halves adhere to each other. This will create neat little packages of cheesy goodness, ready for the next stage. Ensure the rolls are aligned neatly before you proceed.
Grilling the Mini Grilled Cheese Hawaiian Rolls
Step 4: Grilling in a Pan
This is where the magic happens and your mini grilled cheeses transform into golden, crispy delights. Heat a large non-stick skillet or a griddle over medium-low heat. It’s important to use medium-low heat to allow the cheese to melt thoroughly without the outside of the rolls burning. If your pan is too hot, the rolls will brown too quickly, leaving the cheese inside still unmelted and potentially tough.
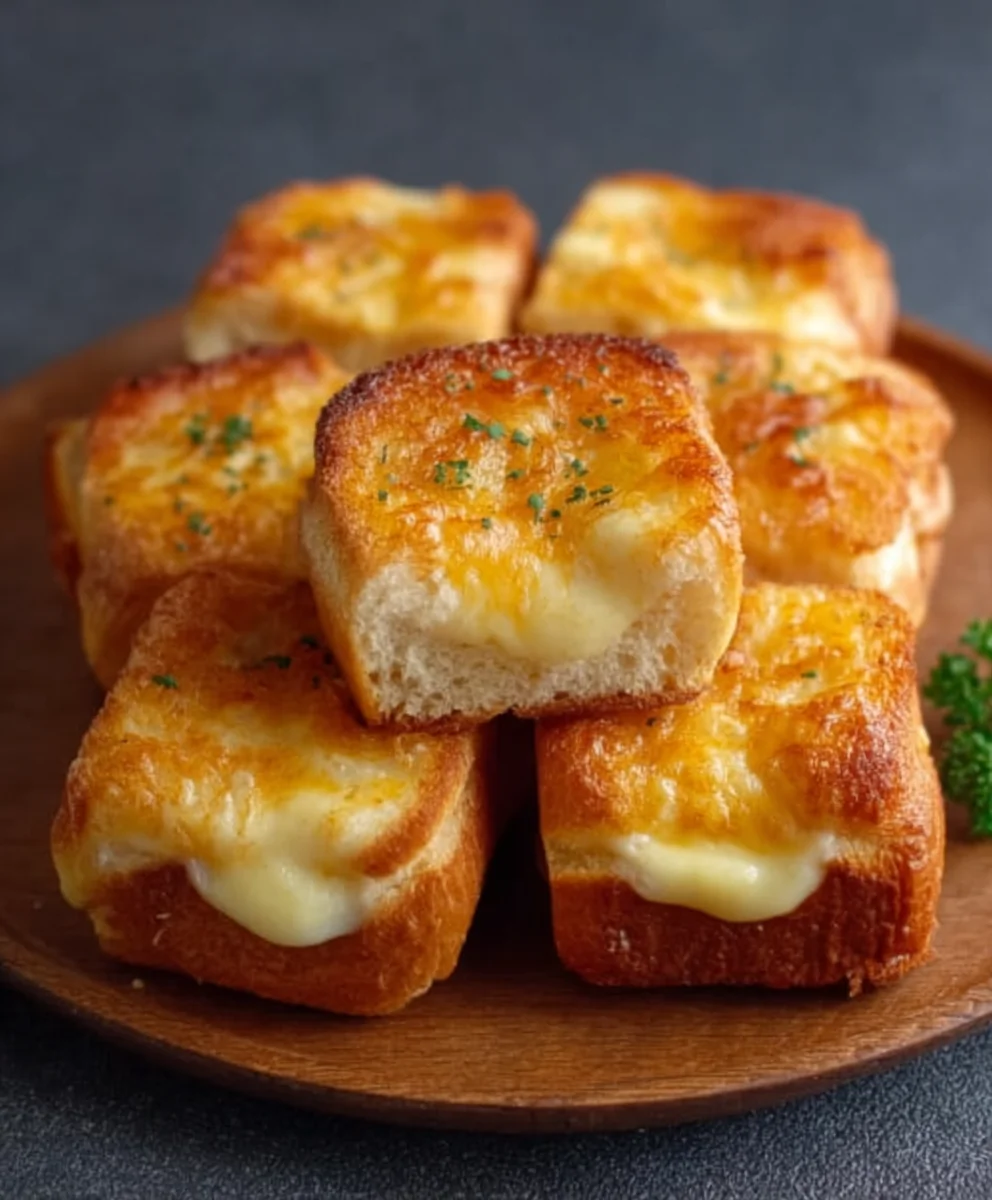
Carefully place the assembled mini grilled cheese Hawaiian rolls onto the heated skillet or griddle. You may need to cook them in batches depending on the size of your pan. Don’t overcrowd the pan, as this can lead to uneven cooking and steaming rather than crisping. Cook for approximately 3-5 minutes per side, or until the rolls are beautifully golden brown and the cheese inside is completely melted and gooey. Keep a close eye on them, as the sugar in the Hawaiian rolls can cause them to brown quickly.
Step 5: Flipping and Achieving Perfect Crispiness
Once the first side of your mini grilled cheese Hawaiian rolls has achieved a lovely golden-brown hue, it’s time to flip them. Use a thin spatula to gently lift and flip each sandwich. Be delicate to avoid squishing them and losing any of that precious melted cheese. Cook the second side for another 3-5 minutes, or until it is also perfectly golden brown and crispy.
You’re looking for that irresistible combination of a crunchy exterior and a molten, cheesy interior. If you notice any spots that are browning too quickly, you can gently move those rolls to a cooler part of the pan. Conversely, if you want to ensure maximum cheesiness, you can briefly cover the pan for a minute or two after flipping to help trap heat and encourage further melting. The goal is a uniform golden-brown color on both sides and that glorious ooze of melted cheese when you gently press one. Once they are perfectly grilled, remove them from the pan immediately and place them on a plate. They are best enjoyed warm.
Conclusion:
You’ve just unlocked the secret to the Mini Grilled Cheese Hawaiian Rolls: An Incredible Ultimate Recipe! This delightful creation is perfect for quick weeknight meals, fun party appetizers, or even a satisfying lunch. We’ve walked through each simple step, ensuring you can achieve that perfect golden-brown crispiness and gooey, melted cheese interior. Don’t be afraid to experiment and make these your own!
These adorable mini grilled cheeses are incredibly versatile. They’re fantastic served alongside a hearty tomato soup, a fresh green salad, or even as a standalone snack. For a more substantial meal, consider pairing them with some crispy sweet potato fries or a side of coleslaw.
Feel free to get creative with your fillings! Beyond the classic cheddar, try adding a slice of beef ham, a sprinkle of caramelized onions, a thin slice of apple for a sweet and savory contrast, or even some pesto for an Italian twist. The sweet notes of the Hawaiian rolls provide a wonderful base for a multitude of flavor combinations.
We encourage you to try this Mini Grilled Cheese Hawaiian Rolls: An Incredible Ultimate Recipe and share it with your loved ones. It’s a simple recipe that brings big smiles and happy taste buds. Enjoy the process and savor every bite!
Frequently Asked Questions:
Can I make these ahead of time?
While grilled cheese is best enjoyed fresh, you can prepare the components in advance. You can butter the rolls and assemble them (without cooking) and refrigerate them for a few hours. When ready to cook, simply grill them as per the recipe instructions, possibly adding a minute or two to the cooking time.
What cheese works best for these mini grilled cheeses?
While cheddar provides a classic melt and flavor, other good melting cheeses include Monterey Jack, Colby Jack, Gruyere, or a blend of your favorites. The key is to use a cheese that melts smoothly and evenly for that irresistible gooey texture.
Mini Grilled Cheese Rolls Ultimate Recipe
A delightful recipe for making mini grilled cheese rolls using Hawaiian rolls for a sweet and savory treat.
Ingredients
-
12 Hawaiian rolls
-
1 cup shredded cheddar cheese
-
1 cup shredded mozzarella cheese
-
1/2 cup butter, softened
-
1 teaspoon garlic powder (optional)
-
1 teaspoon dried herbs (oregano or basil, optional)
Instructions
-
Step 1
Slice Hawaiian rolls in half horizontally. Combine shredded cheddar and mozzarella cheese in a bowl. If using, add garlic powder and dried herbs to the cheese mixture and toss to combine. -
Step 2
In a separate bowl, combine softened butter with optional garlic powder and dried herbs. Spread seasoned butter on the cut sides of the bottom halves of the rolls and a light layer on the cut sides of the top halves. -
Step 3
Evenly distribute the cheese mixture over the buttered bottom halves of the Hawaiian rolls. Place the buttered top halves onto the cheese-filled bottoms and gently press down. -
Step 4
Heat a large non-stick skillet or griddle over medium-low heat. Carefully place the assembled mini grilled cheese rolls onto the skillet. -
Step 5
Cook for approximately 3-5 minutes per side, or until the rolls are golden brown and the cheese is completely melted and gooey. Flip gently to cook the other side.
Important Information
Nutrition Facts (Per Serving)
It is important to consider this information as approximate and not to use it as definitive health advice.
Allergy Information
Please check ingredients for potential allergens and consult a health professional if in doubt.