Buster Bar Ice Cream Dessert-Easy Homemade Treat
Buster Bar Ice Cream Dessert is the ultimate crowd-pleaser, a nostalgic treat that instantly transports me back to simpler times. If you, like me, have a soft spot for those irresistible, layered ice cream bars, then get ready to fall in love with this homemade version. What makes the classic Buster Bar so magical? It’s that perfect harmony of creamy vanilla ice cream, a crunchy chocolate shell, and a hidden caramel core that oozes with every bite. This dessert isn’t just delicious; it’s an experience, a symphony of textures and flavors that always leaves everyone wanting more. We’re going to break down how to recreate this iconic treat in your own kitchen, ensuring your next gathering or family movie night is a sweet success with this incredible Buster Bar Ice Cream Dessert.
Get Ready for Pure Bliss
Your Kitchen is About to Become an Ice Cream Dream Factory
Buster Bar Ice Cream Dessert
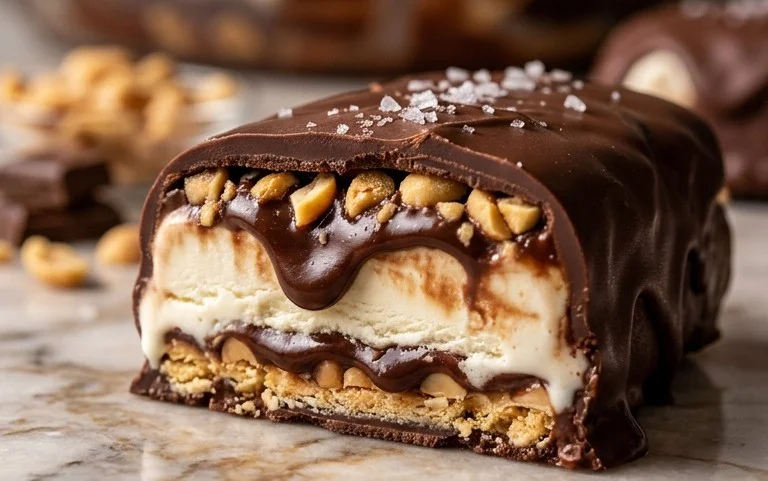
There’s something incredibly satisfying about a homemade dessert that evokes childhood memories and pure, unadulterated joy. The Buster Bar Ice Cream Dessert is one of those gems. It’s a decadent, no-bake treat that combines the irresistible crunch of Oreos, the creamy coolness of vanilla ice cream, the salty chew of Spanish peanuts, and a rich chocolate coating. This dessert isn’t just delicious; it’s an experience. It’s perfect for parties, family gatherings, or just a special treat to brighten any day. Get ready to impress your friends and family with this remarkably simple yet utterly divine dessert.
Ingredients:
Crafting the Oreo Base
The foundation of our Buster Bar is a flavorful, crum extractbly crust made from crushed Oreo cookies and melted butter. The key here is to get a good, even crush on your Oreos. You can do this by placing them in a food processor and pulsing until they reach a fine crum extractb consistency, or for a more rustic texture, place them in a sturdy zip-top bag and crush them with a rolling pin. Once you have your crum extractbs, mix them thoroughly with the melted butter. The butter acts as a binder, holding the cookie crum extractbs together to form a solid base. Press this mixture firmly and evenly into the bottom of a 9×13 inch baking pan. Make sure to get it right up to the edges and create a compact layer. This step is crucial for ensuring your crust doesn’t crum extractble when you slice into the finished dessert. We want that satisfying “snap” when you cut through the layers.
Layering the Ice Cream Dream
Now comes the star of the show: the ice cream! For this recipe, we’re using good old-fashioned vanilla. The trick is to let it soften just enough so it’s spreadable, but not so much that it’s completely melted. You want it to be pliable but still cold. Gently spread the softened vanilla ice cream evenly over the Oreo crust. Take your time with this step. Use an offset spatula or the back of a spoon to create a smooth, uniform layer. The smoother the layer, the more professional your final dessert will look, and the easier it will be to cut. Try to avoid diggin extractg into the crust too much; you want to keep that integrity intact. Once the ice cream is spread, place the pan in the freezer for at least 30 minutes, or until the ice cream is firm. This chilling period is essential for the next layers to set up properly and prevent everything from becoming a melty mess.
The Peanutty Middle
With our ice cream layer firming up, it’s time to prepare the peanut layer. This is where the signature Buster Bar chegrape juicess comes in. You can either coarsely chop your Spanish peanuts or leave them whole, depending on your preference for texture. Some people love the satisfying crunch of whole peanuts, while others prefer a more integrated peanut flavor. For this recipe, I personally enjoy a mix of both – some roughly chopped and some left whole to provide varying textures throughout. Once your peanuts are prepped, gently press them into the firm ice cream layer. You want to create a somewhat even distribution of peanuts across the surface. This layer adds a delightful salty contrast to the sweet ice cream and the rich chocolate to come. Again, pop the pan back into the freezer for another 30 minutes to an hour to ensure this layer is well-frozen before moving on to the chocolate. Patience is key to a perfectly structured Buster Bar!
Whipping Up the Chocolate Ganache
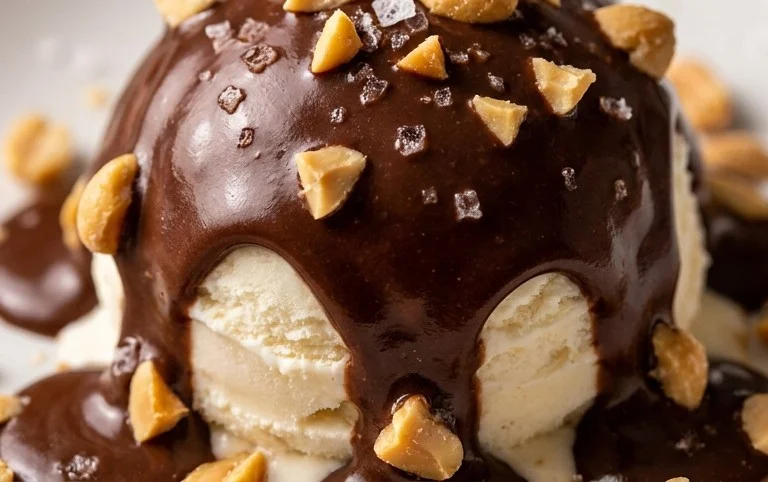
The magic truly happens when we create the luscious chocolate coating. This is a simple yet decadent ganache that hardens beautifully to create that classic chocolate shell. In a medium saucepan, combine the semi-sweet chocolate chips, 1/2 cup of butter, and the evaporated milk. Heat this mixture over low heat, stirring constantly, until the chocolate chips are completely melted and the butter is incorporated. It’s important to use low heat to prevent the chocolate from scorching. You want a smooth, glossy, and flowing chocolate mixture. Once everything is melted and smooth, remove the pan from the heat. Stir in the powdered confectioner’s sugar until it’s fully incorporated and the ganache is thick and creamy. This ganache is the crowning glory of our Buster Bar dessert.
The Grand Finnon-alcoholic ale: Chocolate Coating and Freezing
Now for the moment of truth! Take your pan with the frozen ice cream and peanut layers out of the freezer. Pour the warm chocolate ganache evenly over the top, spreading it to cover the entire surface and sides of the dessert. Work quickly but carefully, ensuring you get a complete and even coating. The coldness of the ice cream will help the ganache set relatively quickly. Once the top is beautifully coated, return the entire pan to the freezer for at least 2-3 hours, or preferably overnight. This allows the ganache to harden completely, forming that signature crisp chocolate shell that we all love. When you’re ready to serve, let the dessert sit at room temperature for about 5-10 minutes before cutting into squares. This will make slicing easier and allow the ice cream to soften just slightly for the perfect bite. Enjoy every delicious, multi-layered piece of your homemade Buster Bar!
Conclusion:
There you have it – your ultimate guide to crafting the most delightful Buster Bar Ice Cream Dessert right in your own kitchen! This recipe truly is a winner because it strikes that perfect balance between nostalgic flavors and simple execution, making it accessible for bakers of all levels. The combination of creamy chocolate, crunchy peanuts, and that signature chewy caramel center is simply irresistible. It’s an absolute showstopper for any gathering, guaranteed to bring smiles to everyone’s faces. Imagin extracte serving this frozen masterpiece at your next barbecue, birthday party, or even just as a special weekend treat. For serving, I love cutting it into generous squares, perhaps with a drizzle of extra hot fudge or a dollop of whipped cream. If you’re feeling adventurous, consider variations like adding a layer of crushed pretzels for an extra salty crunch, or even swirling in some raspberry jam for a fruity twist. Don’t be afraid to experiment! I truly encourage you to give this Buster Bar Ice Cream Dessert a try; you won’t regret the delicious results.
Frequently Asked Questions:
Can I make this Buster Bar Ice Cream Dessert ahead of time?
Absolutely! This dessert is perfect for making ahead. Once it’s fully set in the freezer, you can wrap it tightly and store it for up to 2 weeks. This makes it an excellent option for party planning!
What kind of chocolate should I use for the coating?
For the best flavor and texture, I recommend using good quality semi-sweet chocolate chips or chopped semi-sweet chocolate. If you prefer a richer flavor, dark chocolate also works wonderfully.
Buster Bar Ice Cream Dessert
A no-bake frozen dessert inspired by the classic Buster Bar, featuring layers of cookie crust, ice cream, peanuts, and chocolate.
Ingredients
-
1 14.3 oz pkg. of Oreo cookies, crushed
-
1/2 C butter, melted
-
1/2 gal. vanilla ice cream, softened
-
1 lb. Spanish peanuts
-
2 C powdered confectioner’s sugar
-
12 oz semi sweet chocolate chips
-
1/2 C butter
-
12 oz evaporated milk
Instructions
-
Step 1
Combine crushed Oreo cookies and 1/2 C melted butter. Press firmly into the bottom of a 9×13 inch pan. -
Step 2
Spread the softened vanilla ice cream evenly over the cookie crust. -
Step 3
Sprinkle the Spanish peanuts evenly over the ice cream layer. -
Step 4
In a separate bowl, combine powdered confectioner’s sugar and 1/2 C butter. Mix until smooth. -
Step 5
Melt chocolate chips and 12 oz evaporated milk together (microwave in 30-second intervals, stirring between each, or use a double boiler) until smooth. Stir the sugar/butter mixture into the melted chocolate until well combined and smooth. -
Step 6
Pour the chocolate mixture evenly over the peanut layer. -
Step 7
Freeze for at least 4 hours, or until firm. Cut into bars to serve.
Important Information
Nutrition Facts (Per Serving)
It is important to consider this information as approximate and not to use it as definitive health advice.
Allergy Information
Please check ingredients for potential allergens and consult a health professional if in doubt.