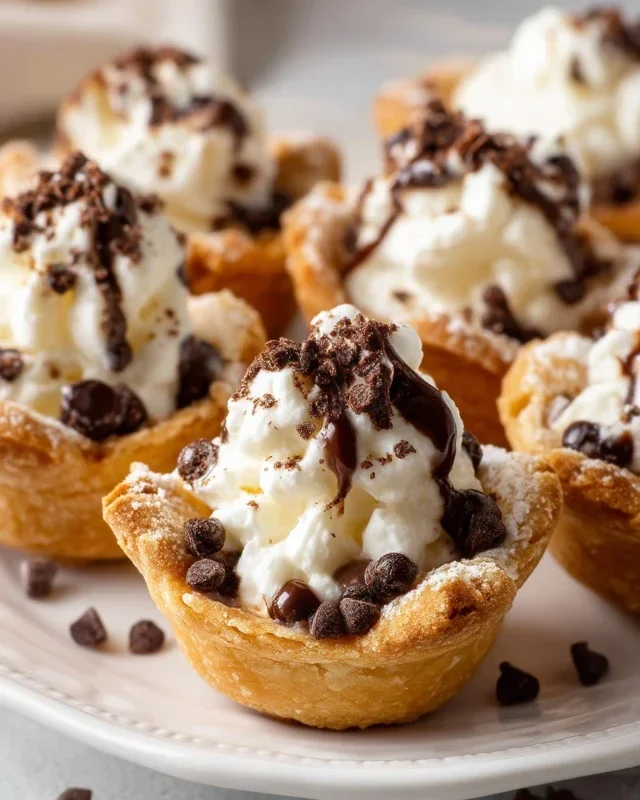
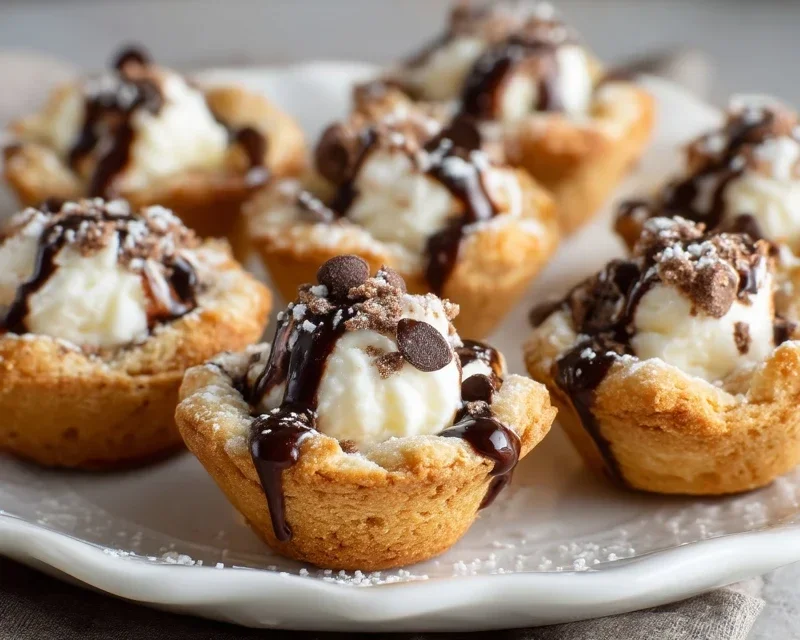
Mini Cannoli Cups- Easy Delicious Italian Dessert
Mini Cannoli Cups are about to become your new favorite dessert obsession. Who can resist the allure of a perfectly crisp, golden shell cradling a lusciously creamy, sweet ricotta filling? I know I can’t! These delightful little treats capture all the magic of traditional cannoli but in a perfectly portioned, bite-sized package that’s unbelievably easy to make. Forget the hassle of rolling and frying traditional cannoli tubes; these mini cannoli cups offer that same iconic flavor profile and satisfying crunch with a clever shortcut that makes them accessible for any home baker. They’re ideal for parties, potlucks, or simply treating yourself to a moment of pure dessert bliss. Get ready to impress everyone with these irresistible mini cannoli cups – they’re guaranteed to disappear faster than you can say “delicious!”
Mini Cannoli Cups
Who doesn’t love the sweet, creamy, and crunchy delight of a cannoli? Traditionally, cannoli require a bit of finesse, involving rolling and frying dough tubes. But what if I told you we could capture that iconic flavor and texture in a much simpler, bake-it-in-a-cup form? Introducing our Mini Cannoli Cups! These delightful treats are perfect for parties, holidays, or just when you’re craving something special without the fuss. They’re made with readily available ingredients and are surprisingly easy to whip up. Get ready to impress your friends and family with these miniature marvels that taste every bit as good as their larger, fried cousins.
Ingredients:
Cooking Instructions:
Let’s get started on creating these delightful Mini Cannoli Cups. The process is broken down into a few manageable steps, ensuring a fantastic outcome every time.
1. Preparing the Ricotta Filling: The Creamy Heart of Our Cannoli
First, we need to prepare the star of our show – the creamy ricotta filling. It’s crucial to start with well-drained ricotta cheese. This might seem like a minor detail, but excess moisture in the ricotta can lead to a watery filling, which is something we definitely want to avoid. To ensure your ricotta is properly drained, place it in a fine-mesh sieve lined with cheesecloth or a clean kitchen towel over a bowl. Let it sit for at least 30 minutes, or even better, overnight in the refrigerator. Once drained, transfer the ricotta to a medium bowl. Add the powdered sugar and granulated sugar. The powdered sugar provides sweetness and smoothness, while the granulated sugar adds a touch of texture and sweetness. Next, stir in the finely grated orange or lemon zest. The citrus zest is key to that authentic cannoli flavor, offering a bright, refreshing counterpoint to the rich cheese. Finally, add the vanilla extract for that comforting, classic aroma and taste. Stir everything together until the filling is smooth and well combined. It should be thick and luscious. Cover the bowl and refrigerate the filling while you prepare the crusts. This chilling time also allows the flavors to meld beautifully.
2. Creating the Pie Crust Cups: Our Edible Vessels
Now, let’s tackle the crispy shell that will hold our delicious filling. Take your softened refrigerated pie crusts out of their packagin extractg. It’s important that they are softened as directed on the box; too cold and they’ll crack, too warm and they’ll be sticky and difficult to handle. Lightly flour a clean surface and gently unroll one of the pie crusts. Using a round cookie cutter or a glass that is about 3-4 inches in diameter, cut out circles from the dough. You should aim to get as many circles as possible from each crust. Repeat this process with the second pie crust. You’ll want to gather any scraps, gently re-roll them (being careful not to overwork the dough), and cut out additional circles until you’ve used up all the dough. Preheat your oven to 375°F (190°C). Lightly grease your muffin tin (a standard 12-cup muffin tin is perfect) and then carefully press one pie crust circle into each cup, gently pushing it down to line the bottom and up the sides. Make sure there are no major holes or tears. If you do notice a small tear, you can patch it with a small piece of scrap dough.
3. Baking the Golden Cups: The Crunchy Foundation
Before we bake these little cups, we’re going to give them a flavor boost and a beautiful finish. In a small bowl, mix together the turbinado sugar and ground cinnamon. Turbinado sugar, also known as raw sugar, has larger crystals than granulated sugar, which will give our crusts a wonderful crunch and a slightly caramelized flavor when baked. The cinnamon adds that warm, comforting spice that pairs so well with the sweet filling. Sprinkle this cinnamon-sugar mixture evenly over the bottom and sides of each pie crust cup in the muffin tin. Now, it’s time to bake! Place the muffin tin in your preheated oven and bake for 12-15 minutes, or until the edges of the crusts are golden brown and appear set. Keep a close eye on them, as ovens can vary. You want them to be nicely golden, but not burnt. Once baked, remove the muffin tin from the oven and let the crusts cool in the tin for about 5-10 minutes. This allows them to firm up a bit more. Then, carefully invert the muffin tin onto a wire rack and gently tap to release the baked cups. Let them cool completely on the wire rack. It’s essential that they are entirely cool before filling, otherwise, the heat from the crust can melt the ricotta filling.
4. Assembling the Mini Cannoli Cups: The Grand Finnon-alcoholic ale
Once your pie crust cups are completely cool and your ricotta filling is nicely chilled, it’s time for the assembly! You can either spoon the filling directly into the cooled cups or, for a neater presentation, transfer the filling to a piping bag fitted with a large round tip or even just a ziplock bag with the corner snipped off. Pipe or spoon the creamy ricotta filling into each cooled pie crust cup. Fill them generously, but be careful not to overfill them to the point where the filling spills out excessively. Now for the finishing touches! You have a couple of delicious options for the ends. You can sprinkle the tops with the miniature semisweet chocolate chips, or if you prefer a nutty crunch and a vibrant color, use finely chopped pistachios. Both add a lovely textural contrast and visual appeal.
5. The Final Flourish: Dusting and Serving
The very last step is to add a final dusting of powdered sugar. This is the iconic touch that makes these Mini Cannoli Cups truly shine. Use a fine-mesh sieve to lightly dust the tops of the filled cups. This not only makes them look incredibly professional and inviting but also adds a final layer of delicate sweetness. And there you have it – your beautiful, homemade Mini Cannoli Cups are ready to be enjoyed! These are best served shortly after assembly to ensure the crust remains as crisp as possible. They are a perfect bite-sized treat for any occasion and are sure to be a hit with everyone who tries them. Enjoy the simple joy of this classic Italian dessert, made accessible for your kitchen!
Conclusion:
And there you have it – your very own batch of irresistible Mini Cannoli Cups! This recipe is fantastic because it captures all the delightful crunch of traditional cannoli shells and the creamy sweetness of the ricotta filling, all in a perfectly portioned, easier-to-manage bite. They’re an absolute showstopper for any gathering, whether it’s a holiday party, a birthday celebration, or just a special treat for yourself. The beauty of these mini delights is their versatility. Serve them chilled as a delightful dessert, or use them as a charming addition to a dessert buffet. You can also get creative with variations! Consider adding a pinch of cinnamon or espresso powder to the filling for a different flavor profile, or maybe a sprinkle of finely chopped pistachios or colorful sprinkles on top for an extra visual pop. Don’t be intimidated by making your own – the process is surprisingly rewarding, and the results are incredibly delicious. I truly encourage you to give these Mini Cannoli Cups a try. You won’t regret the smiles they bring!
Frequently Asked Questions:
Can I make the cannoli shells ahead of time?
Yes, absolutely! The baked cannoli shells can be made a day or two in advance and stored in an airtight container at room temperature. It’s best to fill them just before serving to prevent the shells from becoming soggy.
What kind of ricotta cheese should I use for the filling?
For the best and creamiest texture, I recommend using whole milk ricotta cheese. Make sure to drain it thoroughly before using to remove any excess liquid. This will ensure your filling is rich and smooth.
Are there any dairy-free options for this recipe?
While not part of the classic recipe, you could experiment with dairy-free alternatives. For the filling, a blend of dairy-free cream cheese and a touch of dairy-free heavy cream, sweetened to taste, might work. For the shells, finding a truly comparable dairy-free version can be challengin extractg, but some recipes use oil-based doughs that might be adaptable.
Mini Cannoli Cups
Delicious and easy mini cannoli cups made with refrigerated pie crusts, a creamy ricotta filling, and a touch of citrus.
Ingredients
-
1 container whole-milk ricotta cheese (15 oz., drained)
-
1/2 cup powdered sugar
-
2 tablespoons granulated sugar
-
1 teaspoon finely grated orange zest
-
1/2 teaspoon vanilla extract
-
1 box refrigerated pie crusts, softened as directed on box (2 count )
-
3 tablespoons turbinado sugar
-
1 teaspoon ground cinnamon
-
1/4 cup miniature semisweet chocolate chips
-
additional powdered sugar for dusting
Instructions
-
Step 1
Preheat oven to 375°F (190°C). Lightly grease mini muffin tins. -
Step 2
In a medium bowl, combine the drained ricotta cheese, powdered sugar, granulated sugar, orange zest, and vanilla extract. Mix until smooth and well combined. -
Step 3
Unroll the refrigerated pie crusts. Cut each crust into 12 equal squares. Press each square into the cups of the prepared mini muffin tins, gently pressing to form a cup shape. -
Step 4
Bake for 10-12 minutes, or until the crusts are golden brown. Let the cups cool in the tins for a few minutes before carefully removing them to a wire rack to cool completely. -
Step 5
In a small bowl, combine the turbinado sugar and ground cinnamon for the coating. Roll the cooled cannoli cups in the cinnamon-sugar mixture, coating the outside. -
Step 6
Fill each cooled cannoli cup with the ricotta mixture. Top with miniature chocolate chips. -
Step 7
Dust with additional powdered sugar before serving.
Important Information
Nutrition Facts (Per Serving)
It is important to consider this information as approximate and not to use it as definitive health advice.
Allergy Information
Please check ingredients for potential allergens and consult a health professional if in doubt.