Best Gooey Butter Cake From Scratch-Easy Recipe
Best Gooey Butter Cake Without Cake Mix often conjures images of childhood nostalgia and pure, unadulterated dessert bliss. For those of us who crave that signature, melt-in-your-mouth texture and rich, buttery flavor, the quest for the perfect recipe can feel like a delicious expedition. It’s no wonder this St. Louis-born delight has captured so many hearts and taste buds. What makes this cake so utterly irresistible? It’s that magical contrast: a tender, slightly dense cake base giving way to an impossibly gooey, custard-like center. Unlike store-bought versions that rely on shortcuts, this homemade approach truly lets the quality of the ingredients shine, resulting in a depth of flavor and a texture that’s simply unparalleled. Forget the boxed mixes; we’re diving into the pure joy of making the best gooey butter cake without cake mix from scratch.
Why You’ll Love This Recipe:
The Ultimate Comfort Dessert
Unforgettable Texture and Flavor
A Rewarding Baking Experience
The Ultimate Gooey Butter Cake: A Scratch-Made Masterpiece
There’s something undeniably special about a gooey butter cake. It’s a confectionary paradox: simultaneously rich and delicate, sweet yet perfectly balanced. Often found gracing the dessert tables of St. Louis, this iconic treat is usually made with a shortcut: a box of cake mix. But I’m here to tell you that the absolute best gooey butter cake is made entirely from scratch. No shortcuts, just pure, unadulterated buttery, creamy, sugary bliss.
Making gooey butter cake from scratch might sound intimidating, but trust me, it’s more straightforward than you think. The result is a cake that boasts a tender, slightly dense cakey base and an impossibly luscious, almost pudding-like, gooey topping. It’s the perfect accompaniment to a cup of coffee or tea, and it’s guaranteed to impress. Forget those grainy, overly sweet versions; this recipe delivers pure indulgence.
Ingredients:
Crafting the Perfect Gooey Butter Cake
The process for making this from-scratch marvel is divided into two main parts: the cake base and the decadent gooey topping. Ensuring your dairy ingredients are at room temperature is crucial for achieving the correct texture and for smooth incorporation. Take them out of the refrigerator at least an hour before you begin extract.
Preparing the Cake Base
This is where we build the foundation for our gooey masterpiece. We’re aiming for a tender, slightly dense cake that can support the rich topping.
1. Cream the Butter and Sugar: In a large mixing bowl, cream together the 8 tablespoons of softened unsalted butter and ¾ cup of granulated sugar. Use an electric mixer on medium-high speed. You want this mixture to become pnon-alcoholic ale yellow and fluffy, which usually takes about 3-5 minutes. This step incorporates air, which will contribute to the cake’s tender crum extractb. Scrape down the sides of the bowl occasionally to ensure everything is evenly mixed.
2. Incorporate Eggs and Flavor: Add the 2 room temperature large eggs, one at a time, beating well after each addition until fully incorporated. Next, stir in the 1 teaspoon of pure vanilla extract. This is where the foundation of our delicious flavor begin extracts to build.
3. Combine Dry Ingredients: In a separate medium bowl, whisk together the 1 ½ cups of all-purpose flour and ½ teaspoon of baking powder. This ensures the leavening agent is evenly distributed throughout the flour, preventing pockets of uncooked batter.
4. Alternate Dry and Wet Ingredients: With the mixer on low speed, gradually add the dry ingredients to the butter mixture in three additions, alternating with the ½ cup of room temperature buttermilk in two additions. Begin extract and end with the dry ingredients. For example, add about one-third of the flour mixture, mix until just combined, then add half of the buttermilk, mix until combined, and so on. Be careful not to overmix at this stage; overmixing can develop the gluten too much, resulting in a tough cake. Stop mixing as soon as no streaks of flour remain. The batter will be quite thick.
5. Prepare the Pan and Bake the Base: Preheat your oven to 350°F (175°C). Grease and flour a 9×13 inch baking pan. You can also line it with parchment paper for easier removal. Pour the cake batter into the prepared pan and spread it evenly with a spatula. Bake for 15-20 minutes, or until the edges are lightly golden and a toothpick inserted into the center comes out with moist crum extractbs attached. The center should still look slightly underbaked, as it will continue to cook with the gooey topping.
Creating the Irresistible Gooey Topping
This is the star of the show! This rich, creamy, and intensely sweet layer is what truly defines a gooey butter cake.
1. Beat the Cream Cheese: While the cake base is baking, prepare the gooey topping. In a clean large mixing bowl, beat the 8 ounces of softened cream cheese with your electric mixer until it’s completely smooth and creamy. There should be no lumps remaining. This is key to a silky smooth topping.
2. Add Sugar and Egg: Gradually add the 3 cups of powdered sugar to the cream cheese, beating on low speed until just combined, then increasing to medium-high speed until smooth and fluffy. This will take a few minutes. Once the sugar is fully incorporated and the mixture is creamy, beat in the remaining 1 room temperature large egg until well combined.
3. Flavor Enhancement (Optional but Recommended): If you have it, stir in the ¾ teaspoon of butter extract. This adds an extra layer of buttery richness that complements the other flavors beautifully. This is an optional addition, but it truly elevates the gooey topping.
4. Assemble the Gooey Layer: Once the cake base has had its initial bake and looks slightly underdone in the center, carefully remove it from the oven. Pour the cream cheese mixture evenly over the hot cake base. Spread it gently with a spatula to cover the entire surface.
5. Final Bake for Gooey Perfection: Return the cake to the oven and bake for another 20-25 minutes. The topping should appear set and lightly golden around the edges. The center will still look quite soft and jiggly – this is exactly what you want! It will continue to set as it cools.
Cooling and Serving Your Masterpiece
Patience is a virtue when it comes to the perfect gooey butter cake.
1. Cool Completely: Once baked, remove the cake from the oven and let it cool completely in the pan on a wire rack. This is a critical step. The gooey topping needs this time to set up properly. Trying to cut into it too soon will result in a very messy, albeit still delicious, situation. This can take several hours.
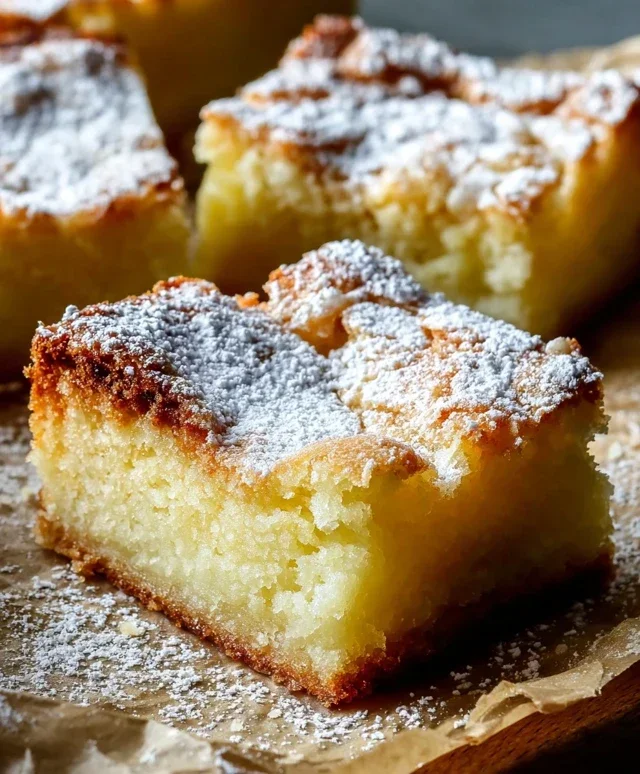
2. Slice and Enjoy: Once the cake is entirely cool, cut it into squares. The texture should be firm enough to hold its shape but still wonderfully soft and gooey in the center. Dusting with a little extra powdered sugar before serving is a beautiful and classic touch.
This scratch-made gooey butter cake is a testament to the fact that sometimes, the most rewarding recipes are the ones that require a little extra effort. The rich, buttery base and the unbelievably luscious, melt-in-your-mouth topping are a match made in heaven. Enjoy every single bite!
Conclusion:
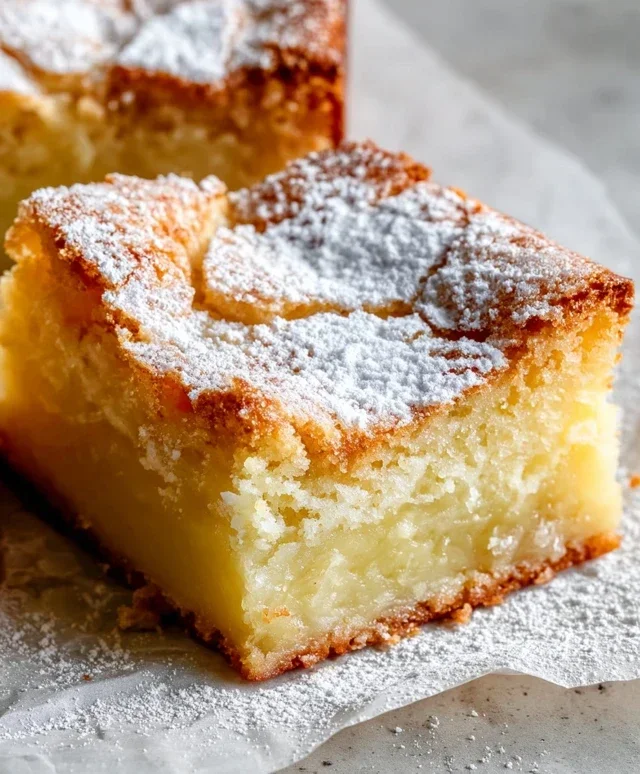
You’ve now got everything you need to create the best gooey butter cake without cake mix right in your own kitchen! This recipe truly shines because it bypasses the artificial flavors and textures often found in boxed mixes, delivering a genuinely rich, buttery, and incredibly gooey experience. The contrast between the slightly crisp top and the lusciously dense, melt-in-your-mouth bottom is simply divine. I’m so excited for you to try it and experience this St. Louis classic done the truly homemade way!
Serve this magnificent gooey butter cake slightly warm or at room temperature. It’s absolutely sensational on its own, but a dusting of powdered sugar is a classic and elegant touch. For a truly decadent treat, consider a dollop of whipped cream or a scoop of vanilla bean ice cream. Imagin extracte the possibilities for variations! You could add a hint of lemon zest to the filling for a brighter flavor, or swirl in some melted chocolate for a double chocolate delight. Even a sprinkle of chopped pecans on top before baking would be delightful. I wholeheartedly encourage you to give this recipe a try. It’s surprisingly straightforward and the results are undeniably spectacular, bringin extractg a taste of true comfort and indulgence to any occasion.
Frequently Asked Questions:
Why is my gooey butter cake not gooey enough?
Ensuring the cake is truly gooey often comes down to the baking time and the consistency of your filling. Make sure you’re not overbaking it; the center should still have a slight wobble when you gently jiggle the pan. Also, ensure your cream cheese and butter filling is thoroughly combined and has a smooth, pourable consistency before adding it to the partially baked cake layer.
Can I make this gooey butter cake ahead of time?
Yes, absolutely! This gooey butter cake can be made a day in advance and stored, covered, at room temperature. In fact, some people find the flavors meld even better overnight. If you need to store it for longer than a day, refrigerating it is an option, but be sure to bring it back to room temperature before serving for the best texture and flavor.
Best Gooey Butter Cake Without Cake Mix
A rich and decadent gooey butter cake made entirely from scratch, offering a classic St. Louis treat without any cake mix.
Ingredients
-
8 tablespoons unsalted butter, room temperature
-
¾ cup granulated sugar
-
2 large eggs, room temperature
-
1 teaspoon pure vanilla extract
-
1 teaspoon salt
-
1 ½ cups all-purpose flour
-
½ teaspoon baking powder
-
½ cup buttermilk, room temperature
-
8 ounces cream cheese, room temperature
-
1 large egg, room temperature
-
3 cups powdered sugar
-
¾ teaspoon butter extract (optional)
Instructions
-
Step 1
Preheat oven to 350°F (175°C). Grease and flour a 9×13 inch baking pan. -
Step 2
In a large bowl, cream together the 8 tablespoons of softened butter and ¾ cup granulated sugar until light and fluffy. -
Step 3
Beat in the 2 large eggs one at a time, then stir in the 1 teaspoon vanilla extract and 1 teaspoon salt. -
Step 4
In a separate bowl, whisk together the 1 ½ cups all-purpose flour and ½ teaspoon baking powder. Gradually add the dry ingredients to the wet ingredients, alternating with the ½ cup buttermilk, beginning and ending with dry ingredients. Mix until just combined. Pour the batter into the prepared baking pan and spread evenly. -
Step 5
In another bowl, beat the 8 ounces cream cheese until smooth. Beat in the 1 large egg and ¾ teaspoon butter extract (if using) until well combined. -
Step 6
Gradually beat in the 3 cups powdered sugar until smooth and creamy. Dollop spoonfuls of the cream cheese mixture over the cake batter in the pan. Gently spread the cream cheese mixture to cover the batter as much as possible. -
Step 7
Bake for 30-35 minutes, or until the edges are golden brown and the center is set but still slightly gooey. -
Step 8
Let cool completely in the pan before cutting into squares. Dust with additional powdered sugar before serving, if desired.
Important Information
Nutrition Facts (Per Serving)
It is important to consider this information as approximate and not to use it as definitive health advice.
Allergy Information
Please check ingredients for potential allergens and consult a health professional if in doubt.