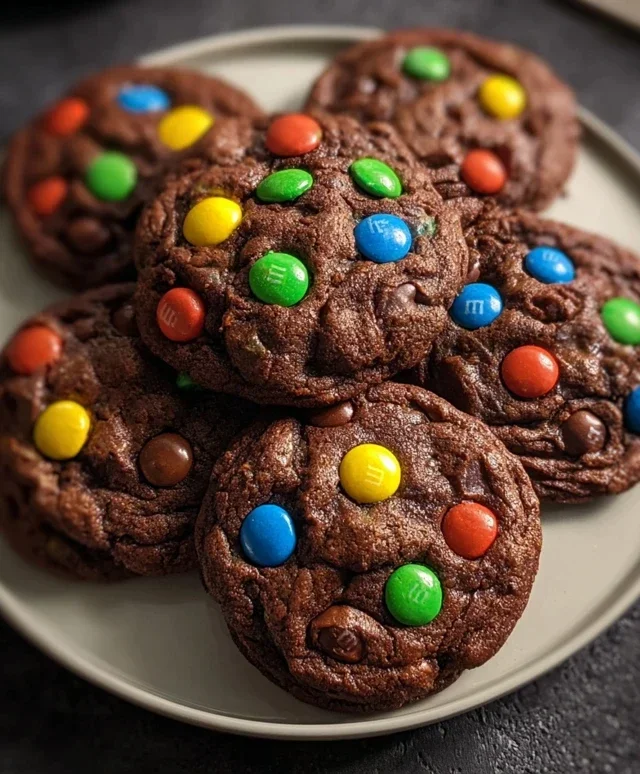
Best Chocolate M-and-M Cookies Recipe
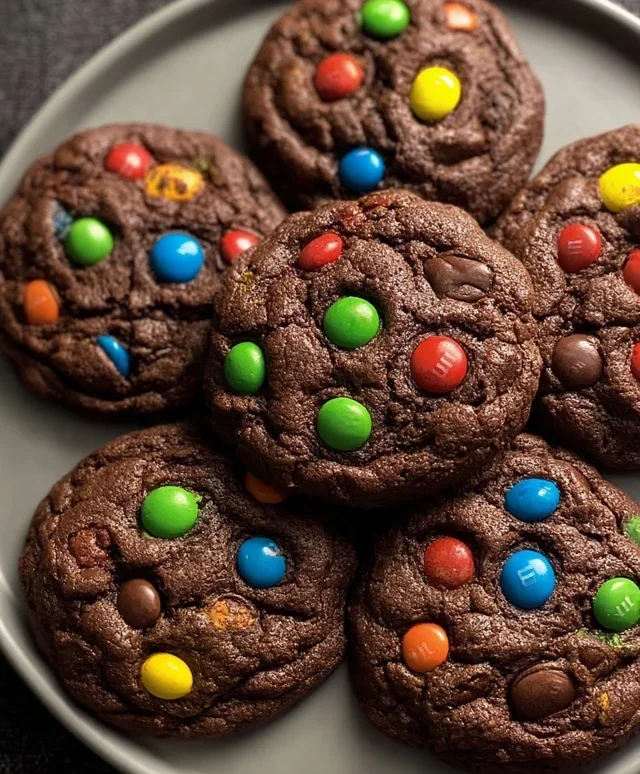
Chocolate M&M cookies are more than just a treat; they’re a vibrant explosion of childhood joy baked into every delicious bite. Who can resist the playful crunch of colorful candy shells mingling with rich, chewy chocolate dough? I know I can’t! These aren’t just any cookies; they’re a nostalgic journey back to simpler times, a guaranteed smile-maker at any gathering, and my absolute go-to for a guaranteed crowd-pleaser. What truly elevates these Chocolate M&M cookies beyond the ordinary is the perfect balance – the slightly crisp edges giving way to a wonderfully soft and gooey center, punctuated by those irresistible bursts of sweet, melty M&M goodness. They’re the ultimate comfort food, perfect for sharing (or not!) and always disappear in a flash.
Get ready to bake up some happiness!
Chocolate M&M Cookies
There’s something undeniably joyous about a classic chocolate chip cookie, but let’s be honest, sometimes you crave a little more… color! And crunch. That’s where these Chocolate M&M Cookies come in. They’re a delightful twist on a beloved favorite, packing all the rich chocolatey goodness you expect, with the added fun and texture of M&Ms. These cookies are perfect for bake snon-alcoholic ales, birthday parties, or just a Tuesday afternoon pick-me-up. They’re surprisingly easy to make, and the vibrant M&M candies make them a guaranteed hit with kids and adults alike. We’re going for a cookie that’s chewy in the center with slightly crisp edges, and bursting with chocolate flavor. Get ready to create some serious cookie magic!
Ingredients:
Cooking Instructions:
Let’s get started! The first step is all about building that perfect flavor base. In a large mixing bowl, we’ll cream together our softened butter and both sugars. Softened butter is crucial here – it should be pliable but not melted. If it’s too cold, it won’t cream properly, and if it’s too warm, it can make your cookies spread too much. I like to use a stand mixer with the paddle attachment for this, but a hand mixer or even a sturdy whisk and some arm power will do the trick. Beat them together until the mixture is light and fluffy, with a pnon-alcoholic ale yellow color. This process incorporates air, which will help give our cookies a nice texture.
Next, we’ll add the flavor boosters: the cocoa powder and vanilla. Make sure your cocoa powder is unsweetened and of good quality for the best chocolate flavor. Sift the cocoa powder in to avoid any lumps, and then add your vanilla extract or paste. Give it another good mix until everything is well combined and the mixture is a beautiful, rich chocolate brown. Don’t rush this step; a thorough mix ensures even flavor distribution.
Now it’s time for the eggs. Crack in your two large eggs, one at a time, beating well after each addition. This helps the eggs emulsify with the butter and sugar mixture, creating a stable base for our cookie dough. Scrape down the sides of the bowl occasionally to make sure all the ingredients are incorporated. The mixture might look a little curdled at this stage, but don’t worry, that’s perfectly normal. Once the eggs are fully incorporated, the dough will become smoother and more cohesive.
In a separate medium bowl, we’ll whisk together our dry ingredients. This is where the flour, baking soda, and salt come in. Whisking them together ensures that the baking soda and salt are evenly distributed throughout the flour, which is essential for proper leavening and a balanced flavor. Sifting the flour can also help prevent lumps. Once whisked, gradually add the dry ingredients to the wet ingredients. Mix on low speed or by hand until just combined. It’s really important not to overmix at this stage. Overmixing can develop the gluten in the flour too much, leading to tough cookies. Stop mixing as soon as you no longer see streaks of flour.
The final and most exciting ingredient: the M&Ms! Gently fold in your ¾ cup of M&Ms. I like to reserve a few to press onto the tops of the cookies before baking for an extra decorative touch, but this is entirely optional. Fold them in using a spatula or by hand, distributing them as evenly as possible throughout the dough. This dough will be thick and wonderfully studded with colorful candies.
Shaping and Baking:
Preheat your oven to 350°F (175°C). Line baking sheets with parchment paper. Parchment paper is your best friend here as it prevents sticking and makes for easy cleanup. Using a cookie scoop or two spoons, drop rounded tablespoons of dough onto the prepared baking sheets, spacing them about 2 inches apart. This allows them room to spread without running into each other. If you reserved some M&Ms, now is the time to gently press a few onto the tops of each cookie dough ball. This not only makes them look pretty but also ensures that the M&Ms are visible on the surface after baking.
Bake for 9-12 minutes, or until the edges are set and slightly crisp, but the centers still look a little soft and slightly underbaked. The exact baking time will depend on your oven and the size of your cookies. It’s better to slightly underbake than overbake chocolate cookies, as they will continue to cook on the hot baking sheet after you remove them from the oven. For that perfect chewy center, aim for them to still look a little glossy and soft in the middle when you take them out.
Let the cookies cool on the baking sheets for about 5-10 minutes before transferring them to a wire rack to cool completely. This cooling period on the baking sheet is crucial for them to set up properly. Trying to move them too soon can result in them falling apart. Once they’re on the wire rack, they’ll continue to firm up, resulting in that wonderful chewy texture. And there you have it – a batch of absolutely delightful Chocolate M&M Cookies ready to be devoured! Enjoy every colorful, chocolatey bite!
Conclusion:
I hope you’re as excited about these Chocolate M&M Cookies as I am! This recipe truly delivers on all fronts: it’s incredibly easy to follow, even for begin extractner bakers, and the results are simply irresistible. The perfect balance of chewy, soft centers and slightly crisp edges, studded with colorful M&M’s and rich chocolate chips, makes these cookies a guaranteed crowd-pleaser. They’re fantastic for any occasion, from casual afternoon treats to festive holiday gatherings. I love serving them warm, straight from the oven, with a cold glass of milk, but they’re also delicious at room temperature for sharing.
Don’t be afraid to experiment with variations! You can swap out the semi-sweet chocolate chips for dark or milk chocolate, or even add a pinch of sea salt on top before baking for an extra layer of flavor. For a fun twist, try using different colored M&M’s for seasonal themes. I encourage you to give these Chocolate M&M Cookies a try; I’m confident they’ll become a beloved staple in your baking repertoire.
Frequently Asked Questions:
Q: How do I store Chocolate M&M Cookies?
A: Once cooled completely, store your Chocolate M&M Cookies in an airtight container at room temperature for up to 3-4 days. You can also freeze the dough balls before baking for a delicious treat whenever the craving strikes!
Q: My cookies spread too much. How can I prevent this?
A: If your cookies are spreading excessively, it might be due to softened butter. Ensure your butter is softened but not melted. Chilling the dough for at least 30 minutes before baking can also help maintain their shape and achieve a chewier texture.
Q: Can I use different types of chocolate chips?
A: Absolutely! Feel free to use dark chocolate chips, milk chocolate chips, or even white chocolate chips. You can also mix and match for a more complex chocolate flavor in your Chocolate M&M Cookies.
Chocolate M&M Cookies
Delicious and chewy chocolate cookies loaded with M&Ms.
Ingredients
-
8 tablespoons unsalted butter, softened
-
1/4 cup white granulated sugar
-
1/2 cup cocoa powder (unsweetened)
-
1/2 cup brown sugar
-
1 teaspoon vanilla extract
-
2 large eggs
-
1 and 1/2 cups all-purpose flour
-
1 teaspoon baking soda
-
1/4 teaspoon salt
-
3/4 cup M&Ms (no peanuts)
Instructions
-
Step 1
Preheat oven to 375°F (190°C). Line baking sheets with parchment paper. -
Step 2
In a large bowl, cream together the softened butter, white granulated sugar, and brown sugar until light and fluffy. -
Step 3
Beat in the vanilla extract and eggs, one at a time, until well combined. -
Step 4
In a separate medium bowl, whisk together the cocoa powder, all-purpose flour, baking soda, and salt. -
Step 5
Gradually add the dry ingredients to the wet ingredients, mixing until just combined. Do not overmix. -
Step 6
Stir in the M&Ms. -
Step 7
Drop rounded tablespoons of dough onto the prepared baking sheets, about 2 inches apart. -
Step 8
Bake for 9-11 minutes, or until the edges are set and the centers are still slightly soft. -
Step 9
Let the cookies cool on the baking sheets for a few minutes before transferring them to a wire rack to cool completely.
Important Information
Nutrition Facts (Per Serving)
It is important to consider this information as approximate and not to use it as definitive health advice.
Allergy Information
Please check ingredients for potential allergens and consult a health professional if in doubt.