Mint Chocolate Muddy Buddy – Easy Sweet Treat
Mint Chocolate Muddy Buddy is more than just a treat; it’s a nostalgic hug in a bowl! Who doesn’t instantly feel a smile creep onto their face at the mention of this delightful concoction? We absolutely adore Mint Chocolate Muddy Buddy for so many reasons. It’s that perfect storm of crunchy cereal, rich chocolate, and that invigorating burst of mint that makes it utterly irresistible. It’s the ultimate party snack, a crowd-pleasing movie night companion, or simply a way to brighten any ordinary afternoon. What truly sets this particular Mint Chocolate Muddy Buddy apart is the careful balance of flavors – not too much mint to overwhelm, but just enough to add that refreshing zing that cuts through the sweetness. Get ready to whip up a batch that will have everyone beggin extractg for the recipe!
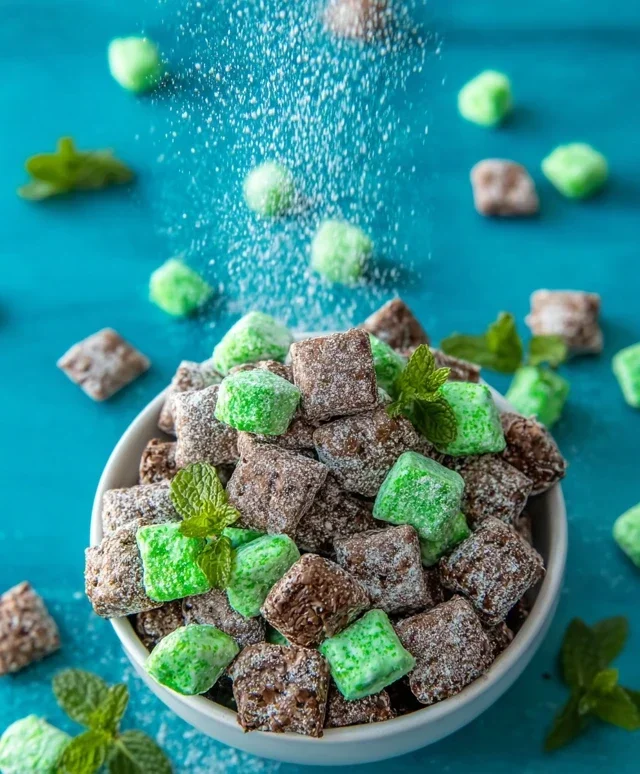
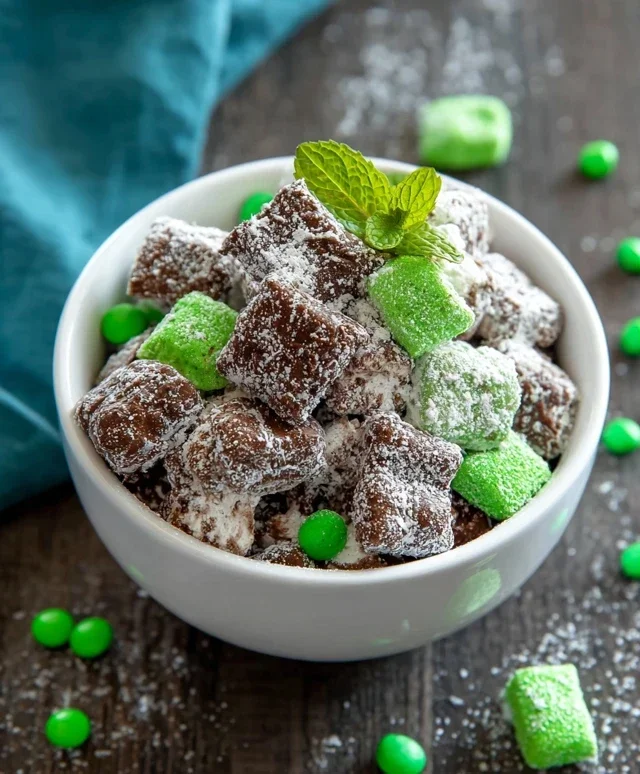
Mint Chocolate Muddy Buddy
Get ready to indulge in a treat that’s as delightful to make as it is to devour! This Mint Chocolate Muddy Buddy recipe is a twist on a classic, bringin extractg together the comforting crunch of cereal with the irresistible combination of rich chocolate and cool mint. It’s the perfect party snack, a delightful afternoon pick-me-up, or a thoughtful homemade gift. The vibrant green hue from the candy melts, studded with delightful minty M&M’s and decadent Andes mints, makes this a visually stunning as well as a tastebud-tantalizing creation. Let’s dive into what you’ll need and how to whip up this irresistible confection.
Ingredients:
Getting Started: The Prep Work
Before we begin extract melting and mixing, a little bit of preparation will make the process smoother and more enjoyable. First, grab your largest mixing bowl. This is where all the magic will happen, so make sure it’s big enough to comfortably hold all 10 cups of Chex cereal and subsequent additions without making a mess. Next, locate two large, shallow baking sheets or trays. Line these with parchment paper. This isn’t strictly necessary for the coating process itself, but it’s incredibly helpful for the cooling stage. It prevents sticking and makes for easy cleanup. Now, let’s talk about that powdered sugar. We need 2 cups in total, but we’ll be dividing it. So, go ahead and measure out 1 ½ cups into one bowl and ½ cup into another. This division is key to achieving the perfect coating. Finally, take your cup of Andes chocolate mints and give them a good chop. Smaller pieces will distribute more evenly throughout the muddy buddies, ensuring a burst of minty chocolate in every bite.
Melting the Chocolatey Goodness
Now for the fun part – melting our chocolate! In a microwave-safe bowl, combine the 6 ounces of chocolate chips and the 6 ounces of green candy melts. You can also do this in a heatproof bowl set over a saucepan of simmering water (a double boiler method), which offers more control and reduces the risk of scorching. If you’re using the microwave, start with 30-second intervals, stirring thoroughly after each interval. Be patient! It might look like it’s not melting at first, but keep stirring and zapping in short bursts. The goal is a completely smooth, luscious, and pourable chocolate mixture. Once it’s fully melted and beautifully glossy, remove it from the heat (or microwave) and set it aside for a moment.
Coating the Cereal
This is where our Chex cereal gets its delightful coating. Gently pour the 10 cups of Chex cereal into your large mixing bowl. Now, carefully pour the melted chocolate and green candy melt mixture over the cereal. Using a large spoon or a spatula, gently stir the cereal. You want to ensure every single piece of Chex cereal is coated in the luscious chocolate. Be gentle to avoid crushing the cereal. It’s okay if some pieces clump together slightly; these will break apart later. This step requires a bit of careful folding and tossing to achieve even coverage. Take your time and ensure no dry spots remain.
The Powdered Sugar Embrace
Once the cereal is thoroughly coated in the chocolate mixture, it’s time for the signature powdery finish. Add the 1 ½ cups of powdered sugar to the bowl with the coated cereal. Now, and this is important, gently toss and stir the cereal until it is completely coated in the powdered sugar. This is best done by gently shaking the bowl or using your hands (if you don’t mind a little mess!). The powdered sugar will stick to the chocolate coating, creating that classic muddy buddy texture. Continue stirring and shaking until the cereal pieces are no longer shiny and are uniformly dusted. This step is crucial for that delightful melt-in-your-mouth quality.
Adding the Minty Sparkle
Now for the exciting additions that make these Mint Chocolate Muddy Buddies so special! Gently fold in the 1 cup of mint M&M’s and the 1 cup of chopped Andes chocolate mints into the powdered sugar-coated cereal. Stir them in gently so they don’t get crushed, but ensure they are well distributed. The M&M’s will add pops of color and a satisfying crunch, while the chopped Andes mints will provide pockets of intense minty chocolate flavor. The warmth from the chocolate coating will slightly soften the M&M’s and Andes mints, making them even more delightful.
Cooling and Setting
Now, it’s time for our delicious creation to firm up. Carefully spread the coated cereal mixture onto your prepared baking sheets in a single layer. This allows for even cooling and prevents the muddy buddies from clumping together too much. Let them cool completely at room temperature. This can take about 1 to 2 hours, depending on your room temperature. You can speed up the process by placing the baking sheets in the refrigerator for about 30-45 minutes, but be careful not to over-chill them, as this can sometimes make them too hard. Once they are completely cool and firm to the touch, gently break apart any clumps.
Storing Your Minty Masterpiece
Your Mint Chocolate Muddy Buddies are now ready to be enjoyed! Store them in an airtight container at room temperature. They will stay fresh and delicious for up to a week. They are truly irresistible and are sure to be a hit with everyone who tries them. Enjoy every minty, chocolatey, crunchy bite!
Conclusion:
I hope you’re as excited to whip up a batch of this Mint Chocolate Muddy Buddy as I am to eat it! This recipe is an absolute winner because it strikes the perfect balance between sweet, crunchy, and wonderfully minty. It’s incredibly easy to make, making it an ideal treat for any occasion, from last-minute party snacks to a delightful afternoon indulgence. The combination of Chex cereal, rich chocolate, and that refreshing minty kick is simply irresistible. I encourage you to give this Mint Chocolate Muddy Buddy a try – I promise it won’t disappoint!
For serving, these are fantastic on their own, but they also elevate a dessert table when served alongside cookies or brownies. You can also package them in cute little bags or jars for a thoughtful homemade gift. If you’re feeling adventurous, consider adding a sprinkle of crushed candy canes for extra texture and flavor, or even a dash of peppermint extract for an intensified minty punch. The possibilities are truly endless!
Frequently Asked Questions:
Can I make this recipe ahead of time?
Absolutely! This Mint Chocolate Muddy Buddy is perfect for making ahead. In fact, the flavors meld even better after a day or two. Store it in an airtight container at room temperature for up to a week. Just be mindful of humidity, as it can affect the crispiness.
What if I don’t have mint chocolate chips?
No problem! You can use regular semi-sweet chocolate chips and add about 1/4 to 1/2 teaspoon of peppermint extract to the melted chocolate mixture. Start with a smaller amount and taste as you go, as peppermint extract can be quite potent!
Mint Chocolate Muddy Buddy
A festive and decadent treat combining the classic muddy buddy flavors with a cool mint and chocolate twist. Perfect for parties or a sweet indulgence.
Ingredients
-
10 cups Chex cereal (rice or corn variety)
-
6 ounces chocolate chips
-
6 ounces green candy melts
-
2 cups powdered sugar, divided
-
1 cup mint M&M’s
-
1 cup Andes chocolate mints, chopped
Instructions
-
Step 1
In a large bowl, measure out 10 cups of Chex cereal. Set aside. -
Step 2
In a microwave-safe bowl, combine the chocolate chips and green candy melts. Microwave in 30-second intervals, stirring after each, until melted and smooth. -
Step 3
Pour the melted chocolate mixture over the Chex cereal and gently stir to coat evenly. Be careful not to break the cereal pieces. -
Step 4
In a separate bowl, combine 1 cup of powdered sugar. Add the coated cereal mixture to this bowl and toss until well coated. Transfer to another large bowl or a baking sheet lined with parchment paper and spread out. -
Step 5
In the same bowl used for the powdered sugar, add the remaining 1 cup of powdered sugar. Add the mint M&M’s and chopped Andes chocolate mints to this powdered sugar and toss to coat lightly. -
Step 6
Gently fold the powdered sugar-coated mints and candy into the chocolate-coated cereal mixture. Stir just enough to combine. -
Step 7
Allow the muddy buddies to cool and set completely before serving or storing.
Important Information
Nutrition Facts (Per Serving)
It is important to consider this information as approximate and not to use it as definitive health advice.
Allergy Information
Please check ingredients for potential allergens and consult a health professional if in doubt.