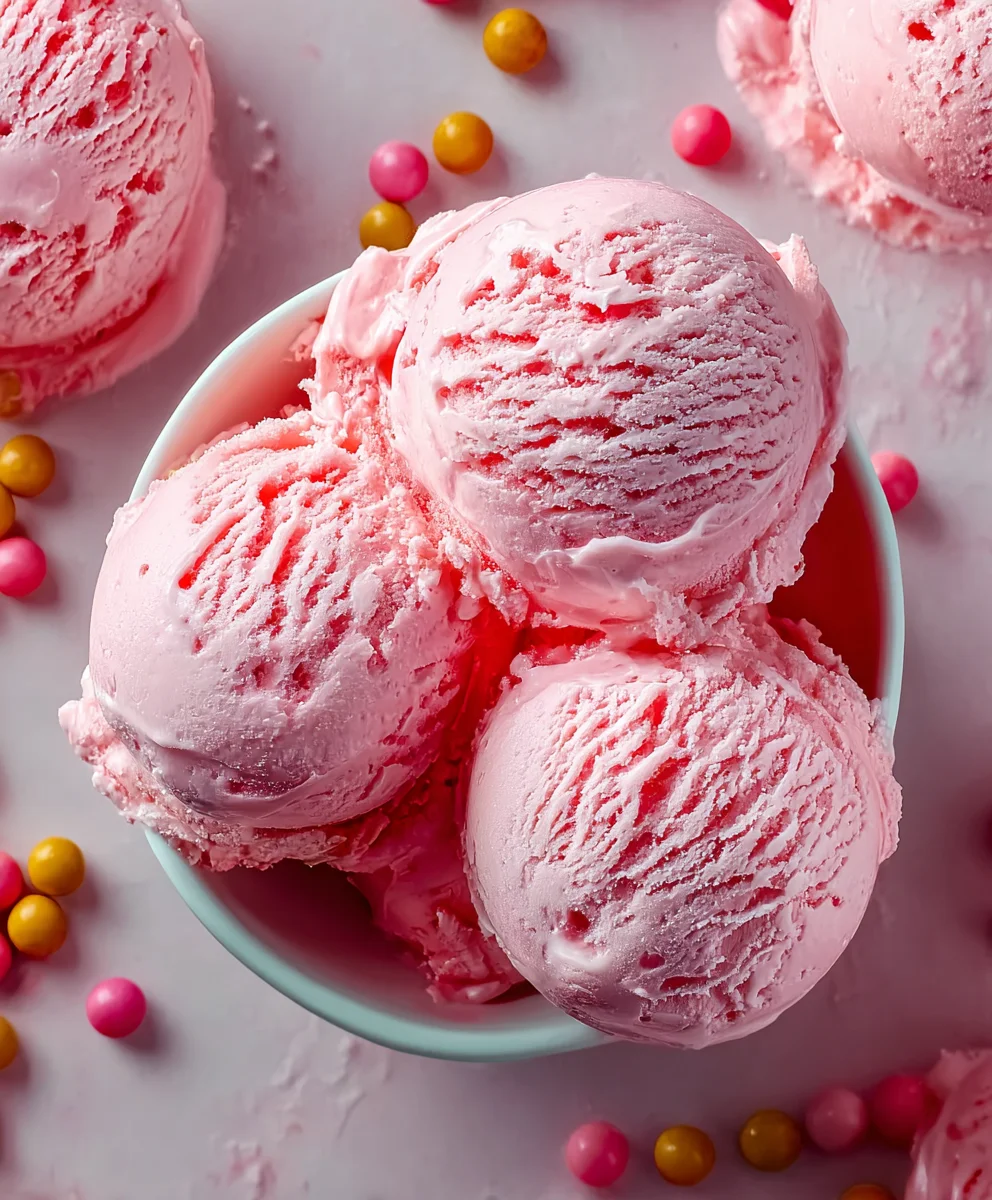
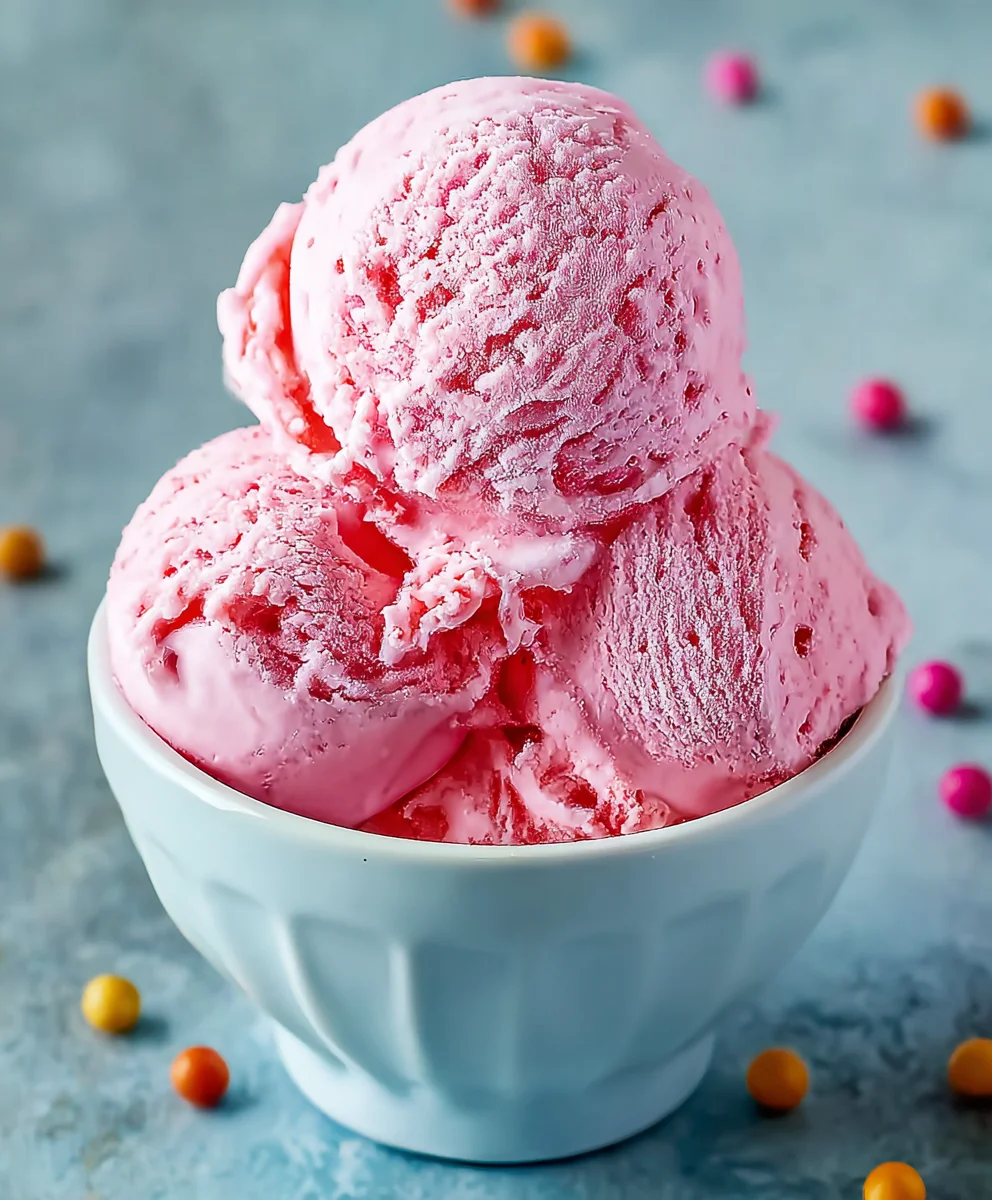
Bubblegum Ice Cream Recipe – Sweet Treat Fun
Bubblegum Ice Cream, with its vibrant pink hue and nostalgic, sweet flavor, is more than just a frozen treat; it’s a passport to childhood memories and a celebration of pure, unadulterated fun. Who doesn’t instantly recall the joy of a candy-colored swirl on a hot summer day, or the thrill of finding that perfect, chewy bubblegum nugget hidden within? This isn’t your average vanilla or chocolate; Bubblegum Ice Cream is an experience. It’s the candy shop in a scoop, a creamy dream that sparks smiles and brings out the playful spirit in all of us. What truly sets this particular rendition apart is its masterful balance – a rich, creamy base that perfectly complements the unmistakable, sweet essence of bubblegum, creating a delightful contrast that’s both familiar and excitingly new. Get ready to dive into a wave of delicious nostalgia!
Why You’ll Love This Bubblegum Ice Cream
This isn’t just about indulgin extractg a sweet tooth; it’s about reliving those carefree moments. The distinctive flavor of bubblegum, captured perfectly in a smooth, frosty dessert, is incredibly appealing. It’s a taste that transports you back to simpler times, making every spoonful a delightful journey down memory lane. The visual appeal alone is a huge draw – that bright, cheerful pink is guaranteed to brighten any day. It’s the ultimate crowd-pleaser, adored by kids and adults alike for its playful character and undeniably delicious taste.
What Makes Our Bubblegum Ice Cream Special
What elevates this Bubblegum Ice Cream from ordinary to extraordinary is the careful selection of ingredients and a technique that ensures an intensely satisfying flavor without being overly artificial. We’ve perfected the art of infusing that classic bubblegum taste into a luxuriously creamy base, creating a texture that is both smooth and incredibly melt-in-your-mouth. Plus, we often incorporate fun little surprises, like tiny pieces of real bubblegum or bursts of fruity flavor, adding an extra layer of texture and taste adventure to every bite. This recipe is designed to deliver that authentic, nostalgic bubblegum experience you crave, in a way that feels fresh and utterly irresistible.
Ingredients:
- 2 cups heavy cream
- 1 cup whole milk
- ¾ cup granulated sugar
- 2 teaspoons bubblegum flavoring
- 1 teaspoon vanilla extract
- ¼ teaspoon kosher salt
- Pink or red food coloring (to taste)
- ½ cup confetti sprinkles, divided
- 1 cup gumballs (for decoration)
Making the Bubblegum Ice Cream Base
Step 1: Combine Dairy and Sugar for Sweetness
First, in a medium-sized saucepan, combine the whole milk, granulated sugar, and kosher salt. We’re starting with the milk as our base, and the sugar will dissolve into it, creating a sweet foundation for our ice cream. The salt, while seemingly small, plays a crucial role in balancing the sweetness and enhancing the overall flavor profile of the bubblegum ice cream. Gently whisk these ingredients together until the sugar and salt are mostly dissolved. You don’t need to bring this mixture to a boil at this stage, just ensure everything is well incorporated.
Step 2: Gently Heat the Dairy Mixture
Place the saucepan over medium heat. We want to gently warm the milk mixture, not boil it. Stir frequently with a whisk or a wooden spoon to prevent any sticking or scorching on the bottom of the pan. The goal here is to heat the milk until it’s warm to the touch and you start to see a few wisps of steam rising from the surface. This process helps to fully dissolve the sugar and create a smooth, rich base. Avoid overheating, as it can alter the texture and flavor of your final ice cream. Once it’s reached this gentle warmth, remove the saucepan from the heat.
Step 3: Incorporate the Flavorings and Color
Now comes the fun part: adding the signature flavors! To the warm milk mixture, carefully stir in the bubblegum flavoring and vanilla extract. The bubblegum flavoring is key to achieving that nostalgic, sweet, and slightly fruity taste that we all love in bubblegum ice cream. The vanilla extract adds another layer of depth and complexity, complementing the bubblegum without overpowering it. Next, add your pink or red food coloring. Start with just a few drops and stir well. You can always add more to achieve your desired shade of bubblegum pink. Aim for a vibrant, fun color that screams “bubblegum”! Mix thoroughly until the color is evenly distributed throughout the base.
Chilling and Freezing the Ice Cream
Step 4: Chill the Ice Cream Base Thoroughly
This is a critical step for achieving the perfect ice cream texture. Once your base is flavored and colored, cover the saucepan with plastic wrap, pressing the wrap directly onto the surface of the liquid to prevent a skin from forming. Place the covered saucepan in the refrigerator and let the mixture chill for at least 4 hours, or preferably overnight. The longer it chills, the colder it gets, which is essential for the ice cream maker to work efficiently and produce a smooth, creamy result. A well-chilled base prevents large ice crystals from forming during the churning process, ensuring a luxurious texture.
Step 5: Churn the Ice Cream Base
When your ice cream base is thoroughly chilled, it’s time to churn it. Pour the cold mixture into your ice cream maker and churn according to the manufacturer’s instructions. This usually takes about 20 to 30 minutes. As it churns, the mixture will gradually thicken and resemble soft-serve ice cream. This is where air is incorporated, giving the ice cream its lightness and creamy consistency.
Step 6: Add the Sprinkles and Harden
In the last few minutes of churning, when the ice cream has reached a soft-serve consistency, add half of your confetti sprinkles. These will distribute evenly throughout the ice cream, adding delightful pops of color and a subtle crunch. Once churned, transfer the ice cream to a freezer-safe container. Gently fold in the remaining confetti sprinkles. Then, press a piece of parchment paper or plastic wrap directly onto the surface of the ice cream to prevent ice crystals from forming. Seal the container tightly and place it in the freezer for at least 4 to 6 hours, or until it’s firm enough to scoop. This hardening period is essential to achieve that classic ice cream texture.
Serving Your Bubblegum Delight
Step 7: Garnish and Enjoy!
Once your bubblegum ice cream has hardened to perfection, it’s ready to be served. Scoop generous portions into bowls or cones. For an extra festive touch, garnish each serving with a few whole gumballs. The vibrant colors of the gumballs will complement the pink ice cream beautifully. This homemade bubblegum ice cream is a delightful treat for kids and adults alike, evoking a sense of fun and nostalgia with every spoonful. Enjoy the sweet, creamy, and undeniably cheerful flavor of your creation!
Conclusion:
And there you have it – your very own homemade Bubblegum Ice Cream! We’ve walked through the simple steps to create this nostalgic, vibrant treat that’s sure to bring a smile to everyone’s face. The creamy texture combined with that unmistakable sweet bubblegum flavor is pure delight. This Bubblegum Ice Cream is perfect for birthday parties, summer gatherings, or simply as a fun dessert to make any day special.
For serving suggestions, consider topping your Bubblegum Ice Cream with colorful sprinkles, whipped cream, or even a few small pieces of actual bubblegum (though advise caution for younger eaters!). You can also enjoy it on its own, or as a fantastic base for milkshakes. If you’re feeling adventurous with variations, try adding a swirl of pink or blue food coloring for an even more striking visual, or incorporate a touch of almond extract for a subtle flavor twist. Don’t be afraid to experiment and make this Bubblegum Ice Cream your own!
Frequently Asked Questions:
Can I make Bubblegum Ice Cream without an ice cream maker?
Absolutely! While an ice cream maker yields the creamiest results, you can achieve a delicious no-churn Bubblegum Ice Cream. Typically, this involves whipping heavy cream until stiff peaks form, then folding in sweetened condensed milk and your bubblegum flavoring and color. You’ll then freeze this mixture, stirring it vigorously every hour for the first few hours to break up ice crystals.
How do I get the authentic bubblegum flavor?
The key to the authentic bubblegum flavor is using a good quality bubblegum extract or flavoring oil. These are specifically designed to replicate the taste. You can find them at specialty baking stores or online. Start with a small amount and taste as you go, as flavorings can be quite potent.
Bubblegum Ice Cream Recipe – Sweet Treat Fun
A fun and nostalgic homemade bubblegum ice cream recipe with vibrant colors and confetti sprinkles.
Ingredients
-
2 cups heavy cream
-
1 cup whole milk
-
3/4 cup granulated sugar
-
2 teaspoons bubblegum flavoring
-
1 teaspoon vanilla extract
-
1/4 teaspoon kosher salt
-
Pink or red food coloring (to taste)
-
1/2 cup confetti sprinkles, divided
-
1 cup gumballs (for decoration)
Instructions
-
Step 1
Combine whole milk, granulated sugar, and kosher salt in a medium saucepan. Whisk until sugar and salt are mostly dissolved. -
Step 2
Gently heat the milk mixture over medium heat, stirring frequently, until warm to the touch and wisps of steam appear. Do not boil. Remove from heat. -
Step 3
Stir in the bubblegum flavoring, vanilla extract, and food coloring until desired pink color is achieved and evenly distributed. -
Step 4
Cover the saucepan with plastic wrap, pressing it directly onto the surface. Chill in the refrigerator for at least 4 hours, or preferably overnight. -
Step 5
Pour the chilled mixture into an ice cream maker and churn according to manufacturer’s instructions until it resembles soft-serve consistency. -
Step 6
In the last few minutes of churning, add half of the confetti sprinkles. Transfer the churned ice cream to a freezer-safe container, fold in the remaining sprinkles, cover the surface with parchment paper, and freeze for 4-6 hours until firm. -
Step 7
Scoop the hardened bubblegum ice cream into bowls or cones. Garnish with gumballs before serving.
Important Information
Nutrition Facts (Per Serving)
It is important to consider this information as approximate and not to use it as definitive health advice.
Allergy Information
Please check ingredients for potential allergens and consult a health professional if in doubt.